This article introduces how to resize VHD/VHDX partition without Hyper-V Manager, resize virtual partition from physical computer.
Applies to: Windows 10, Windows 8, Windows 7, Windows Server 2019, Windows Server 2016, Windows Server 2012 (R2), Windows Server 2008 (R2), Windows Server 2003 (R2).
The same with physical hard disk drive, you can resize virtual partitions for Hyper-V virtual machine without losing data. It is very easy to resize partition by installing NIUBI Partition Editor to Hyper-V vm, but is it possible to resize vhd/vhdx partition without Hyper-V? The answer is yes, this article introduces detailed steps to resize vhd/vhdx virtual partition and disk without Hyper-V.
Preparation before resizing vhd/vhdx virtual partition
Before starting to resize virtual partitions, there are two things you must do:
1. Delete all Checkpoints associate with the VHD or VHDX that you want to resize. Otherwise, you'll receive below error and cannot boot in Hyper-V Manager after resizing virtual partitions.
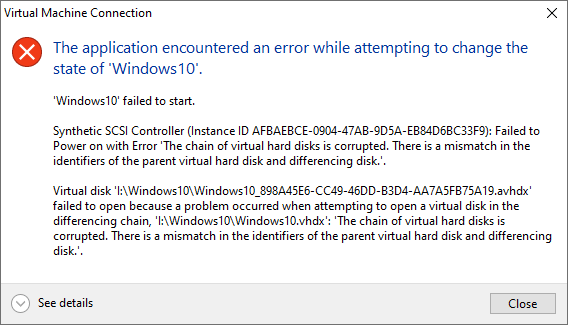
As the error message shows "There is a mismatch in the identified of the parent virtual hard disk and differencing disk."
It is easy to understand, the size of the partitions after resizing is different with the size in Checkpoint.
2. Shut down the guest virtual machine and close Hyper-V Manager or other applications that using this VHD or VHDX. Otherwise, you'll receive error "The process cannot access the file because it is being used by another process."

How to resize vhd/vhdx virtual drive without Hyper-V Manager
Step 1: Open Disk Management in physical computer. (Right click Windows flag on bottom left, or press Windows and R keys together, type diskmgmt.msc and press Enter.)
Step 2: Click Action menu > Attach VHD
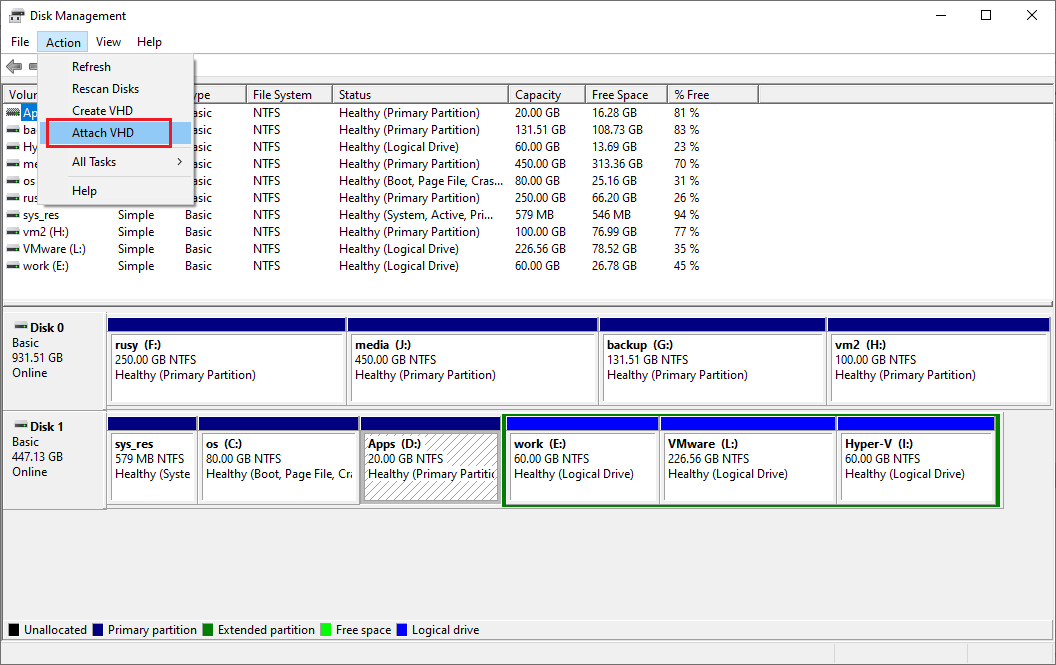
Step 3: Click Browse to select the VHD/VHDX file and then click OK to continue.

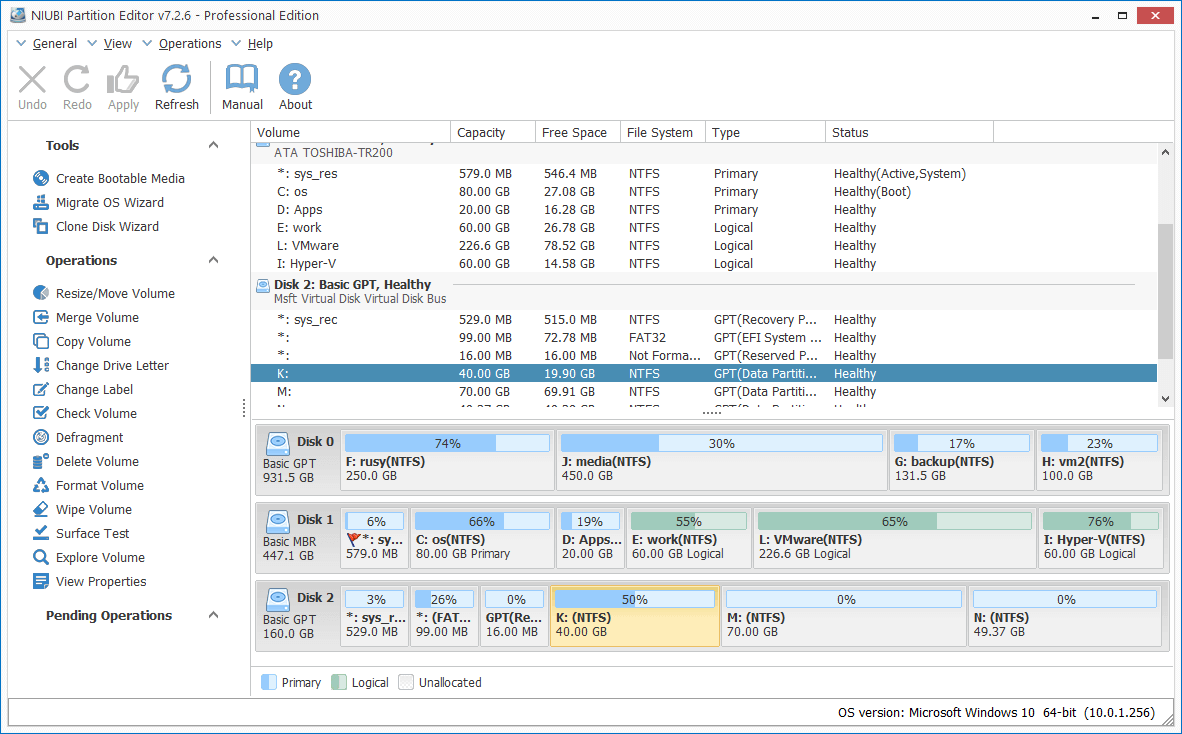
Then this virtual disk is attached. As you see in the screenshot, the icon of Disk 2 is different with other 2 physical hard disks.
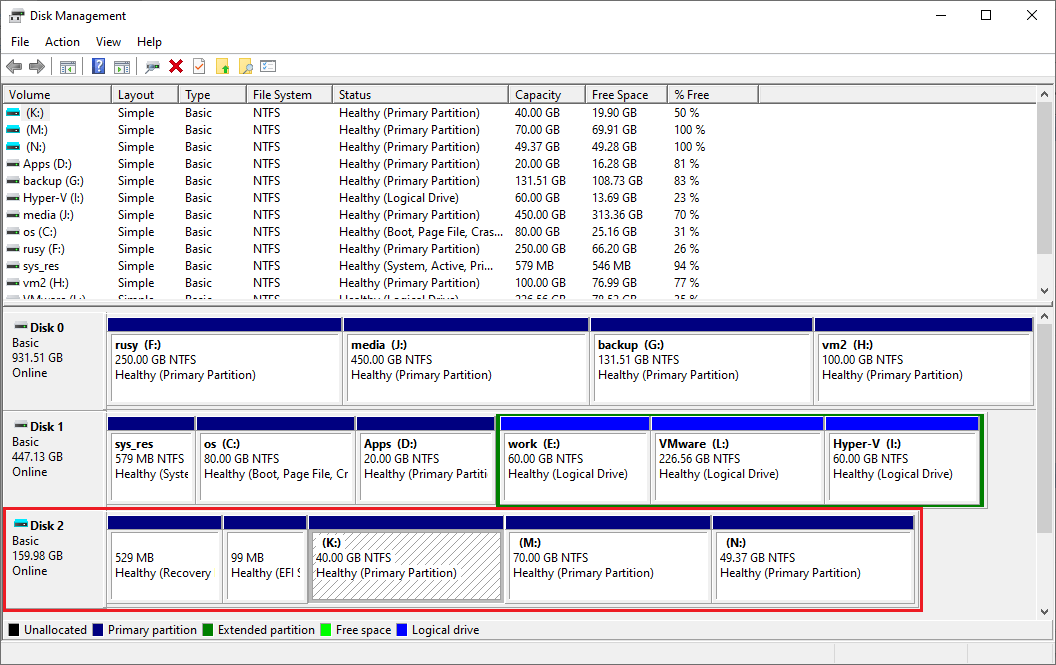
Step 4: Download and install NIUBI Partition Editor to the physical server or personal computer. The same with Disk Management, you'll see all physical and virtual disk partitions in NIUBI Partition Editor. In virtual Disk 2, drive K is the system partition in VHD/VHDX.
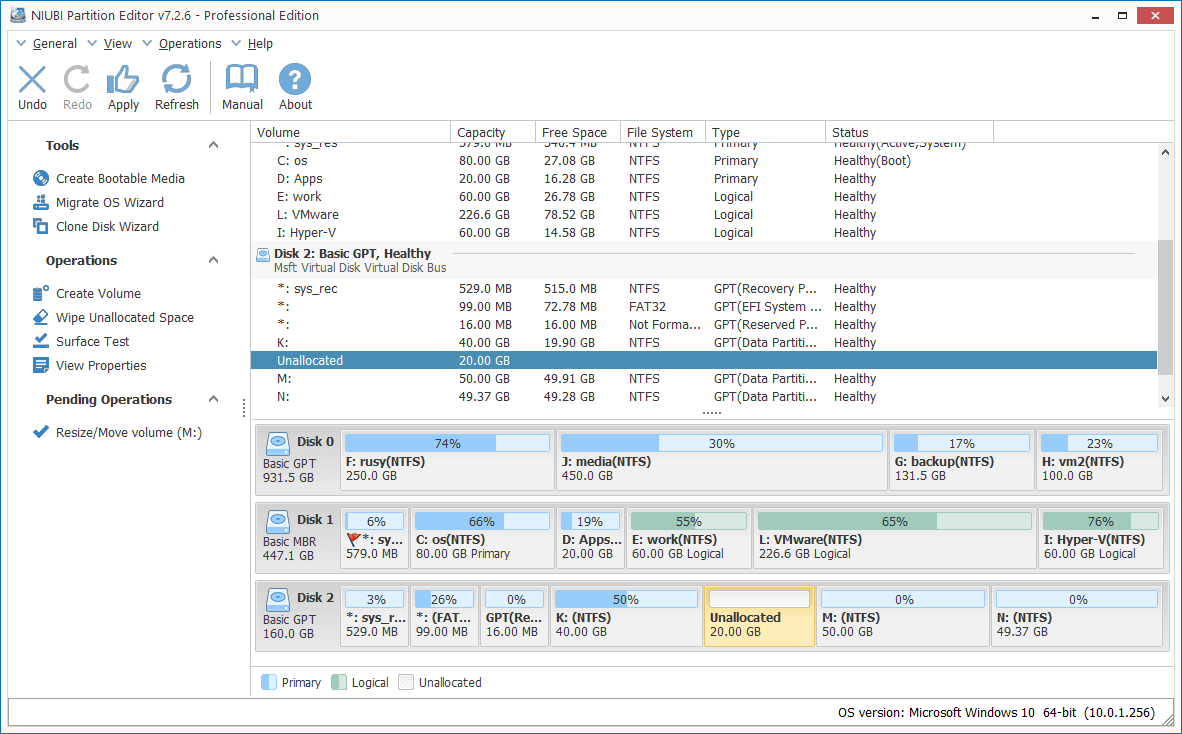
Step 5: Right click drive M: and select "Resize/Move Volume", drag left border towards right in the pop-up window, or enter an amount in the box of "Unallocated space before" directly. Then drive D will be shrunk and some Unallocated space will be made on the left side of it.

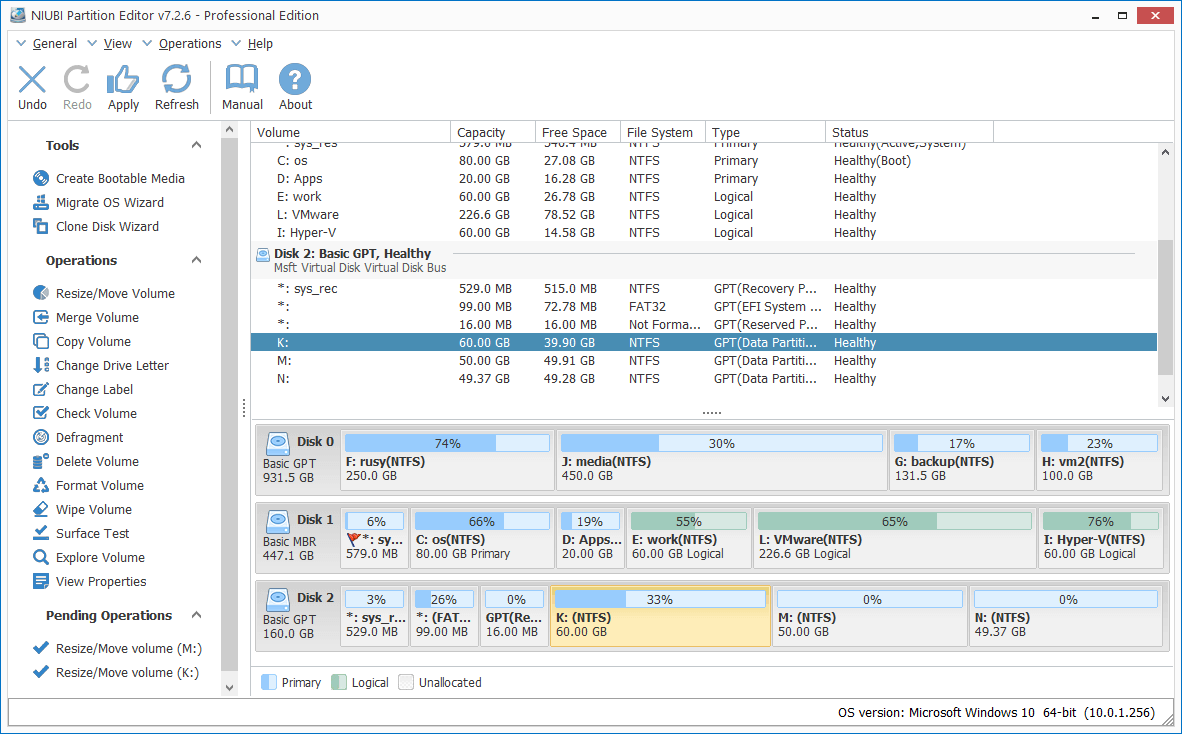
Step 6: Right click drive K: and select "Resize/Move Volume" again, in the pop-up window drag right border towards right to combine this Unallocated space. Then drive K is extended in virtual mode.

Step 7: Click Apply on top left to take effect. (Partitions won't be resized until click Apply to confirm.)
As long as there's free unused space in any partition, you can shrink it to expand another one on the same virtual disk. After resizing virtual partitions, remember to detach VHD, otherwise, when you power on this virtual machine in Hyper-V, you'll receive error "The process cannot access the file because it is being used by another process."


How to resize vhd/vhdx virtual hard disk without Hyper-V Manager
Better than physical hard disk whose size is fixed, VHD/VHDX virtual disk can be resized fast and easily. To accomplish this task, you may either use Hyper-V Manager or via PowerShell without Hyper-V.
Note: before expanding virtual disk with PowerShell, you should also shut down guest virtual machine and delete all associated Checkpoints.
How to resize/expand VHD/VHDX disk without Hyper-V:
- Open PowerShell with Administrator privilege from Quick Launch bar, Start menu or other place in your physical computer.
- Type Resize-VHD -Path 'E:\hyperv.vhdx' -SizeBytes 500gb
Explanation:
- 'E:\hyperv.vhdx' means absolute path and name of the .vhd/.vhdx file with quotes.
- 500gb means expanding this virtual hard disk to 500GB, not adding 500GB.
After expanding virtual disk, additional space will be shown as Unallocated on the end, then run NIUBI Partition Editor and merge Unallocated space to other partition(s). Follow the steps in the video:
- To extend either contiguous partition, simply right click it to run "Resize/Move Volume", and then drag the border to combine Unallocated space.
- To extend a non-adjacent partition with Unallocated space, you need to move Unallocated space to be contiguous on either side first.
Besides resizing physical and virtual disk partition, NIUBI Partition Editor helps do many other operations.