As hardware price becomes cheaper and cheaper, more and more home users manage several computers now, especially after Microsoft released Windows 7. Few people give up the old computers immediately. I still remember that after Windows XP released for a long time, many people still use Windows 98 to play games.
The common problem to manage several computers is how to connect and transfer files among these computers. What will you do if you want to transfer files from one LAN computer to another? Maybe you may consider methods below.
1. Copy to removable storage device and paste to the target computer.
2. Connect two computers directly with cross wire.
3. Transfer with some Instant Messenger.
Either method 1 or 2 is inconvenient, no one want to connect and disconnect the computers for trifles frequently. If you want to transfer large amount of files, you have to use external hard disk, USB stick is too small. Instant Messenger is better, but generally, it has some limitations, for example, file size, file type etc. In fact, the easiest way to transfer files within LAN network is Sharing.
What is the benefit of LAN network sharing?
- With this sharing feature, you can copy and paste files/folders with any size or format.
- You can transfer files from/to anywhere in your home network.
- The transfer speed is very fast.
- You may map this networking sharing, and then you can use it as a physical partition in Explorer.
How to set up LAN network sharing folder?
To set up LAN networking sharing in Windows XP and Windows 7 is similar, in this article, I’ll introduce how to configure file sharing in Windows 7 environment.
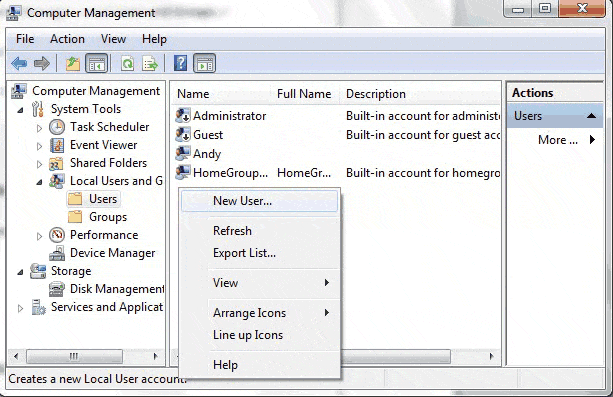
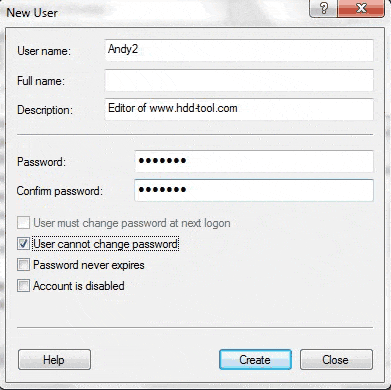
Step1. Create an account for accessing sharing.
Though Windows have built-in account, for example, Guest. Many users like to use this account, but in fact, it is not safe, you’d better create your own passport that is special. To set up a network sharing with no password is bad idea, too.
1. Right click My Computer > Manage > Local Users and Groups.
2. After click User fold you’ll find all current accounts on the right box.
3. Right click the blank space on the right box or click ‘Action’ on menu bar, and then choose ‘New User…’
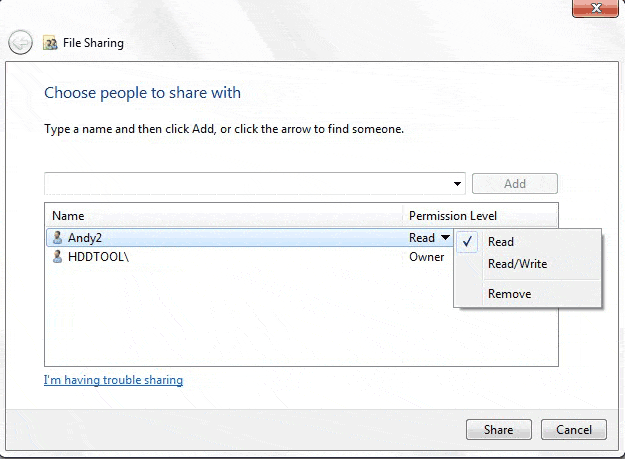
Step2. Configure network sharing.
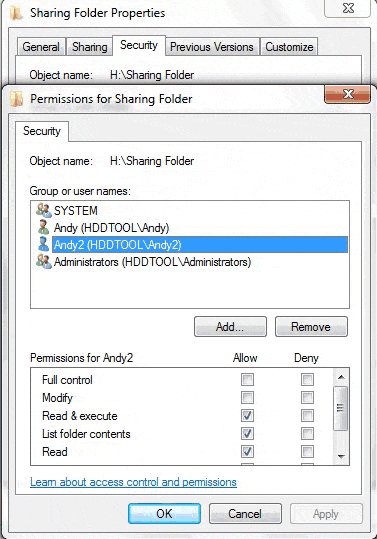
1. Right click the folder you want to share with other LAN network users, then click ‘Properties’ > ‘Sharing’.
2. Click Share, Windows will pop up a window, choose the account ‘Andy2’ and click Add. Please note the Permission Level. ‘Read’ means you can only copy file from this network sharing folder and you cannot paste or create new files from other computers.
Step3. Access network sharing folders
After you set up the LAN network sharing folders, you’d better check on other computer if the sharing can be accessed.
1. Check the IP address of the computer that you just configured network sharing. (Press Windows & R, input ‘ipconfig’)
2. Press Windows & R on another computer, input ‘\\X.X.X.X’, X is the IP address of the file sharing computer.
3. Type the sharing account and password, if you configured correctly in above steps, you’ll see the network sharing folders and files.