Shrink C drive partition for Windows Server 2008
Windows Disk Management can only shrink C drive to create new volume. This article introduces better method to shrink C drive partition on Windows Server 2008 R2. Besides creating new volume, you can extend system reserved partition or other data drives.
Shrink C drive to create new volume
If you just want to create more volumes by shrinking C: drive partition, Windows Server 2008 native Disk Management can help you. It is very easy and fast, furthermore, you can accomplish this task without server interruption. However, in some situations you can’t shrink C drive with this builtin utility.
Steps to shrink C drive in Server 2008 Disk Management:
![]() Press
Press ![]() and
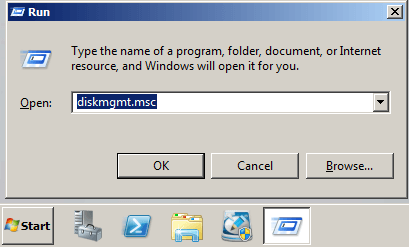
and ![]() on your keyboard to start Run, type diskmgmt.msc and then press Enter.
on your keyboard to start Run, type diskmgmt.msc and then press Enter.
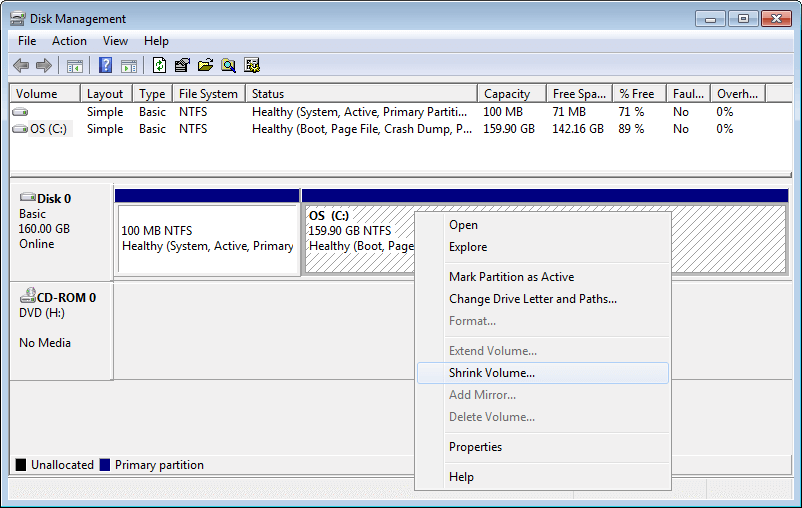
![]() Right click C drive and select Shrink Volume in Disk Management snap-in.
Right click C drive and select Shrink Volume in Disk Management snap-in.
![]() Enter the amount and click Shrink.
Enter the amount and click Shrink.
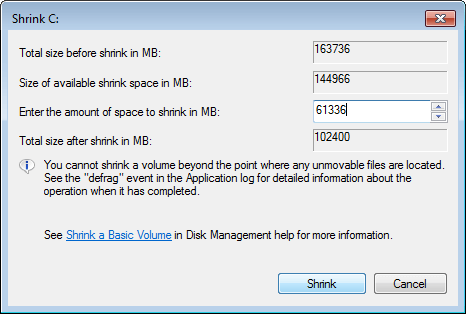
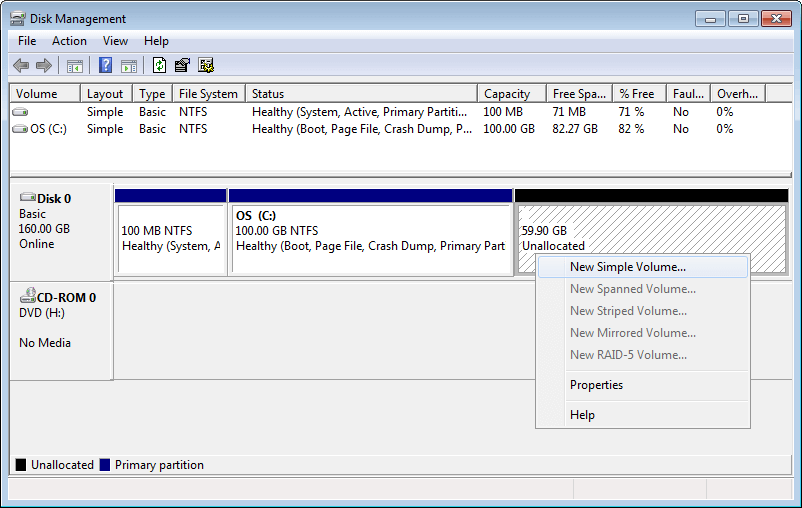
61336MB Unallocated space is produced on the right side of C drive, with which you can create new partitions.
![]()
- Shrink Volume can only shrink NTFS partition, FAT32 is not supported.
- Shrink Volume cannot produce Unallocated space on the left side.
Shrink C to extend system reserved partition
If you want to expand other partitions by shrinking C drive, Windows Disk Management cannot help you. As you see in my test server, Extend Volume is disabled for other partitions.
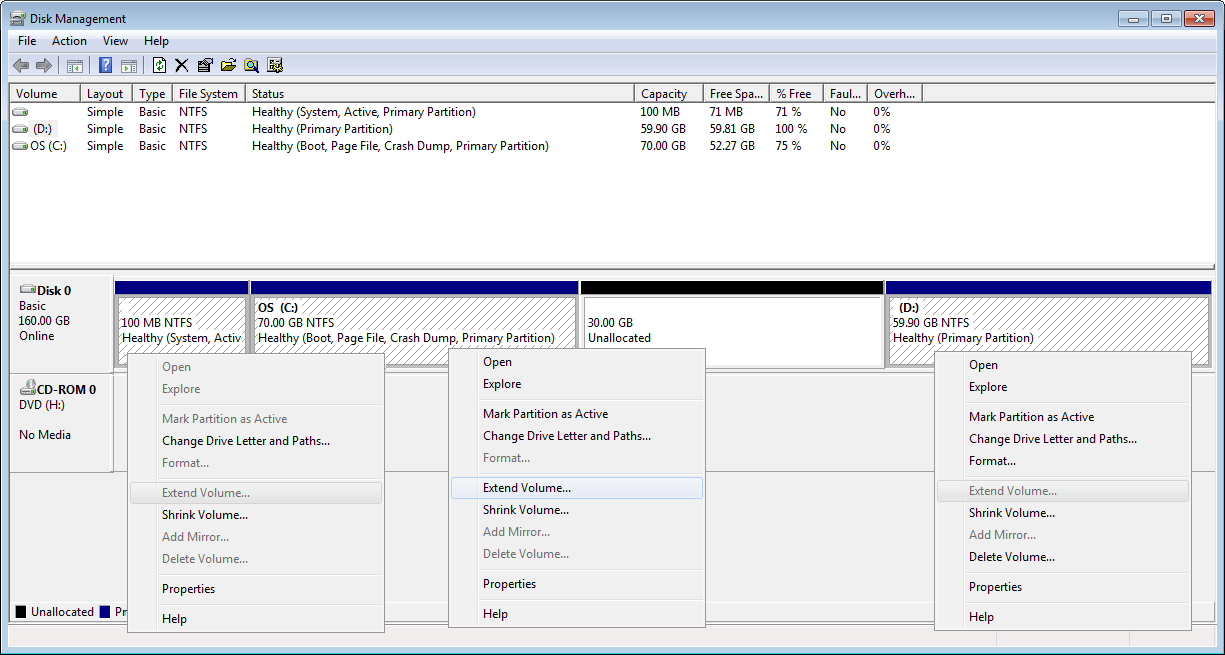
In fact, Extend Volume can only extend the partition with adjacent Unallocated space on the right side. From the screenshot:
- 30GB Unallocated space is nonadjacent to the system reserved partition, so Extend Volume is greyed out.
- Extend Volume is disabled for drive D, because the Unallocated space is on its left side.
3rd party disk partitioning software can shrink C drive towards right and produce Unallocated space on the left side, so you can extend the system reserved partition easily.
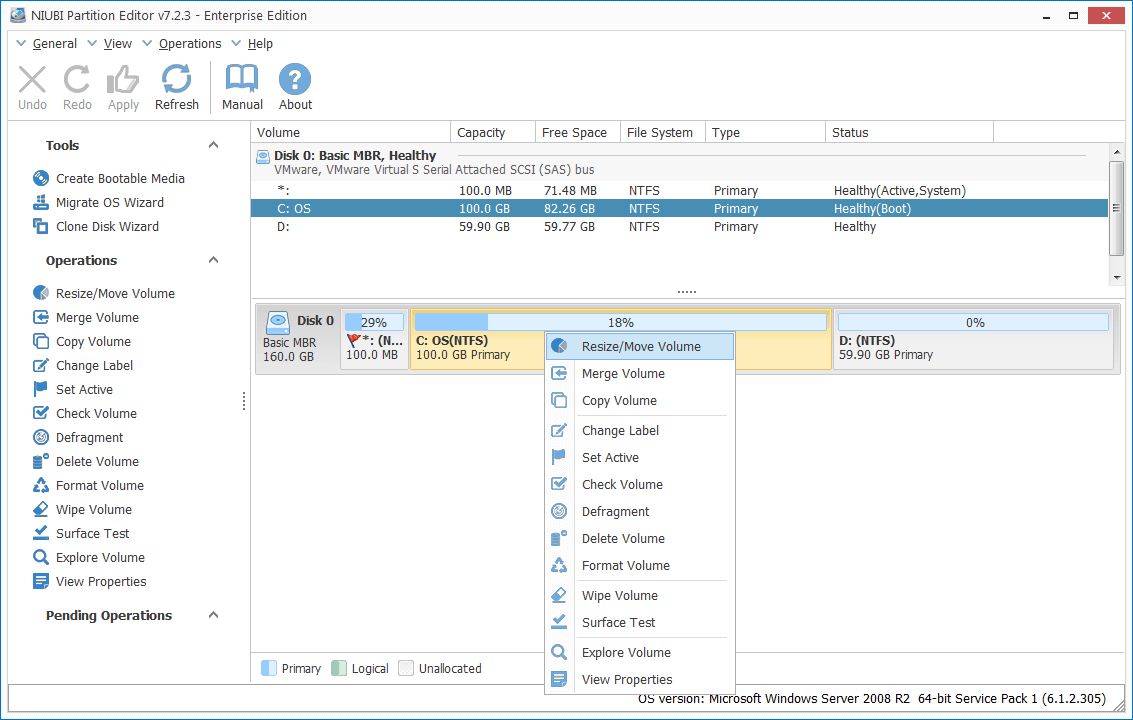
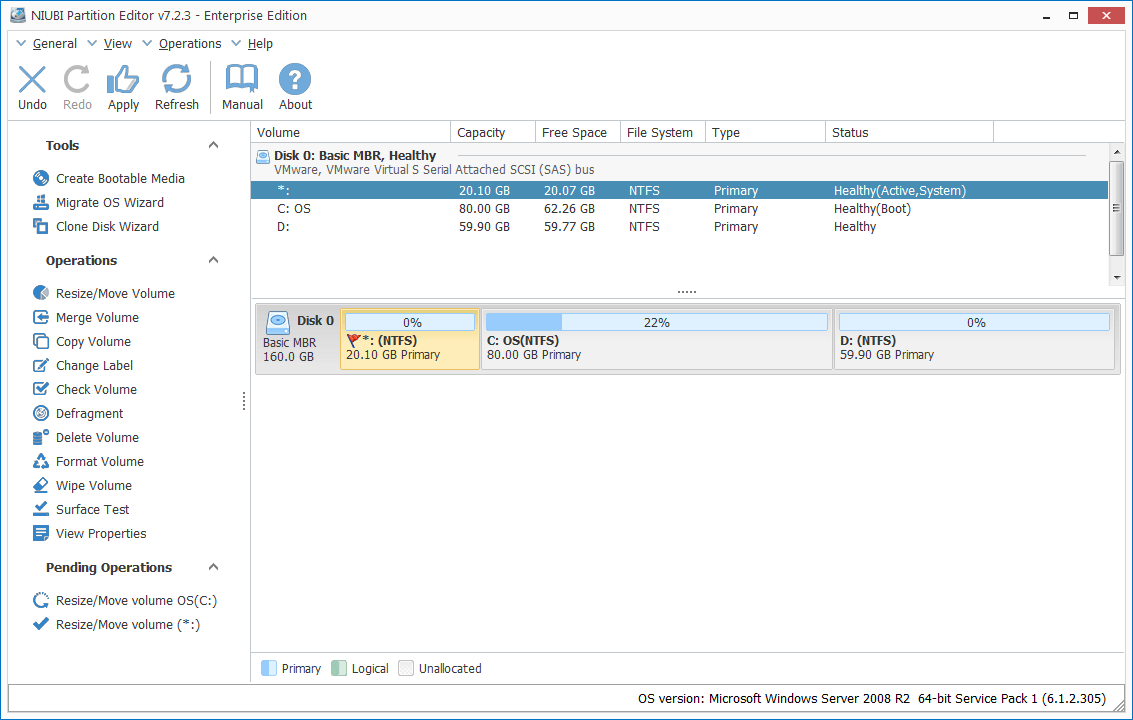
![]() Download NIUBI Partition Editor, right click C drive and select “Resize/Move Volume” feature.
Download NIUBI Partition Editor, right click C drive and select “Resize/Move Volume” feature.
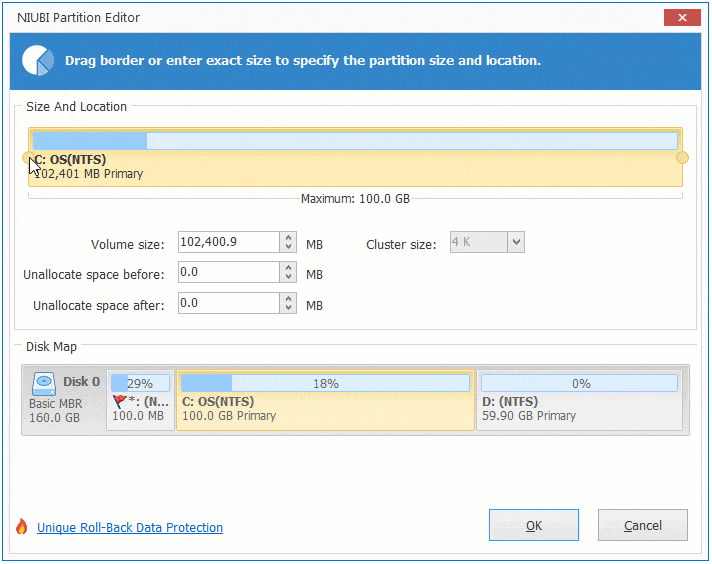
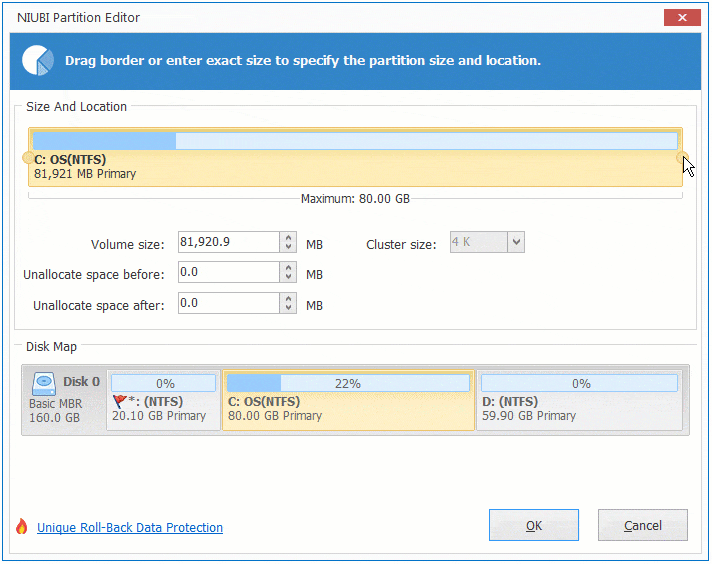
![]() Drag the left border rightwards to shrink it in the pop-up window.
Drag the left border rightwards to shrink it in the pop-up window.
Click OK and back to the main window, system C drive is shrank to 80GB.
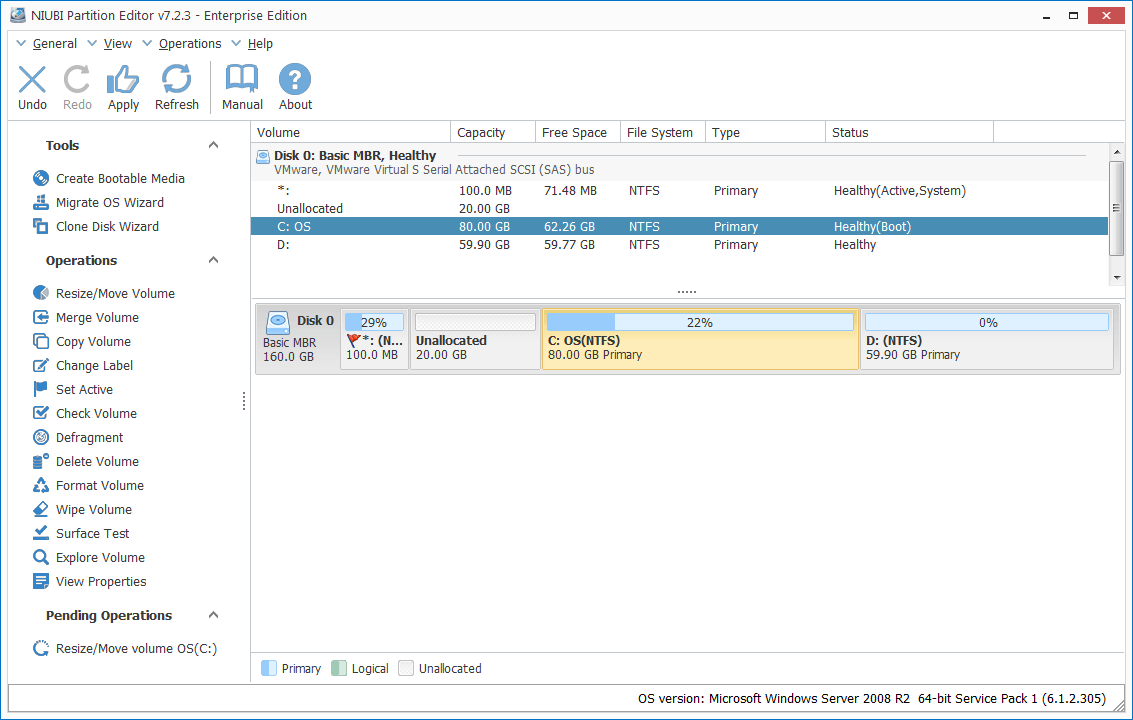
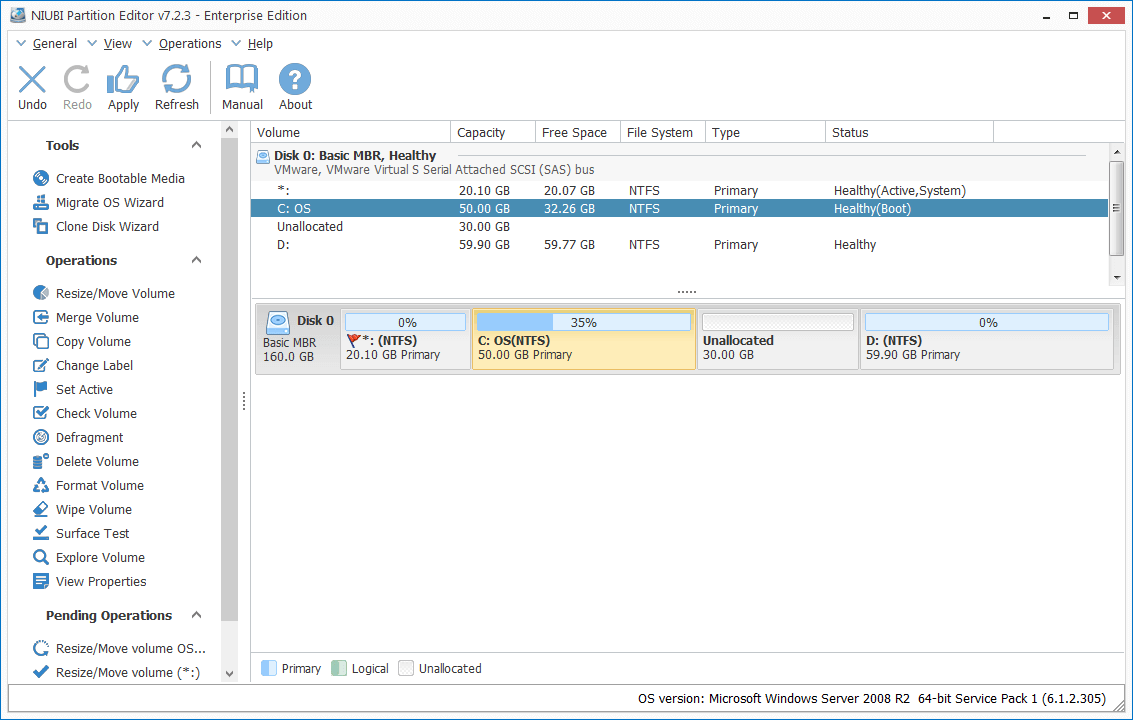
![]() Right click the system reserved partition and select “Resize/Move Volume” again. Drag the right border rightwards to combine the 20GB Unallocated space.
Right click the system reserved partition and select “Resize/Move Volume” again. Drag the right border rightwards to combine the 20GB Unallocated space.

System reserved partition is expand to 20.1GB, click Apply on top left to execute.
![]()
- This program works in its virtual mode, so real disk partitions won’t be modified until click Apply to confirm.
- The pending operations marked as
 can be done in desktop and ones marked as
  requires reboot to execute.
Shrink C to expand D or other volume
If you want to shrink C drive to extend D in Windows Server 2008, it is similar, follow the steps below.
![]() Right click C drive and select “Resize/Move Volume”, drag the right border leftwards to shrink it.
Right click C drive and select “Resize/Move Volume”, drag the right border leftwards to shrink it.
Click OK, Unallocated space is produced on the right side of C drive.
![]() Right click drive D and select “Resize/Move Volume” again, drag the left border leftwards to combine the 30GB Unallocated space.
Right click drive D and select “Resize/Move Volume” again, drag the left border leftwards to combine the 30GB Unallocated space.
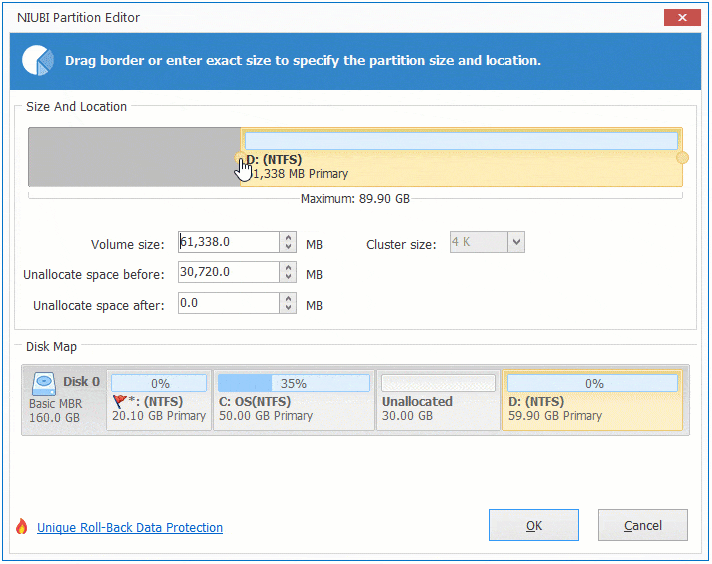
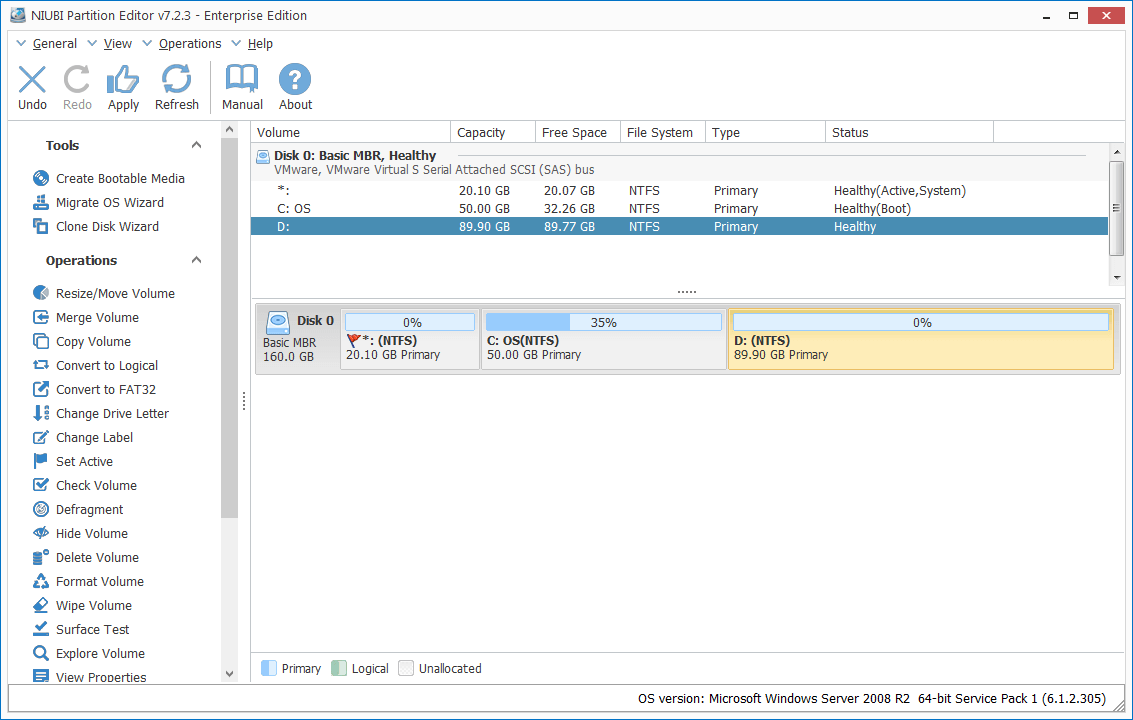
Click OK, drive D is extended to 89.9GB.
In Summary
To shrink C drive in Windows Server 2008 (R2), the native Disk Management is not the best choice. It can only shrink partition C and produce Unallocate on the right side to create new drives. In addition, sometimes you can’t shrink C drive if there are unmovable files. As the best server partition software, NIUBI Partition Editor helps you shrink and extend partition easily and safely.