Better than physical hard disk drive, when a virtual disk is getting full, you can expand it to increase size fast and easily. No matter you run Windows 10 in physical computer or run it as guest virtual machine, there are two ways to increase disk size for Windows 10 Hyper-V vm. This article introduces how to increase disk size of Windows 10 Hyper-V vm, and how to extend virtual partition of Windows 10 in Hyper-V without losing data.
How to increase disk size of Hyper-V vm with Windows 10 PowerShell
Expanding virtual disk in Hyper-V with PowerShell is very easy, in addition, if you run Windows 10 in physical computer, you can expand virtual disk in Hyper-V without shutting down the guest virtual machine. However, you should delete all associated Checkpoints before expanding.
Steps to increase disk size of Hyper-V vm in Windows 10:
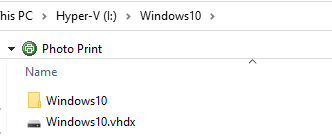
- Open File Explorer and locate the the path of the .vhd/.vhdx file. In my Windows 10 computer, Windows10.vhdx is located in I:/Windows 10.
- Right click Windows flag on bottom left and select Windows PowerShell (Admin). If you did not see it, click Windows and type powershell, and then select Run as Administrator.
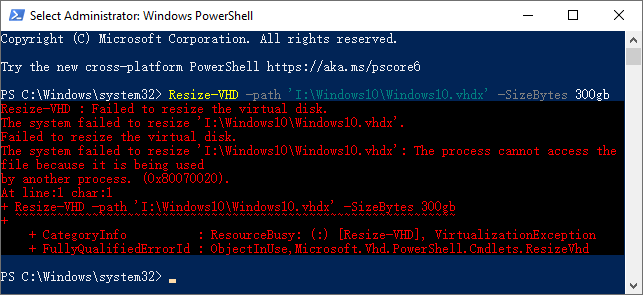
- In the PowerShell window, type Resize-VHD -Path 'I:\Windows10.vhdx' -SizeBytes 200gb and then press Enter.
![Resize VHD]()
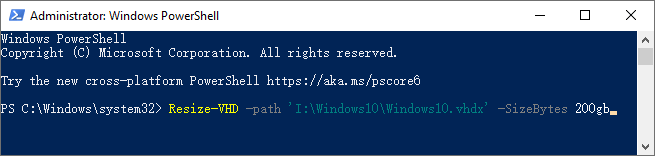
Note: you should indicate absolute path and name of the .vhd/.vhdx file with quotes. 200gb means resizing original disk to 200GB, original disk could be larger or smaller than 200GB.
In general, it complete immediately after pressing Enter key, but you won't see any successful message.
If you did not delete associated Checkpoint(s) or other applications are using this .vhd/.vhdx file, you'll receive error message "Failed to resize the virtual disk", "The process cannot access the file because it is being used by another process. (0x80070020)".
How to expand virtual disk in Windows 10 with Hyper-V Manager
Another way is running Hyper-V Manager, the same with PowerShell, Hyper-V Manager helps expand virtual disk in Windows 10 dynamically without shutting down the guest virtual machine, likewise, you must delete associated Checkpoints firstly.
Steps to expand virtual disk with Windows 10 Hyper-V Manager:
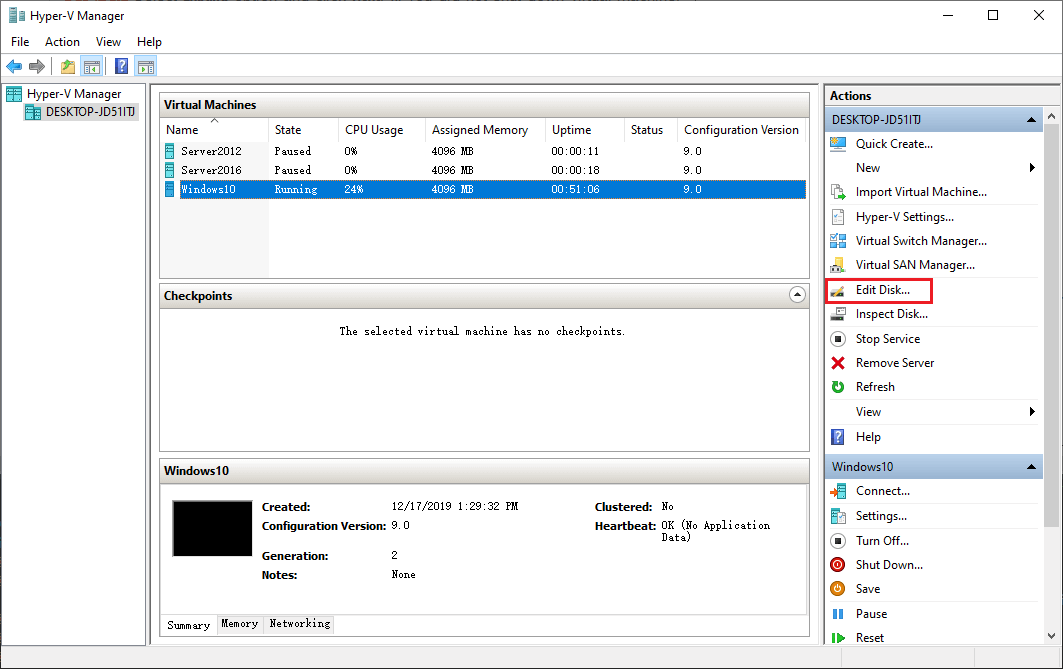
Step 1: Open Hyper-V Manager, click "Edit Disk" in "Actions" panel on the right.
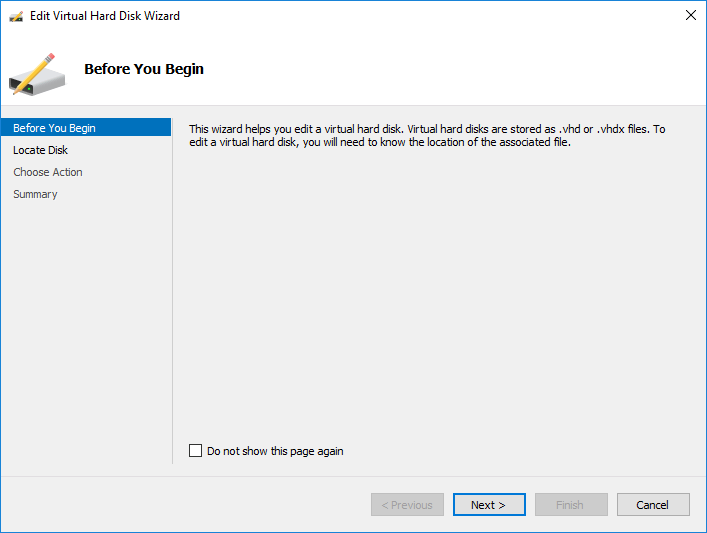
Step 2: Click Next in the pop-up "Edit Virtual Hard Disk Wizard" window.
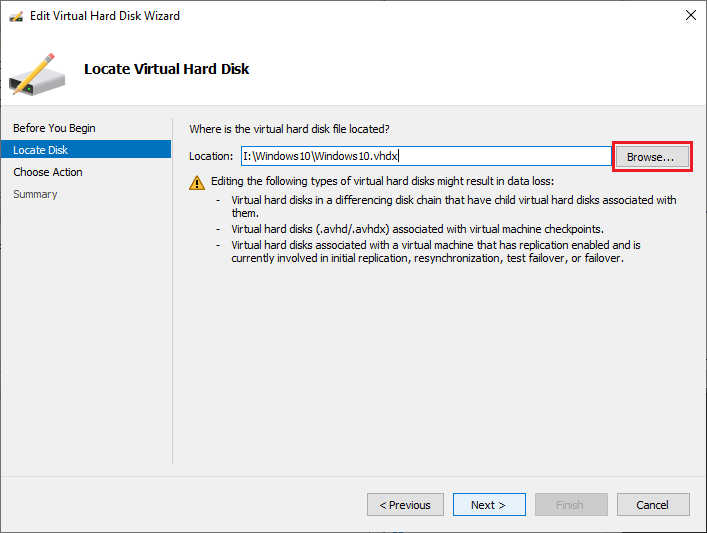
Step 3: Click "Browse" on the top to locate your VHD/VHDX file and click Next.
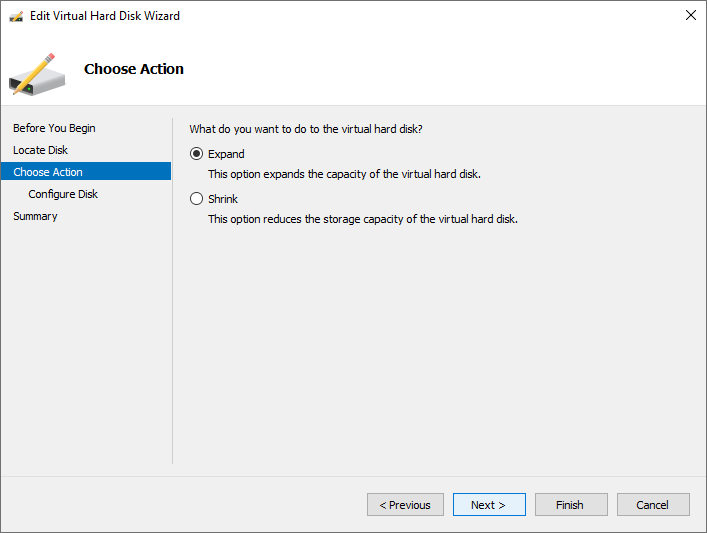
Step 4: Select "Expand" option and click Next.
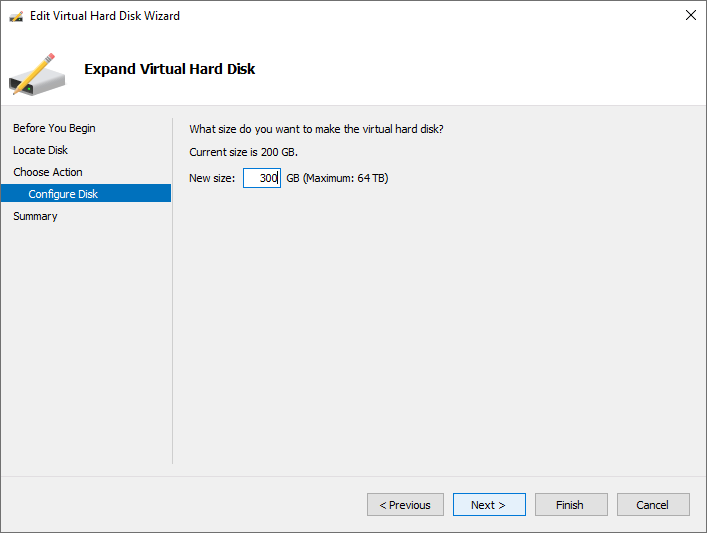
Step 5: Enter an amount of new disk size and the click Next.
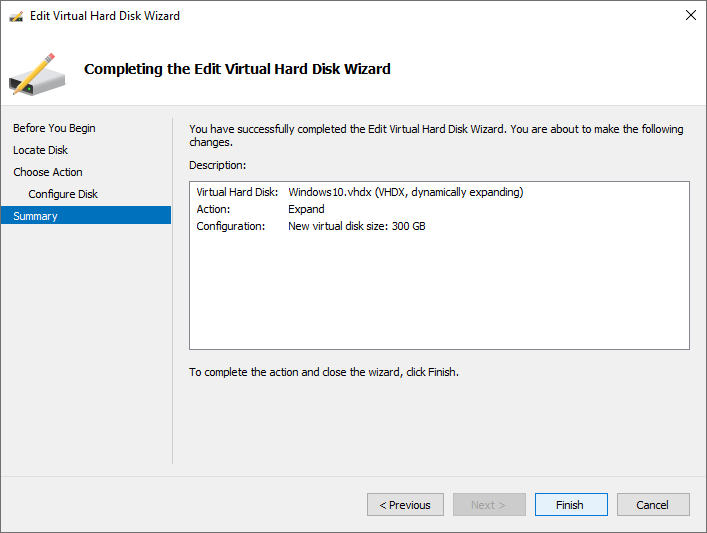
Step 6: Review the expanding operation and click Finish to proceed.
How to extend virtual partition of Windows 10 in Hyper-V after expanding disk
After expanding virtual disk with either Windows 10 PowerShell or Hyper-V Manager, additional disk space will be shown as unallocated on the end. Then you need to combine this space to other partitions.
If you want to combine unallocated space to the left contiguous, you can achieve with Windows 10 native Disk Management without any software. However, there are two preconditions:
- The left contiguous partition is formatted with NTFS file system.
- The left contiguous partition should be primary partition.
If you want to merge unallocated space to any non-adjacent partition, or the left contiguous partition is FAT32 or logical drive, you need third party tool. There's free partition software to accomplish this task.
Download NIUBI Partition Editor Free and follow the steps in the video: