The same with physical hard disk drives, virtual disk in Hyper-V also runs out of space. When a physical disk is full, you have to copy and migrate to another larger one, but to Hyper-V virtual disk, you can expand it directly, therefore, it's much easier and faster. To expand virtual hard disk in Hyper-V guest server or client machine, there are 2 common ways via PowerShell and Hyper-V Manager.
How to expand virtual disk in Hyper-V with PowerShell
Expanding Hyper-V virtual disk with PowerShell is much easier and faster, but before expanding disk (both VHD and VHDX) there are 2 things you should do:
- Delete saved Checkpoint(s).
- Turn off Hyper-V guest virtual machine.
Steps to expand Hyper-V virtual disk with PowerShell:
- Open PowerShell from Quick Launch bar or Start menu according to your own Operating System.
- Type Resize-VHD -Path 'E:\yourown.vhdx' -SizeBytes 200gb

Note:
- Run PowerShell as Administrator.
- You should indicate the absolute path and name of the virtual disk with quotes.
- 200gb here means the final size after expanding, not adding 200GB.
How to expand virtual hard disk with Hyper-V Manager
It requires much more steps to expand virtual disk with Hyper-V Manager, but it can expand virtual disk dynamically without shutting down the guest virtual machine. Note: you still need to delete the Checkpoints before expanding, otherwise, you may encounter the issue that Hyper-V Manager reports successfully extended disk but not really.
Steps to expand virtual hard disk with Hyper-V Manager:.
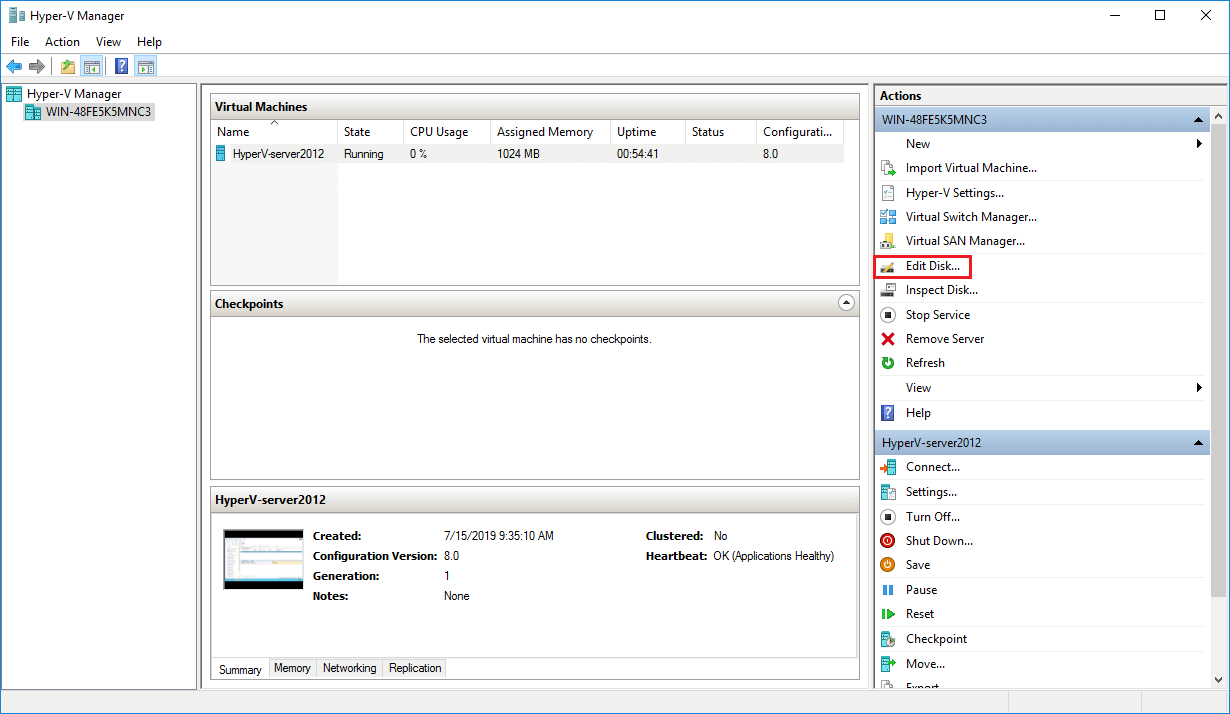
Step 1: Open Hyper-V Manager, click the host in left panel, then click Edit Disk in Actions panel on the right.
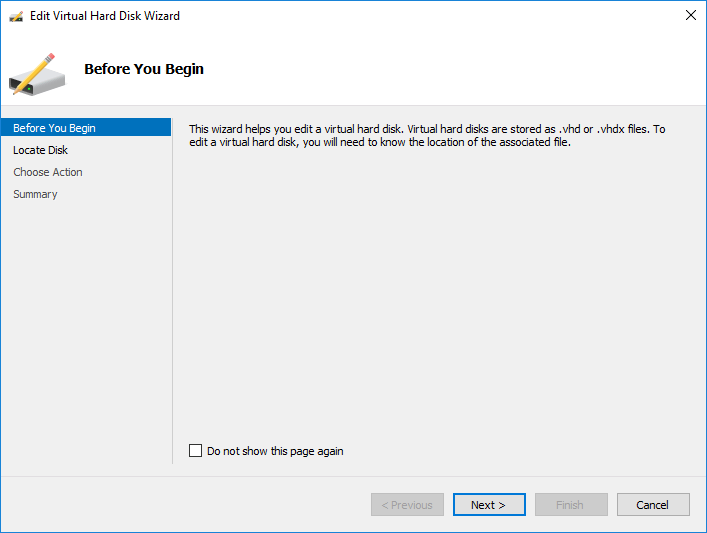
Step 2: Simply click Next in the pop-up Edit Virtual Hard Disk Wizard window.
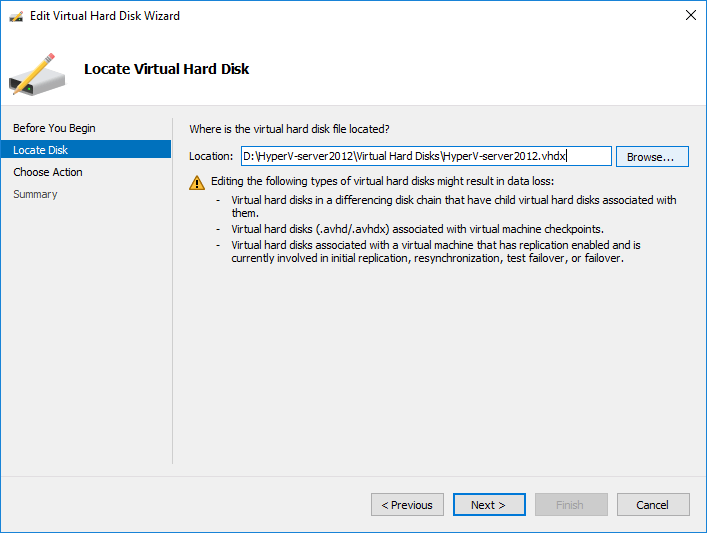
Step 3: Click Browse on the top to locate your VHD/VHDX virtual disk file and the click Next.
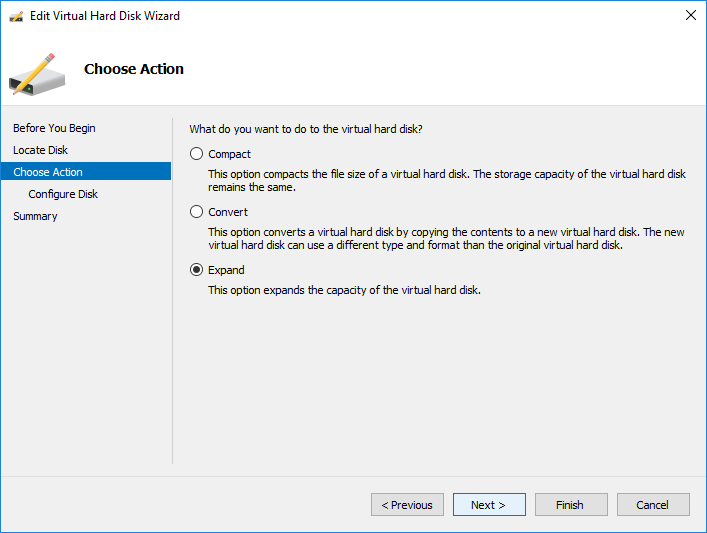
Step 4: Select Expand option and click Next. (If you did not turn off virtual machine, there's only Expand option.)
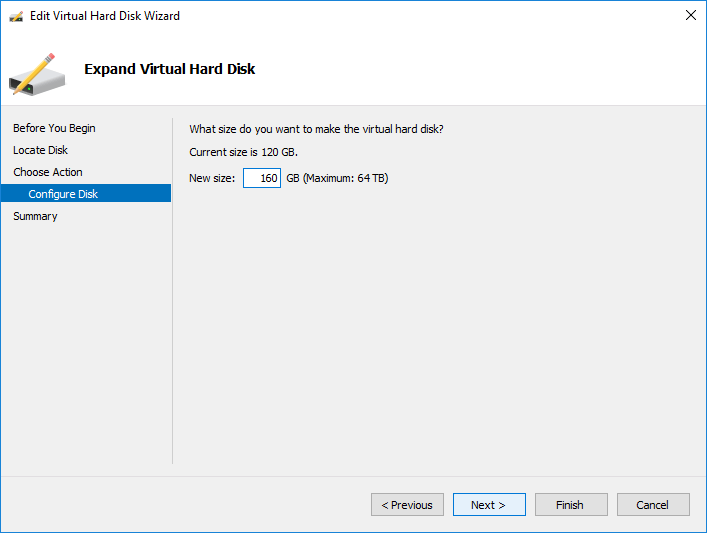
Step 5: Enter an amount of new size and the click Next.
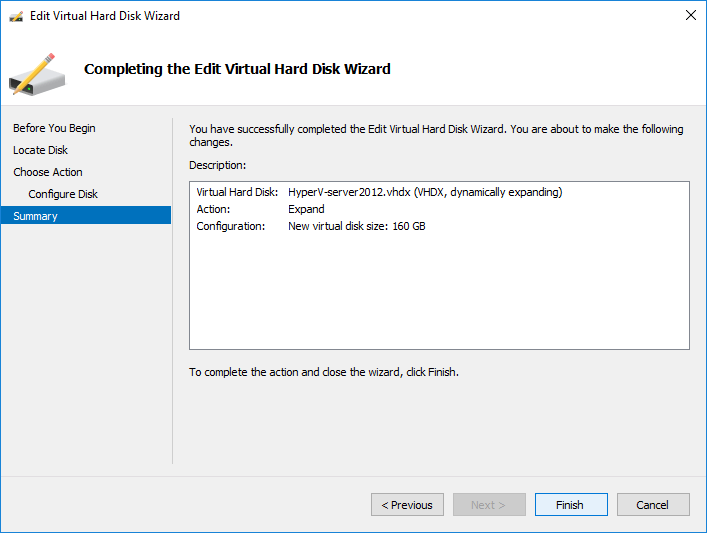
Step 6: Review the expanding operation and click Finish to proceed.
In a short while, the system disk in my Hyper-V Server 2012 is increased from 120GB to 160GB, additional 40GB disk space is shown as unallocated at the end.
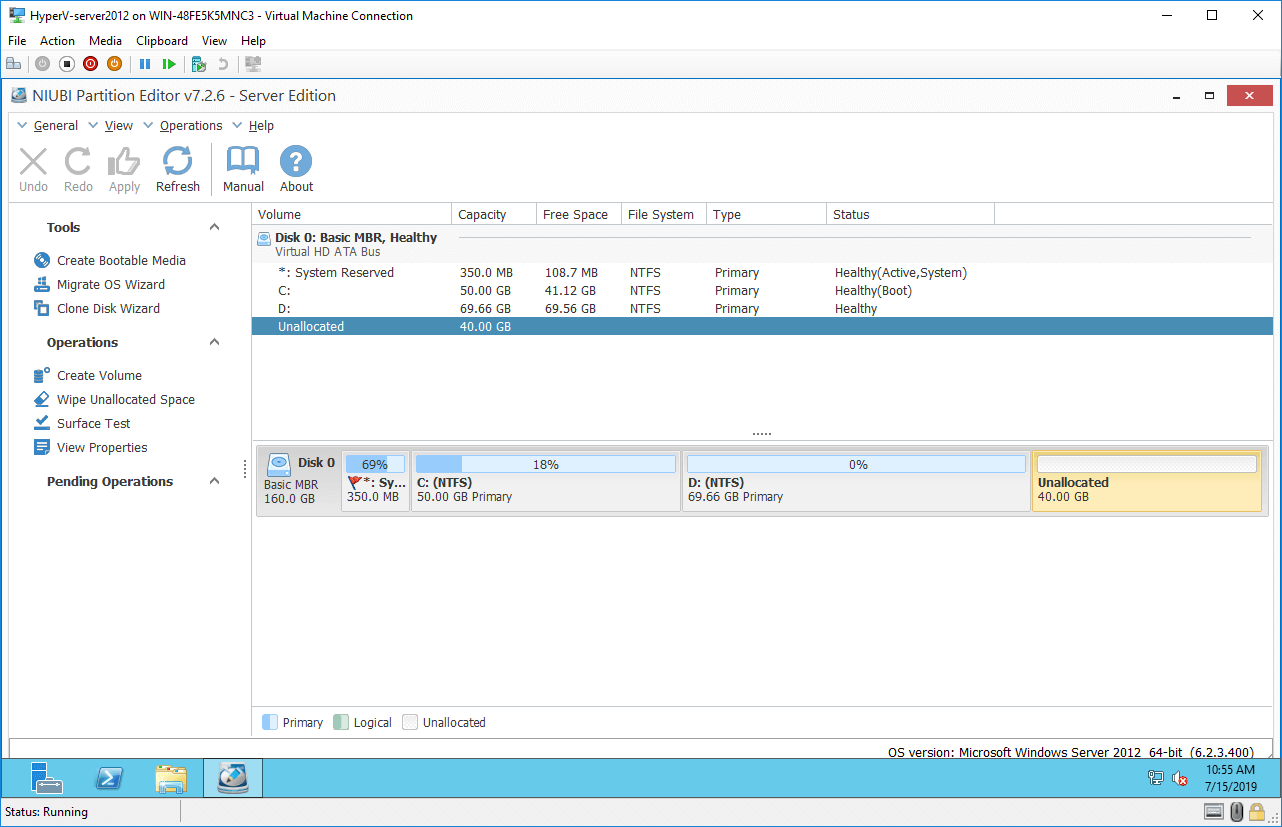
How to extend partition after expanding virtual disk
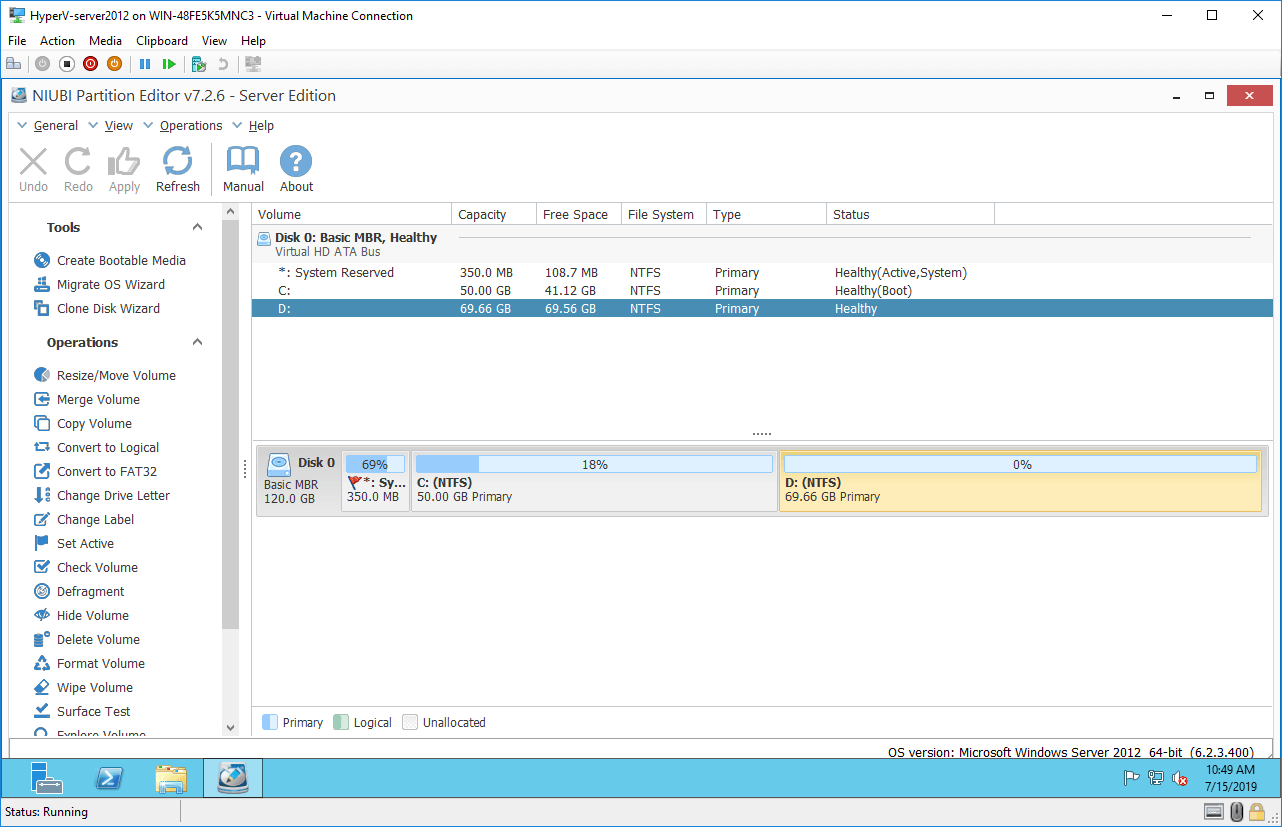
To add this additional unallocated space to other partitions, you need to run NIUBI Partition Editor. If you want to extend drive D (the left contiguous partition), right click it and select "Resize/Move Volume", drag the right border towards right to combine unallocated space.
If you want to extend system partition C in Hyper-V, follow the steps:
- Right click D: drive and select "Resize/Move Volume", drag the middle of this partition towards right in the pop-up window, then additional unallocated space will be moved behind C drive.
- Right click C: drive and select "Resize/Move Volume" again, drag right border towards right to merge unallocated space.
- Click "Apply" on top left to execute, done.
Watch the video guide how to increase partition after expanding virtual disk in Hyper-V vm:

Besides moving and extending partitions, NIUBI Partition Editor helps do many other disk and partition operations.