The same with physical server, when system C drive is running out of space in Hyper-V virtual machine, you can extend C drive without losing data. This article introduces 3 ways to increase C: drive space/size in Hyper-V vm, select the corresponding method according to your own disk partition configuration.
How to increase C drive space by shrinking D in Hyper-V
In most of Hyper-V virtual server, there's another partition D on the same virtual disk. In that case, you can shrink D to expand C. If you run Windows built-in Disk Management console or diskpart command tool, unallocated space can only be made on the right side after shrinking drive D, this space cannot be extended to C drive with either native tool.
To accomplish this task, you'd better run 3rd-party tool, part of free unused space of drive D can be converted to unallocated behind C drive, then C drive can be extended easily. There are many disk partition tools in the market, among them all, NIUBI Partition Editor is the safest and fastest because of its unique 1-Second Rollback, Virtual Mode, Cancel-at-will, Hot Clone technologies and advanced file-moving algorithm.
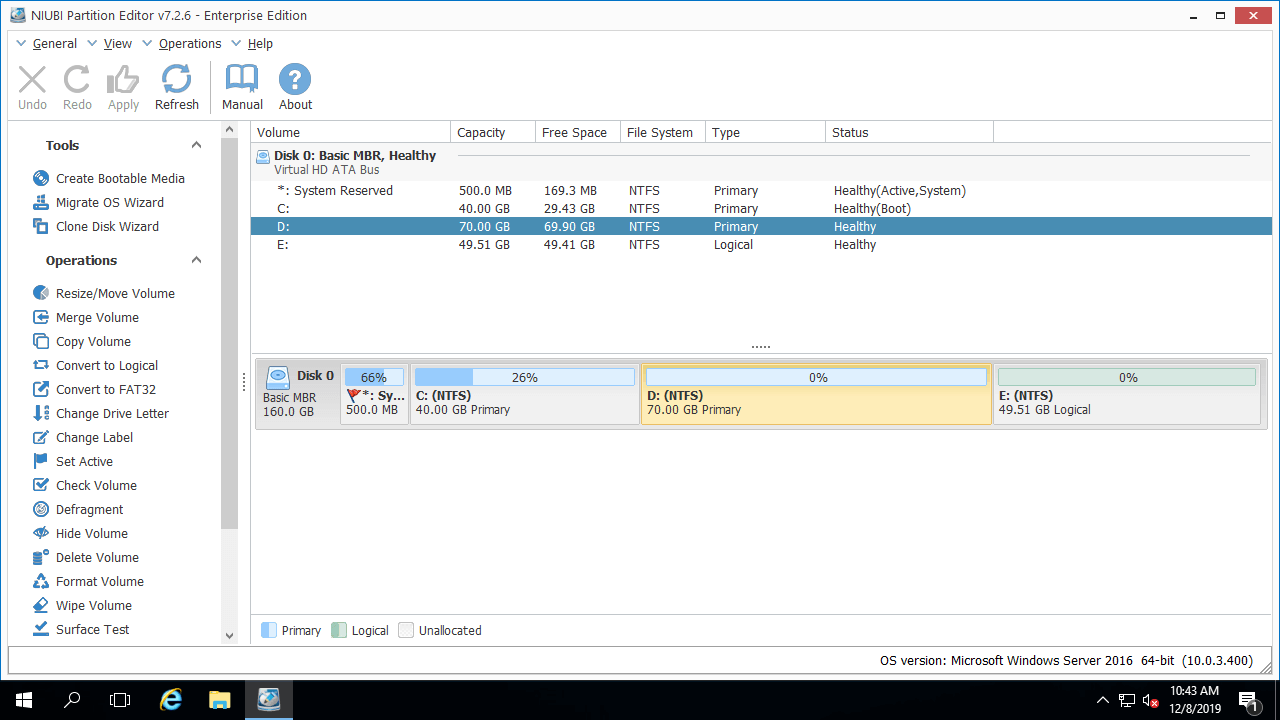
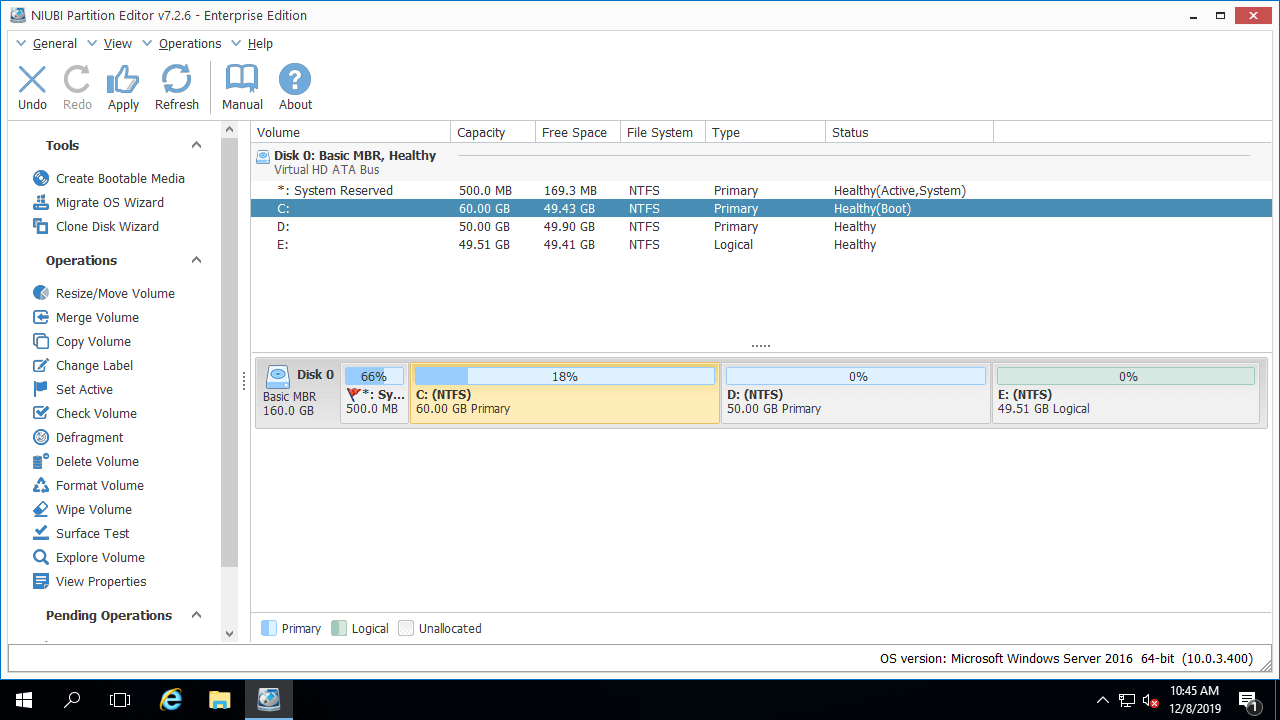
Download NIUBI Partition Editor and you'll see all virtual disk with partition structure on the right, available operations to selected disk or partition are listed on the left and by right clicking.
Steps to increase/extend C: drive in Hyper-V by shrinking partition D:
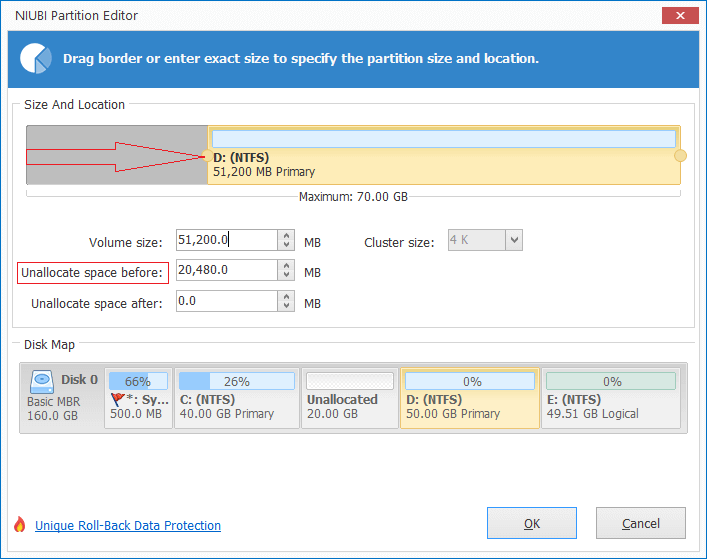
- Right click the right contiguous partition D: and select "Resize/Move Volume", in the pop-up window, drag the left border towards right, or enter an amount in the box of "Unallocated space before". Then unallocated space is made behind system C: drive.
![Shrink D]()
![Shrink D]()
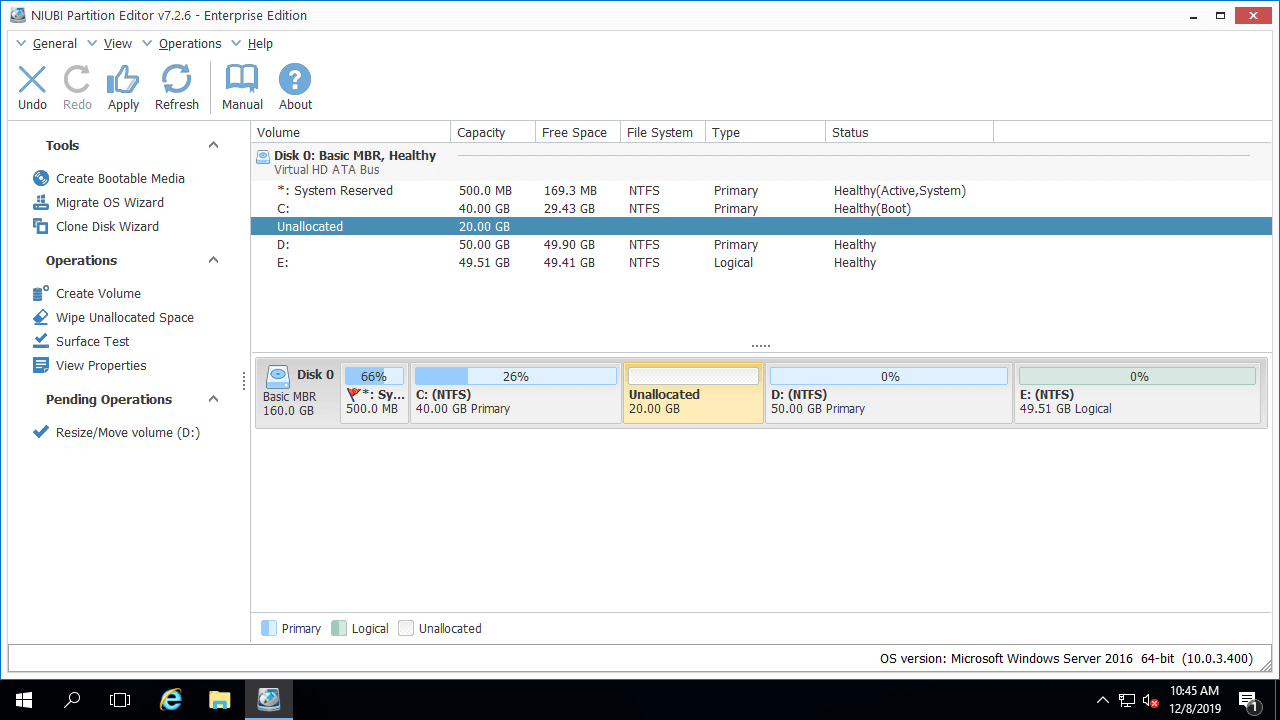
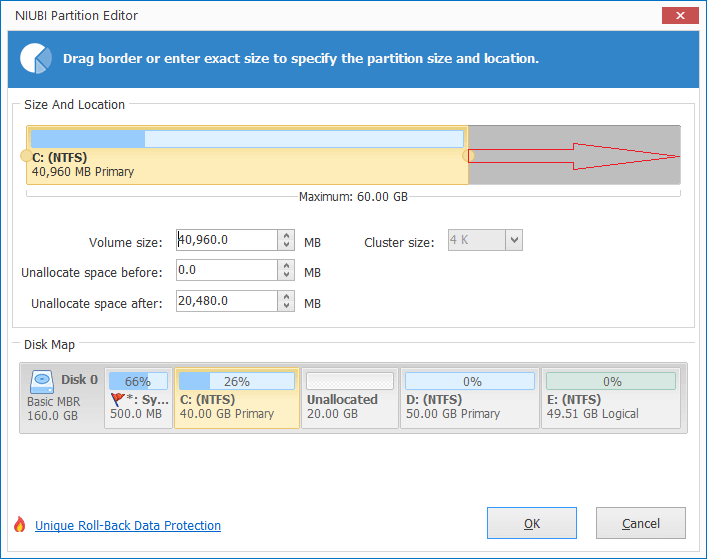
- Right click C: drive and select "Resize/Move Volume" again, drag right border to towards right to combine this adjacent unallocated space. Then C drive is increased from 40GB to 60GB.
![Extend C]()
![System volume extended]()
- Click "Apply" on top left to execute, done. If you did something wrong, simply click "Undo" to cancel the pending operations, partitions won't be changed until click Apply to confirm.
How to extend C drive in Hyper-V from non-adjacent partition
If there's not enough free space in the contiguous partition D but there's another E drive on the same virtual disk, you can shrink E to expand C drive. In that case, there's an additional step to move unallocated space before adding into C drive. Follow the steps in the video to increase C drive space in Hyper-V virtual machine:

How to increase C drive size after expanding virtual disk
If there's no other partition or no available free space on the same disk, no software can extend C drive by moving free space from another separated virtual disk. But easier than physical computer to copy disk, you can expand virtual disk in Hyper-V directly.
For example, if original virtual system disk is 120GB, after expanding it to 160GB, there will be 40GB unallocated space at the end of original disk. If there's no other partition, you can combine this unallocated space to C drive directly. If there's another drive D, move unallocated space next to C drive and then combine.
Besides resizing partition and increase C drive size in Hyper-V vm, NIUBI Partition Editor helps do many other disk and partition management operations.