Comparing with physical server and personal computers, virtual machine has many advantages, for example: much cheaper to build several servers with 1 copy of hardware, easily add, edit and remove components. When a physical hard disk becomes full, it costs a long time to copy or restore to another larger disk, but to virtual hard disk, you can expand it without losing data fast and easily. This article introduces detailed steps to increase disk size/space for Hyper-V virtual machine with 2 inbuilt utilities.
How to increase size of virtual disk with Hyper-V Manager
Hyper-V Manager can help you compact, convert, shrink and expand virtual disk. Better than other tool, it is able to increase vm disk size dynamically without shutting down or rebooting guest virtual machine. It is helpful to a virtual server.
Steps to increase virtual disk size/space with Hyper-V Manager (for both .vhd and .vhdx):
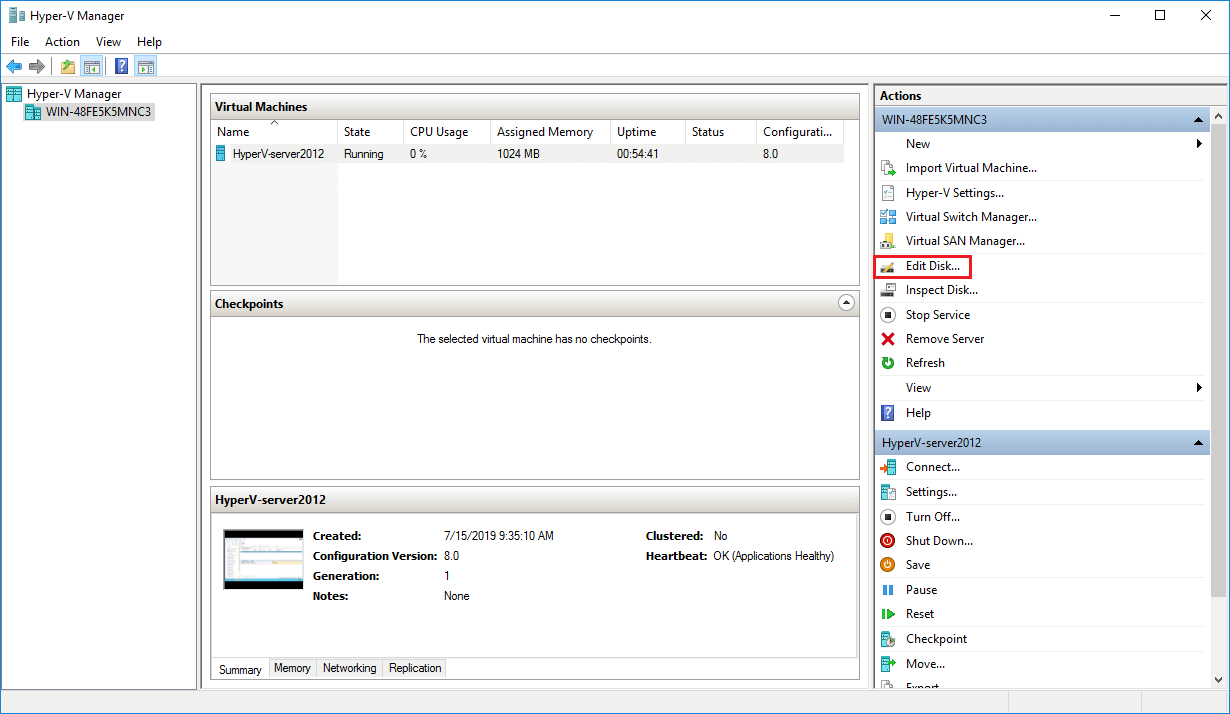
Step 1: Open Hyper-V Manager, click Edit Disk in Actions panel on top right.
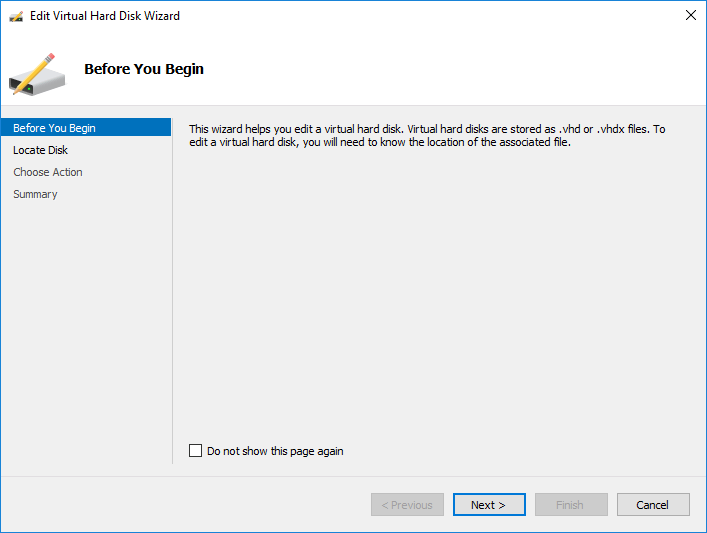
Step 2: Click Next in the pop-up Edit Virtual Hard Disk Wizard window.
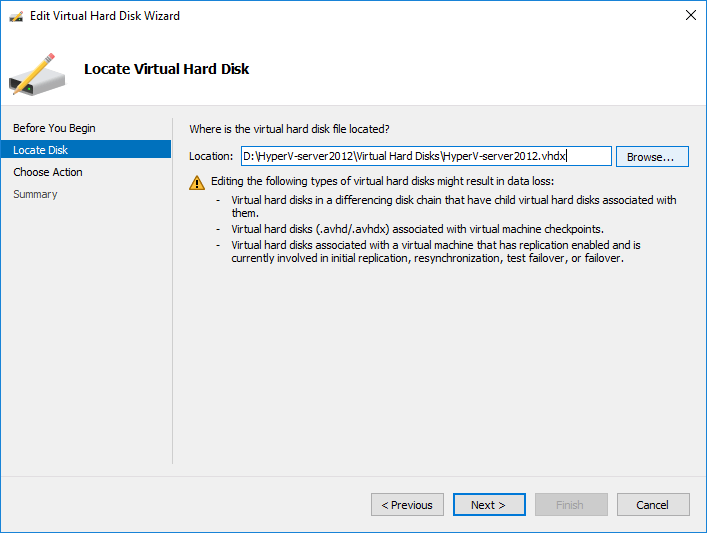
Step 3: Click Browse on the top to locate your VHD/VHDX virtual disk and then click Next. Pay attention to the warning message.
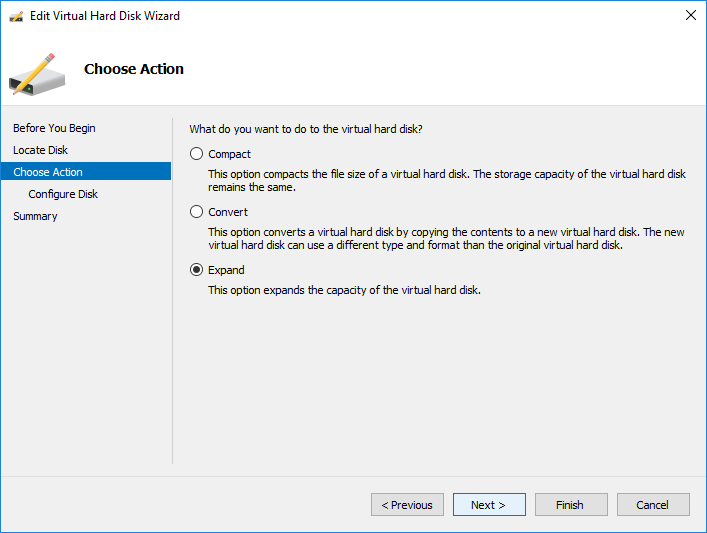
Step 4: Select Expand option and click Next.
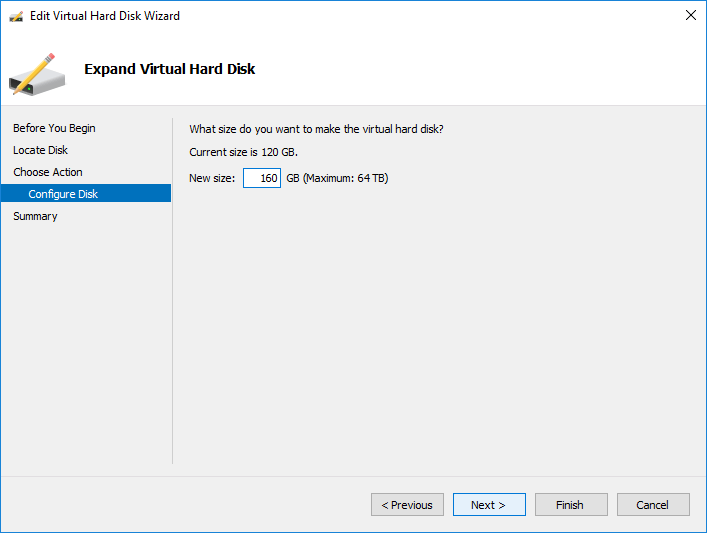
Step 5: Enter an amount of new disk size and then click Next.
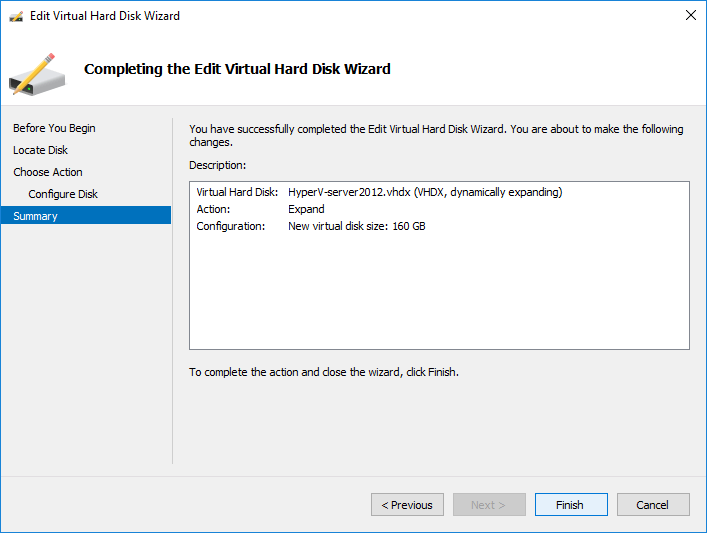
Step 6: Review the expanding operation and click Finish to proceed.
In a short while, original virtual hard disk will be increased and additional disk space will be shown as unallocated at the end.
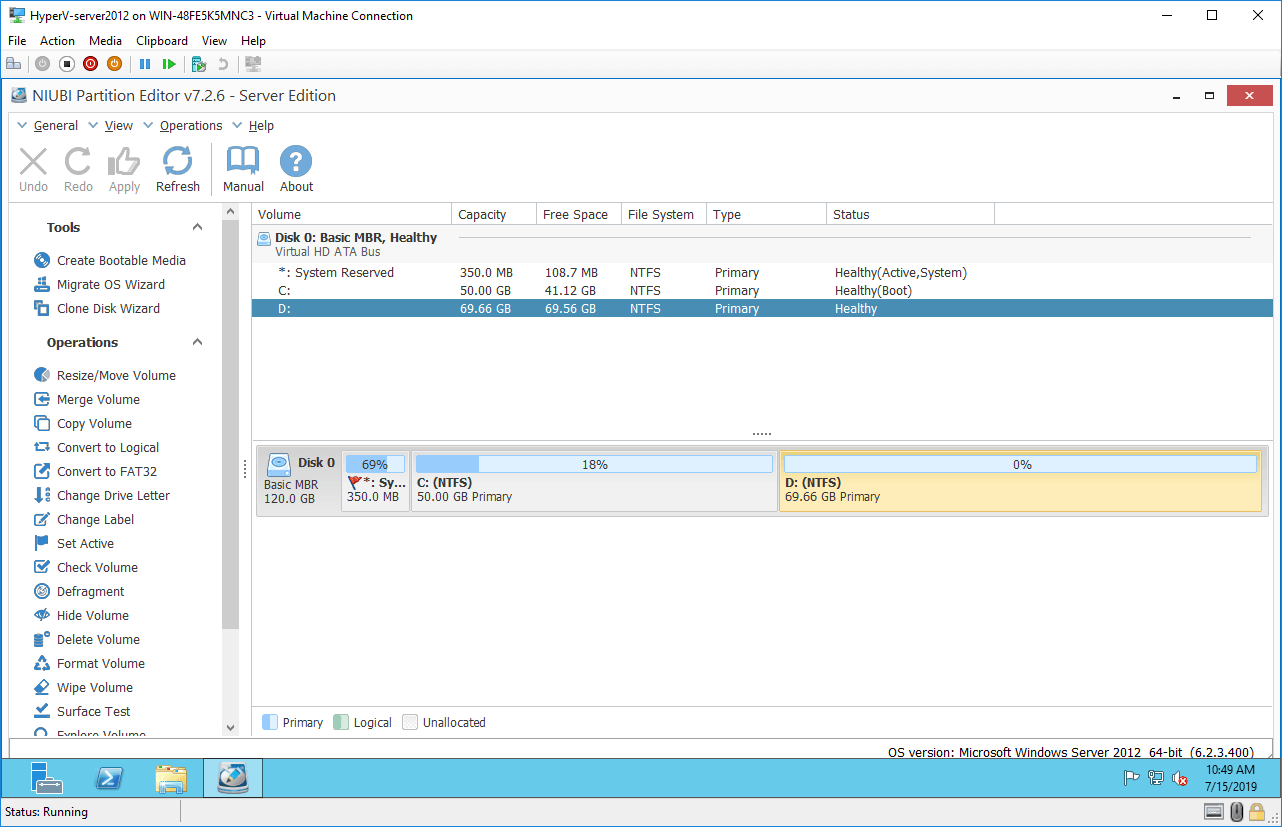
If you keep Windows Disk Management, Server Manager Storage Services or NIUBI Partition Editor running while expanding virtual disk, you need to click "Refresh" to load the latest disk partition parameters. In some Windows versions, you need to re-open Disk Management.
How to increase virtual disk size in Hyper-V with PowerShell
If you think it's complicated to increase vm disk space with Hyper-V Manager, there's an easier way with PowerShell. However, before doing this, you must shut down Hyper-V guest virtual machine and delete the Checkpoints associated with the disk that you want to increase size.
To increase size of hyper-v virtual disk with PowerShell:
- Open PowerShell with Administrator privilege from Quick Launch bar, Start menu or other place.
- Type Resize-VHD -Path 'D:\vm.vhdx' -SizeBytes 500gb

Note:
- D:\vm.vhdx means absolute path and name of the virtual disk with quotes.
- 500gb means increasing vm hard disk to 500GB, not adding 500GB.
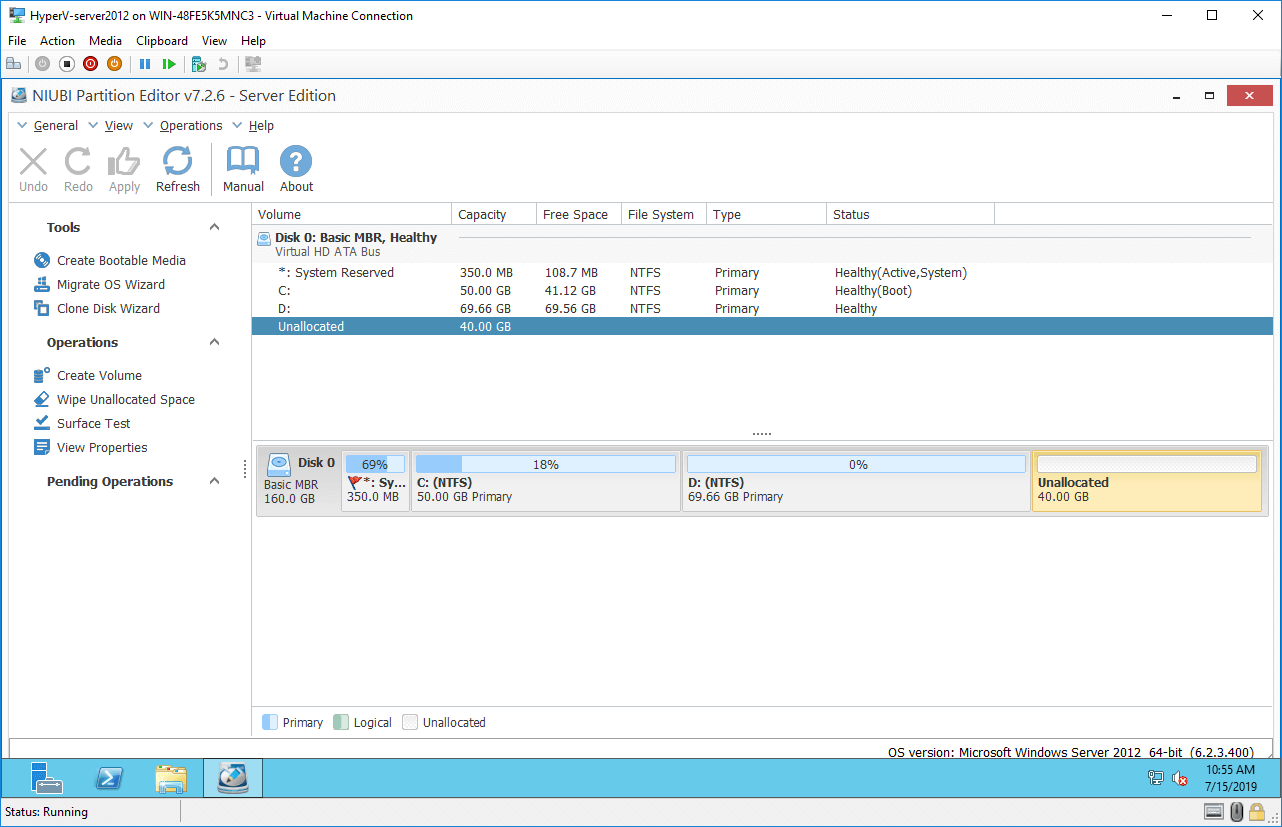
How to increase size of virtual partition after expanding disk
After getting the additional unallocated space on the end, how to add it into other partitions? You need 3rd-party disk partition software such as NIUBI Partition Editor, which is the safest and fastest Windows partition manager.
Download NIUBI Partition Editor and follow the steps in the video:

Note: there's potential system damage and data loss risk while moving and resizing partition, so you'd better create Checkpoint or make independent backup first. Better than other tools, NIUBI Partition Editor has innovative Virtual Mode, Cancel-at-will, 1-Second Rollback and Hot Clone technologies to protect system and data. It is much faster because of the advanced file-moving algorithm. It also helps do many other disk and partition management operations.