
In many servers, the D: drive is used for programs and some Windows services. If it was not allocated enough space initially, or if data grows rapidly, it may run out of space. In that case, you can try to increase the D drive's space without losing data. This article introduces four options to extend the D drive on Windows Server 2012/2016/2019/2022/2025 without data loss. Choose the appropriate method based on your disk partition configuration.
1. Extend D Drive in Disk Management
This method is only used when there is an adjacent partition on the right of the D: drive and it can be deleted.
The size of a physical disk is fixed. Before extending a partition, there must be unallocated space on the same disk. To generate this space, you can either delete or shrink another partition. Shrinking a partition will convert only a portion of its unused space into unallocated space while keeping all files intact, making it a better option than deleting the partition.
Windows' built-in Disk Management offers the "Shrink Volume" and "Extend Volume" functions to help resize partitions without losing data. However, you cannot extend the D: drive by shrinking other volumes with this tool, because:
- The "Shrink Volume" function can only shrink a partition to the left, generating unallocated space on the right side.
- The "Extend Volume" function can only merge unallocated space into the adjacent partition on its left.
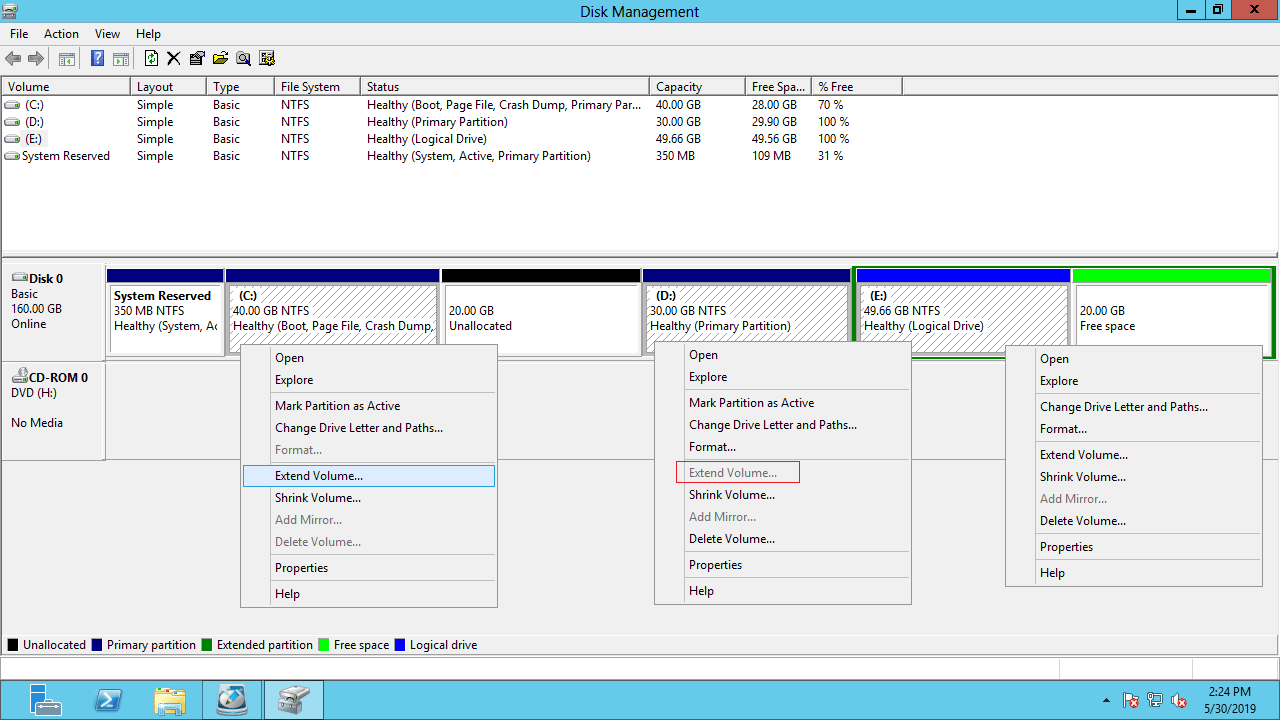
As shown in the screenshot, the "Extend Volume" option is always grayed out for the D: drive after shrinking both the left partition (the C drive) and the right partition (the E drive). Therefore, the only way to extend the D: drive in Windows Server 2012 Disk Management is by deleting the adjacent partition on the right (the E drive).
If there is no adjacent partition (such as the E: drive) on the right or if you cannot delete it, only third-party disk partition software can help.
2. Expand D Drive by Shrinking Partition E
This method is used when there is an adjacent partition (the E: drive) on the right with plenty of free space.
When there is another data partition on the same disk, you can easily shrink it to generate unallocated space and then add this unallocated space to the D: drive.
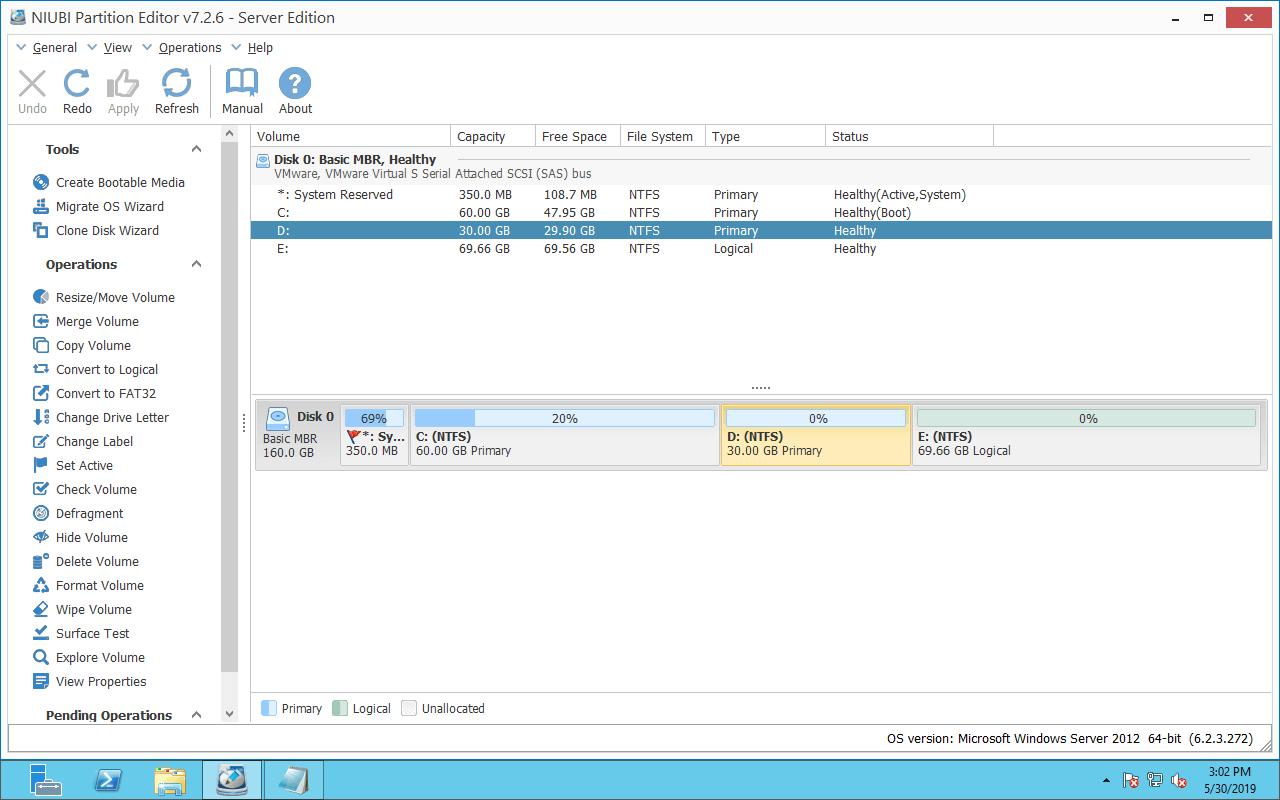
Download NIUBI Partition Editor, and you will see all disks along with their partition layout and other information in the main window.
On Disk 0, there are the C, D, and E drives, as well as a System Reserved partition. The original D: drive is 30GB and E: is 69.66GB.
How to extend the D drive on Windows Server 2012/2016/2019/2022:
Step 1: Right-click the E: drive and select "Resize/Move Volume", then drag the left border to the right in the pop-up window. (Or enter an amount in "Unallocated space before".)
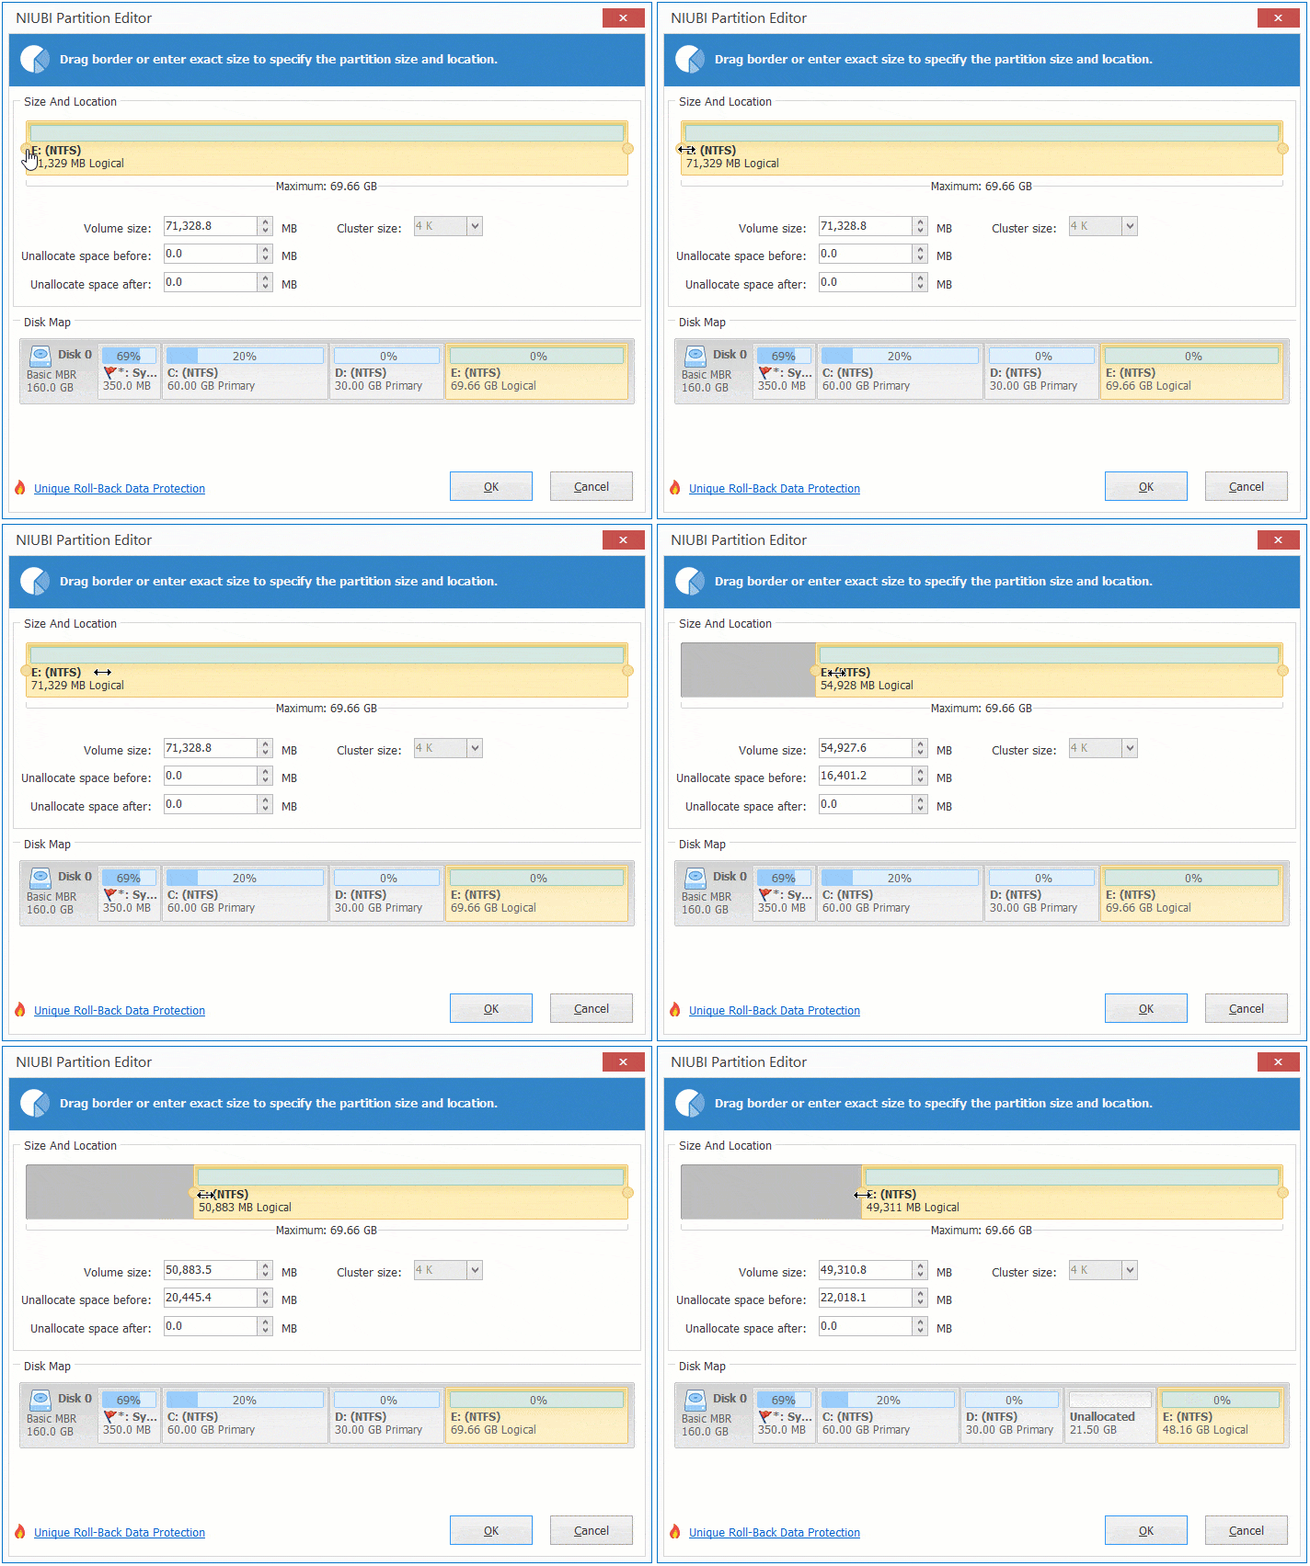
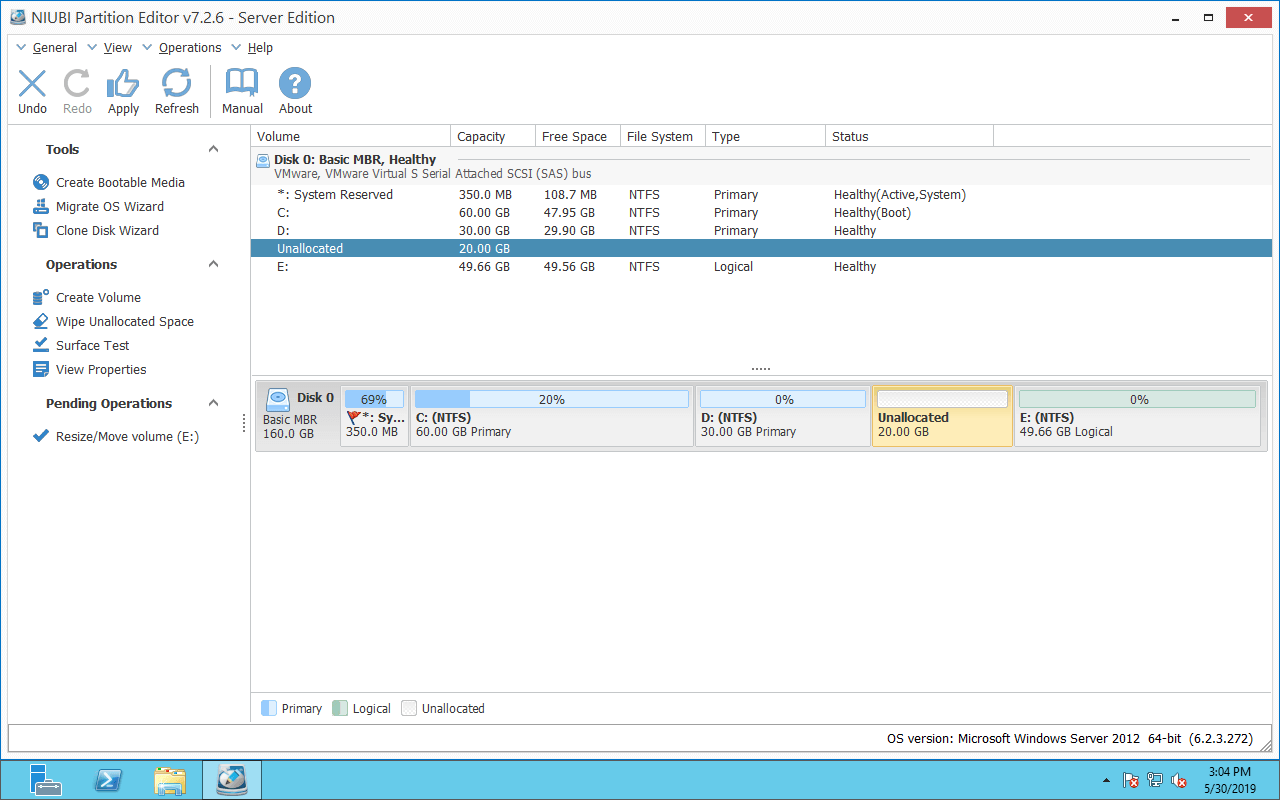
Then, unallocated space will be generated on the left side of the E drive.
Step 2: Right-click the D: drive and select "Resize/Move Volume" again, then drag the right border to the right in the pop-up window.
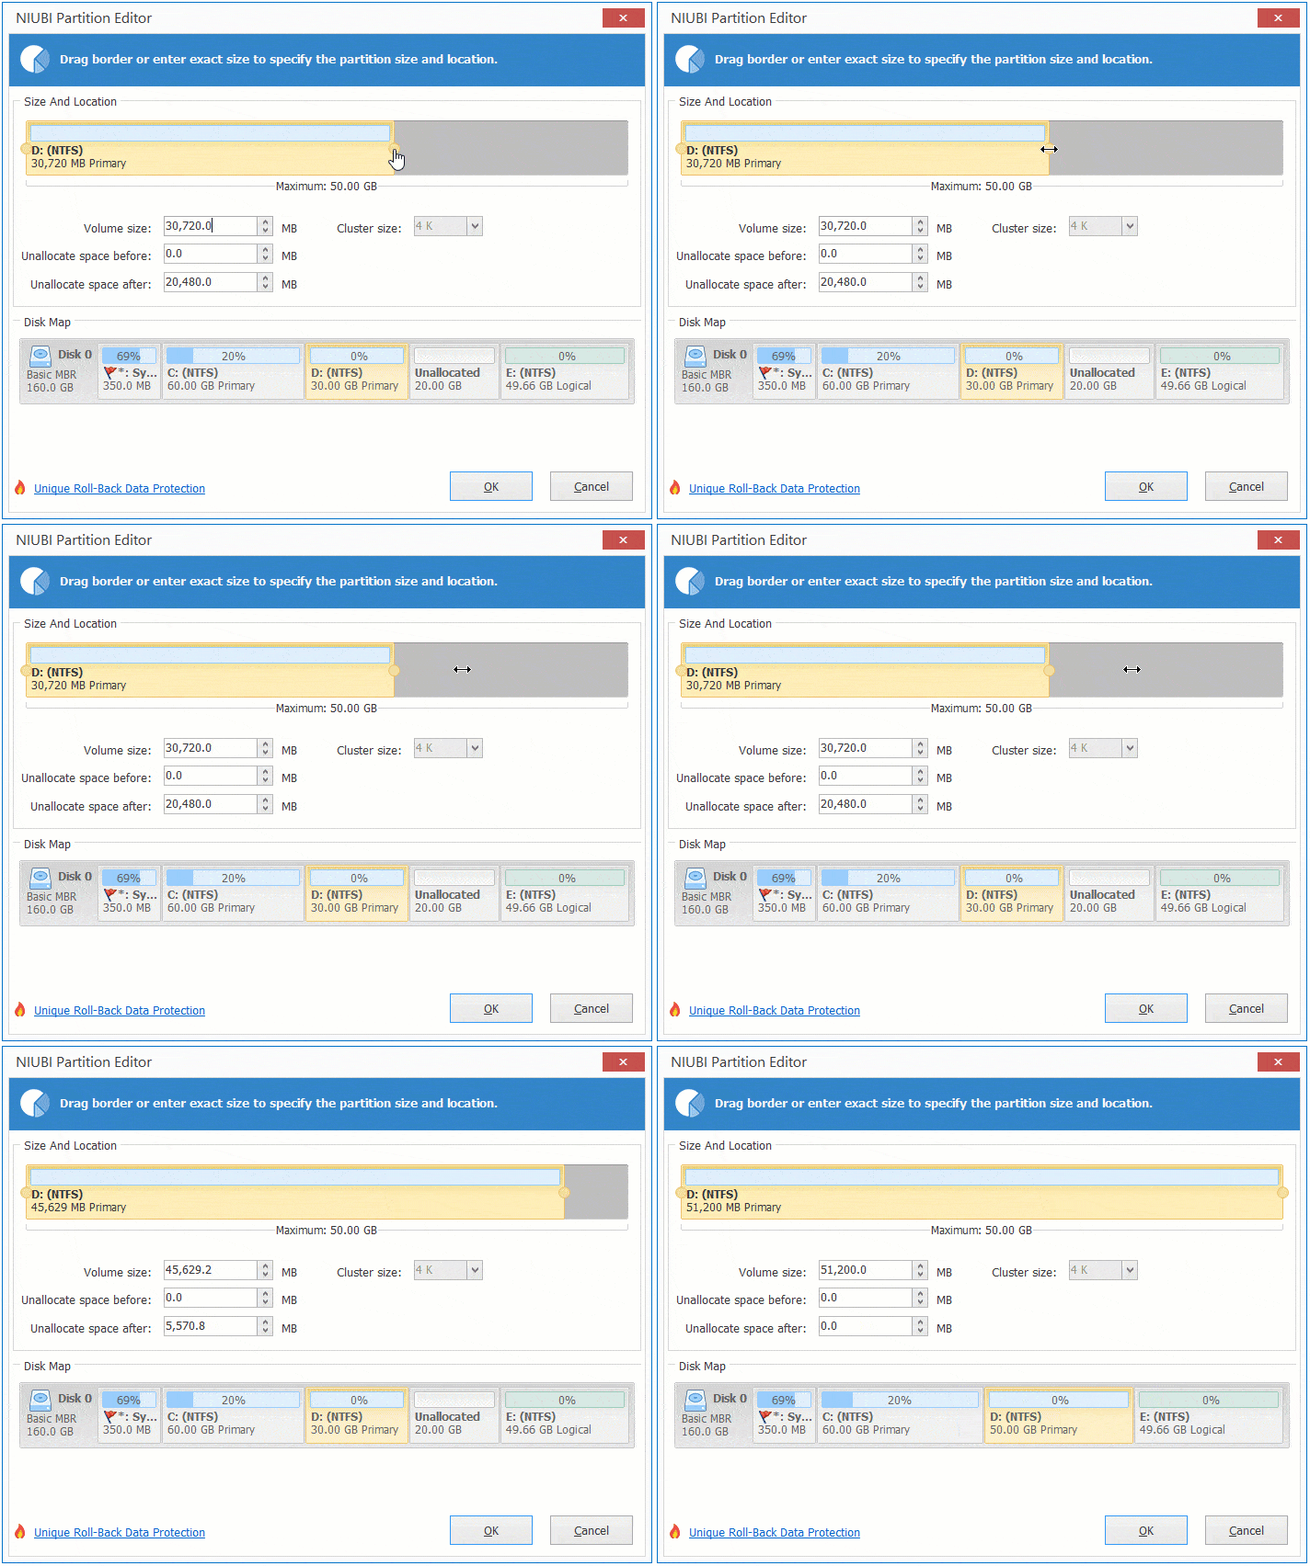
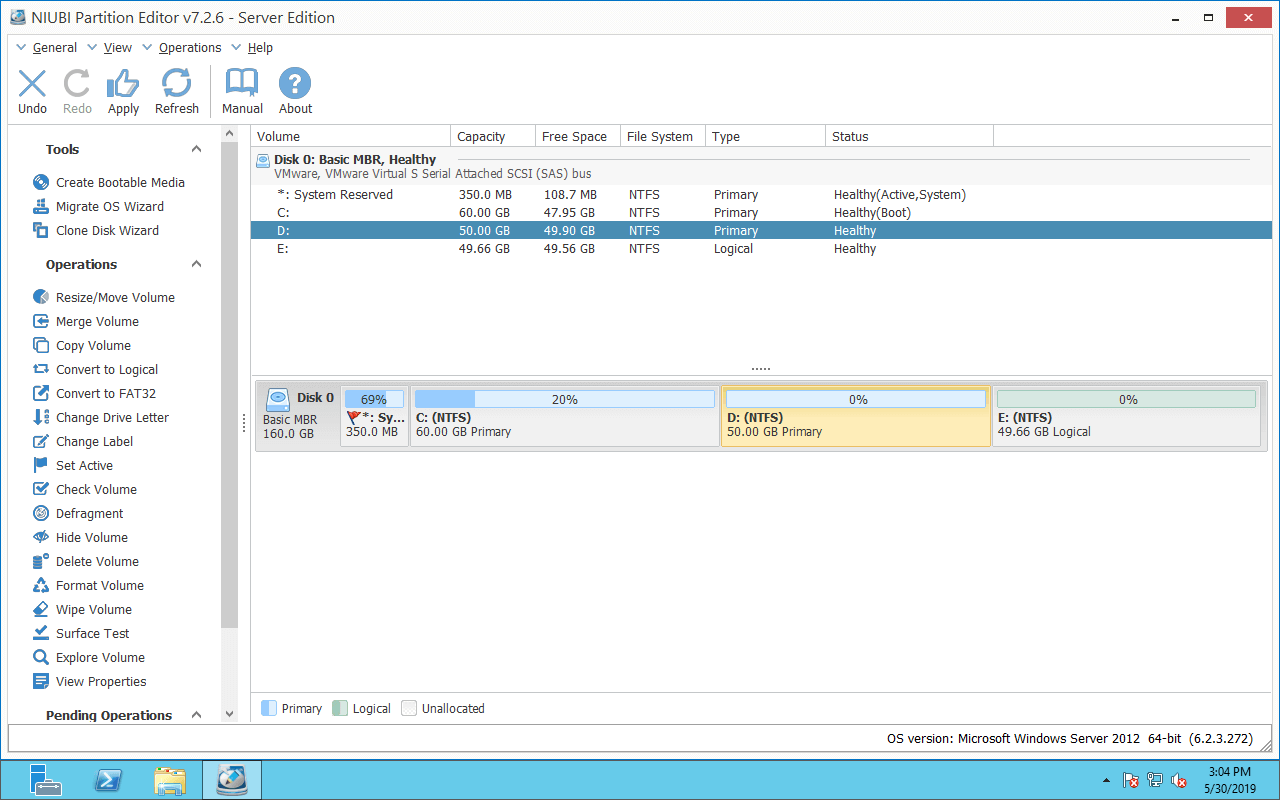
Then, the D drive will be extended by merging this adjacent unallocated space.
Step 3: Click "Apply" on the top left to execute. (All operations before this step only work in virtual mode.)
3. Extend D Drive by Shrinking System Partition C
This method is used when there are no other data volumes, but there is plenty of free space in the system partition (the C: drive).
Follow the steps in the video to extend the D partition in Windows Server 2012 R2 by shrinking other partitions:
4. Extend Volume D with Another Disk
This method is used when there is insufficient free space on the same disk.
You have two options in this case: clone the disk to a larger one and extend the partition with the additional disk space, or copy the D drive to another disk.
Copy the D drive to another disk and increase the space:
Copy the disk to a larger one and extend the partitions:
If you are using any type of hardware RAID array, such as RAID 0, 1, 5, or 10, do not break the array or perform any operations on the RAID controller. The steps to enlarge the D: drive on a RAID array, VMware, or Hyper-V virtual disk are exactly the same as those for a physical disk partition.
No matter how your disk partitions are configured, NIUBI Partition Editor provides a way to extend the D: drive in Windows Server 2012/2016/2019/2022/2025. Compared to other software, NIUBI is much safer and faster due to its powerful technologies.
- Hot Clone - Clone disk partitions in Windows for backup, migration, and fast disk swapping.
- Virtual Mode - All operations are listed as pending for preview, and real disk partitions won't be modified until you click "Apply" to confirm.
- Cancel-at-Will - If you applied incorrect operations, you can safely cancel the ongoing operations at any stage before completion.
- 1 Second Rollback - If any error is detected while resizing partitions, it can immediately and automatically revert the disk partitions to their previous state.
- Advanced File-Moving Algorithm: Resize and move partitions 30% to 300% faster, saving significant time, especially when handling a large number of files.
 © 2009 - NIUBI Technology All Rights Reserved. |