The same with physical server and personal computer, system C drive in Hyper-V virtual machine also runs out of space. No matter you use VMware, Hyper-V, Virtualbox or Citrix, you can extend C drive like physical computers. This article introduces detailed steps to extend C: drive partition in Hyper-V guest virtual machine.
How to extend C drive in Hyper-V by shrinking or moving partition
Before starting, you'd better create a Checkpoint or make an independent backup, because there's potential system damage and data loss risk while resizing virtual partition. Another thing is running safe partition software. Although Windows has inbuilt Disk Management and diskpart command tool, they are useless in most cases. A reliable partition software can help you extend C drive in hyper-v much more safely and easily.
Among these disk partition software, NIUBI Partition Editor has Virtual Mode, Cancel-at-will, 1-Second Rollback and Hot Clone technologies to protect system and data. It is also much faster because of the innovative file-moving algorithm.
Download NIUBI Partition Editor and you'll see all virtual disk with partition structure on the right, available operations to selected disk or partition are listed on the left and by right clicking.
When everything is ready, we can start to resize partition and expand C drive for Hyper-V virtual machine.
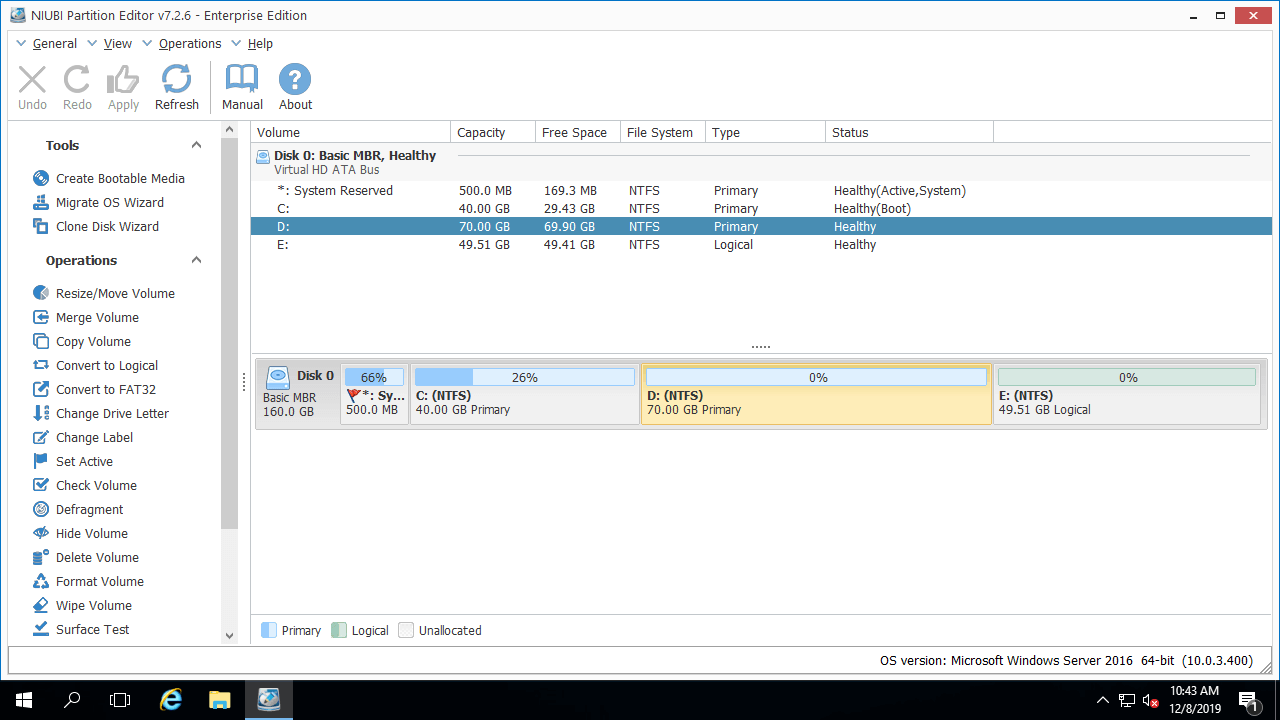
Firstly, check if there's free unused space in other partition on the same virtual disk. If yes, you can shrink it to get unallocated space, and then add into C drive. With NIUBI Partition Editor, Operating System, programs, data and anything else keep the same with before.
Steps to extend C: drive in Hyper-V Windows Server 2022/2019/2016/2012:
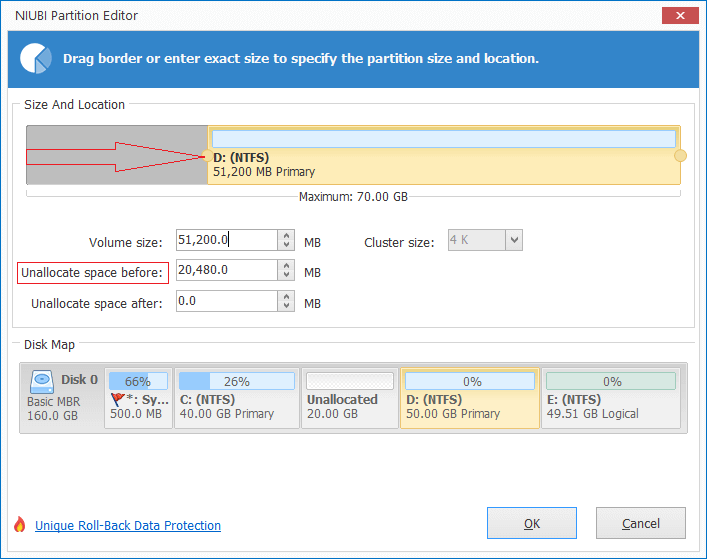
- Right click drive D: (the right contiguous) and select "Resize/Move Volume", in the pop-up window, drag the left border towards right, or enter an amount in the box of "Unallocated space before". Then part of free space will be converted to unallocated behind C: drive.
![Shrink D]()
![Shrink D]()
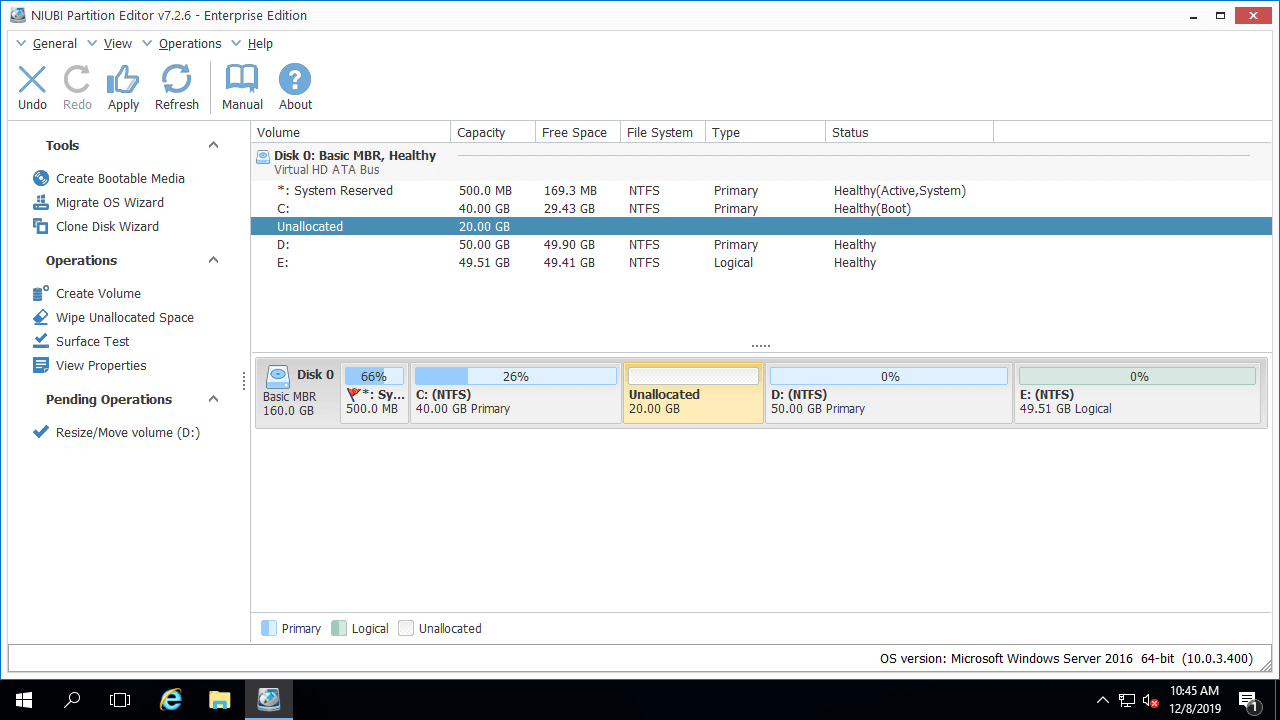
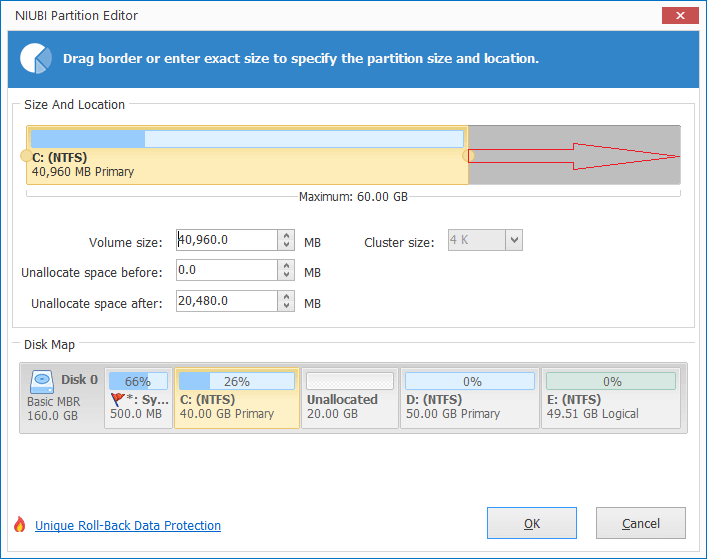
- Right click C: drive and select "Resize/Move Volume" again, drag right border to towards right to combine this adjacent unallocated space.
![Extend C]()
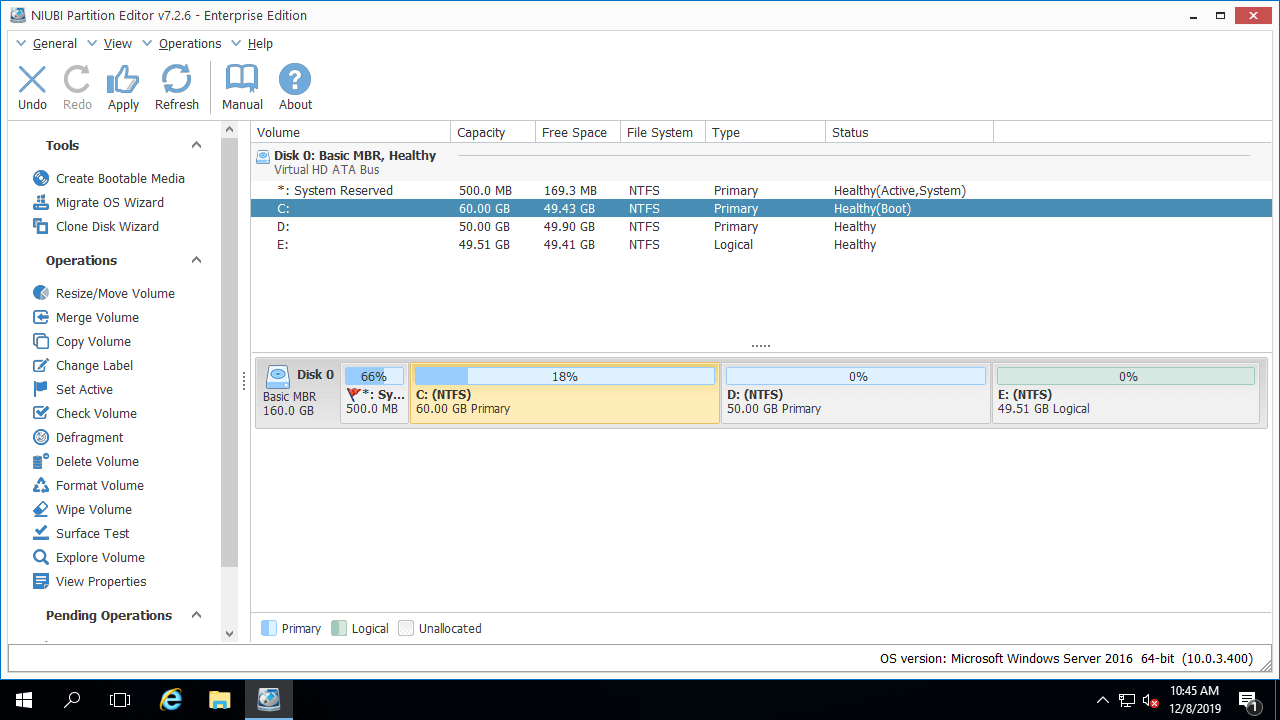
![System volume extended]()
- Click "Apply" on top left to execute, done. If you changed your mind, simply click "Undo" to cancel the pending operation, partitions won't be modified until click Apply to confirm.
In few virtual server or client Windows machine, there's not enough free space in the right contiguous partition. As you see in my virtual Server 2016, if drive D is also full, I can shrink the last partition E. In that case, there's an additional step to move drive D and make unallocated space next to C drive before combining.
Follow the steps in the video to extend C drive by shrinking contiguous D or non adjacent E:

How to increase C drive space by expanding Hyper-V virtual disk
In a physical computer, if entire system disk is full, you have to copy or restore it to another larger disk, because no software can extend C drive by adding space from another separated disk. But in Hyper-V virtual machine, you can expand this disk to larger size directly.
Follow the steps to increase size of hyper-v virtual disk, after that, additional space will be shown as unallocated at the end. Then you just need to add this unallocated space to C drive with NIUBI Partition Editor.
Besides shrinking, moving and extending partitions, NIUBI Partition Editor helps do many other operations such as merge, convert, defrag, wipe, hide, delete, format partition, scan bad sectors.