This article introduces how to shrink partition in Windows 7 32/64 bit, 3 ways to shrink Windows 7 volume without losing data.
Windows 7 has been released over 10 years, but many people still use this old Operating System. The same with previous Windows XP and the latest Windows 10, you need to manage disk partitions for Windows 7 computers. For example, shrink an allocated partition to create new or extend other volume that is running out of space. To shrink partition in Windows 7, there are native and 3rd-party software, this article gives detailed steps with both tools.
Way 1 - Diskpart command to shrink partition
Diskpart is a command prompt tool, which has many commands to manage entire disk and single partition. Diskpart in Windows XP can only shrink data volume, but in Windows 7 it is able to shrink system partition without losing data. Diskpart can only shrink NTFS partition even in latest Windows 10.
How to run Diskpart to shrink partition in Windows 7 32/64 bit:
- Press Windows and R to open Run, type diskpart and press Enter.
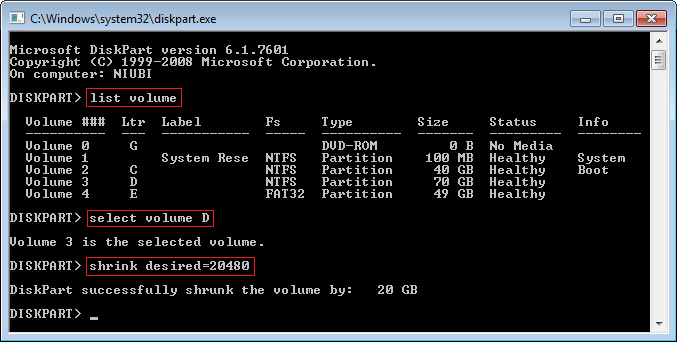
- Type list volume and press Enter in the command prompt window. Then you'll see all single partitions with some information.
- Type select volume D and press Enter. D is the drive letter or number of the volume that you want to shrink.
- Type shrink desired=20480 and press Enter. 20480 is the amount of space that you want to shrink from this partition (in MB).
In a short while, diskpart reports successfully shrunk the volume by 20GB.
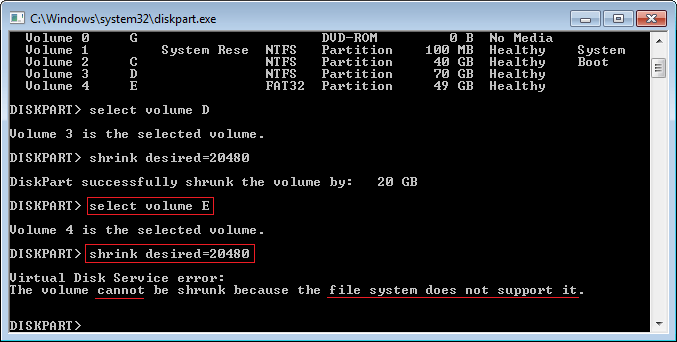
If you shrink a FAT32 partition, you'll receive an error message - The volume cannot be shrunk because the file system does not support it.
The small partitions including OEM, ESP and Recovery can't be shrunk, even if they are formatted as NTFS.
Way 2 - How to shrink volume in Disk Management
Unlike Diskpart, Disk Management has graphical interface, so it is better for the users that are not familiar with computing. But the same with Diskpart command, Disk Management only support shrinking NTFS partition. Furthermore, both native tools can only make Unallocated space on the right while shrinking.
How to shrink volume in Windows 7 Disk Management:
- Press Windows and R together on the keyboard, type diskmgmt.msc and press Enter.
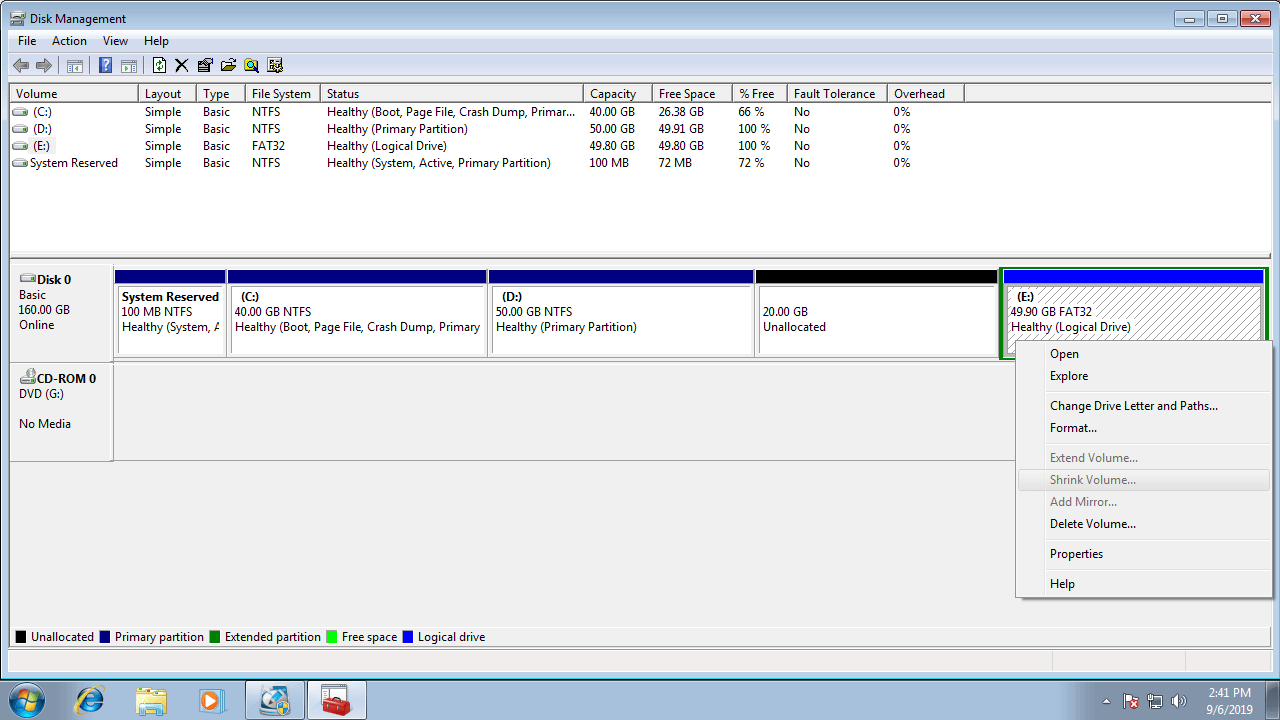
- Right click the drive that you want to shrink (here is D:) and select Shrink Volume.
- Enter an amount of space and click Shrink (there's maximum available space by default).
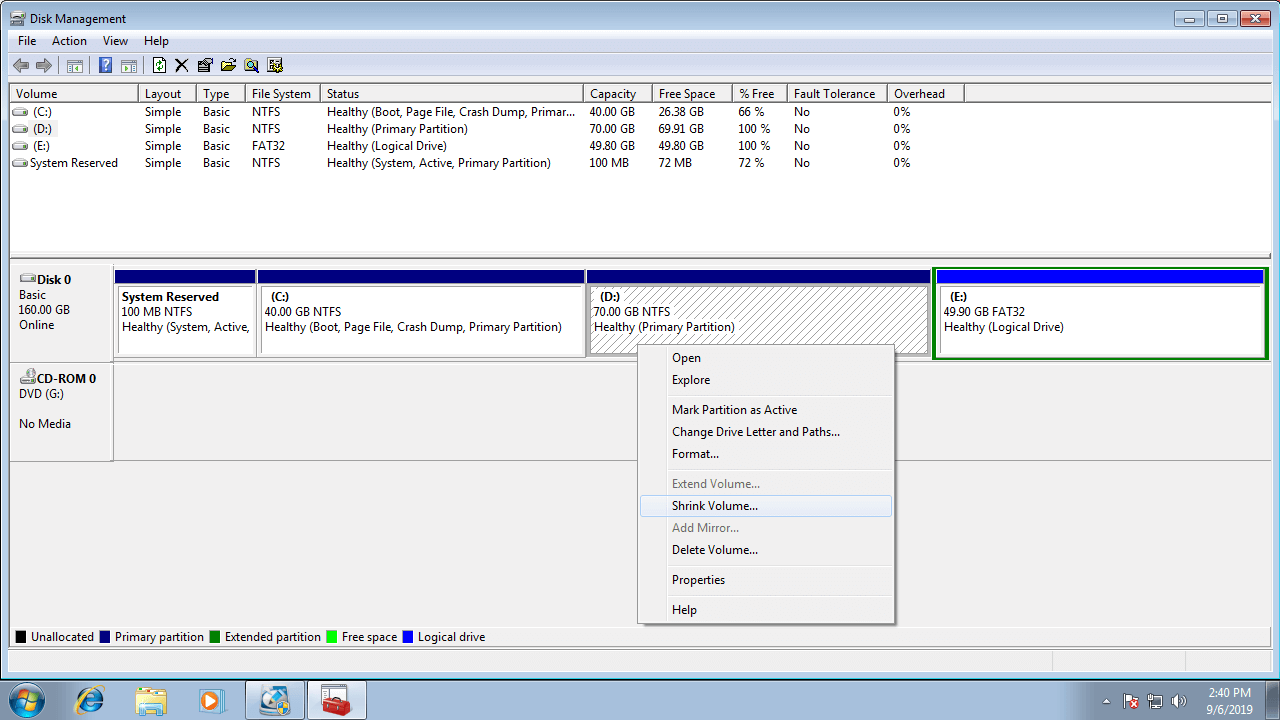
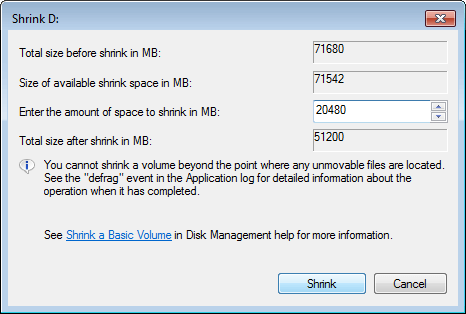
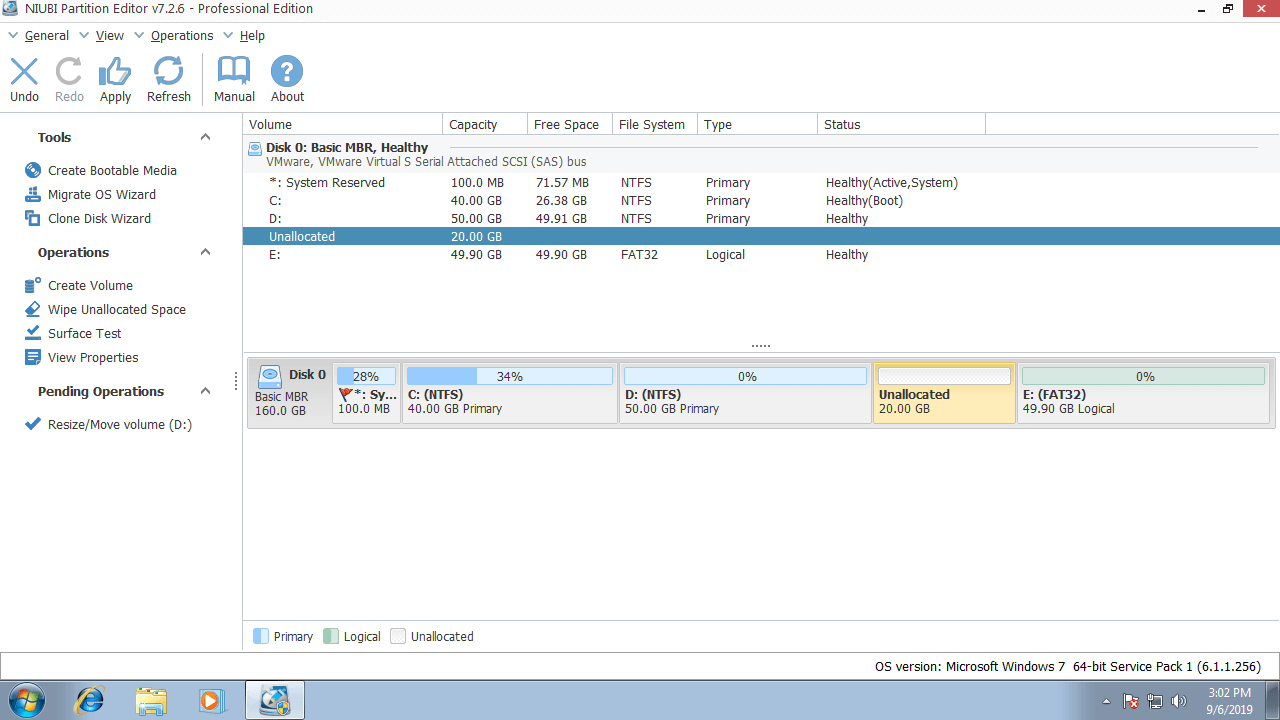
In a short while, this partition is shrunk and 20GB Unallocated space is made on the right side of D. If you right click drive E (FAT32), Shrink Volume is disabled.
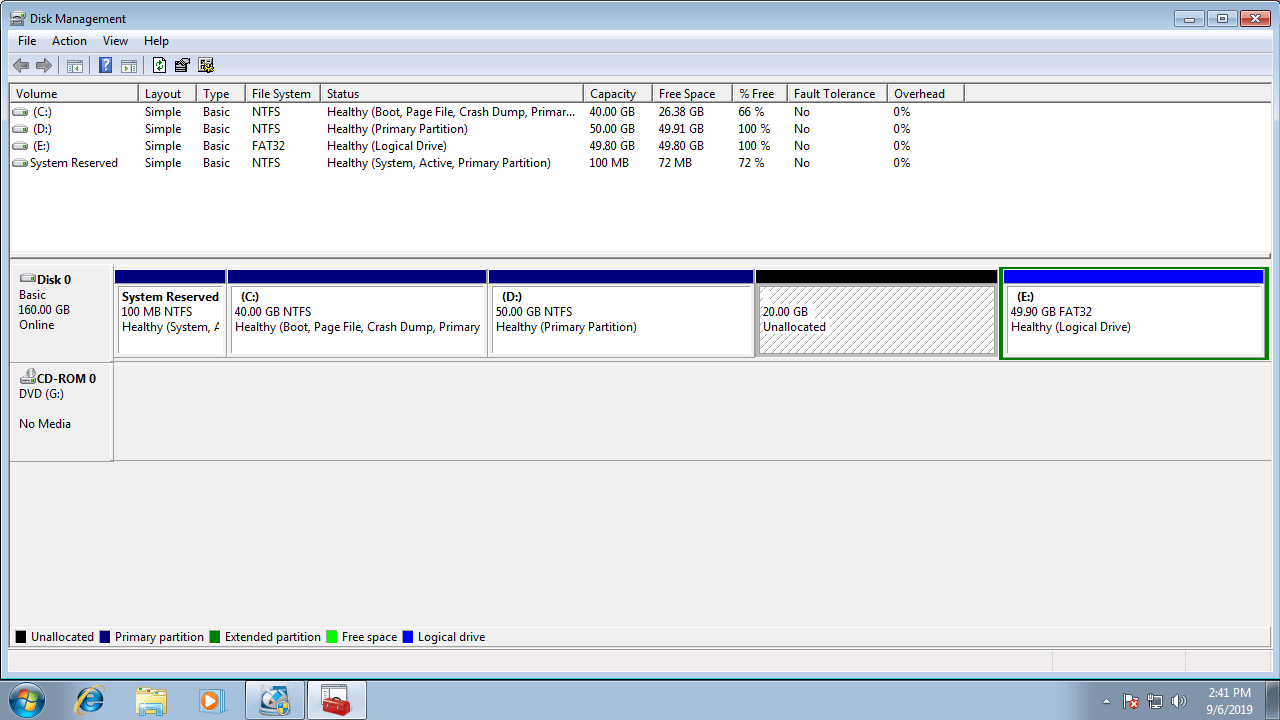
Unallocated space shrunk from a volume can't be extended to any other volume with Extend Volume function of Disk Management
Way 3 - Best way to shrink hard drive partition
Better than Disk Management and Diskpart command tool, NIUBI Partition Editor has more advantages while resizing partitions such as:.
- Both NTFS and FAT32 partitions can be shrunk and extended.
- It is able to make Unallocated space on either left or right while shrinking a partition.
- It is able to combine Unallocated space to either contiguous partition by 1 step, no matter this partition is Primary or Logical, NTFS or FAT32.
- It is able to move Unallocated space and combined to any non-adjacent partitions on the same disk.
- It is able to merge, copy, convert, defrag, hide, wipe partition and much more.
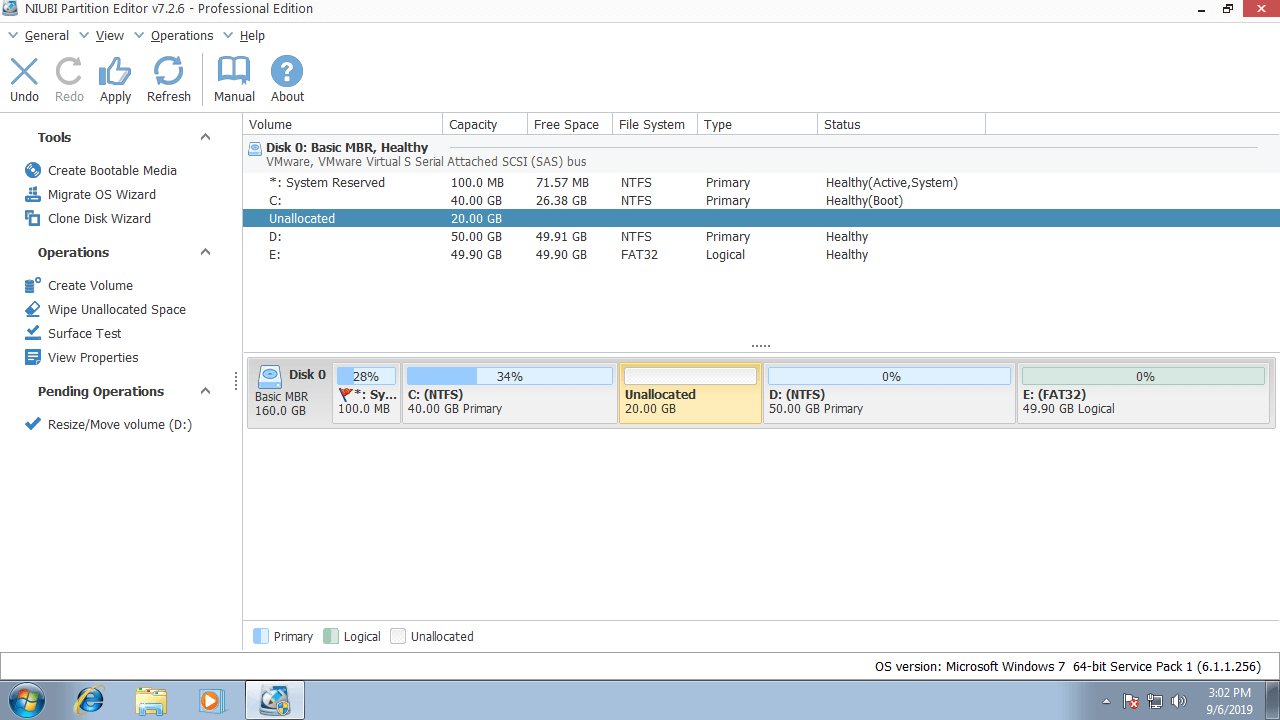
Download NIUBI Partition Editor and you'll see the main window with disk partition structure and other information.
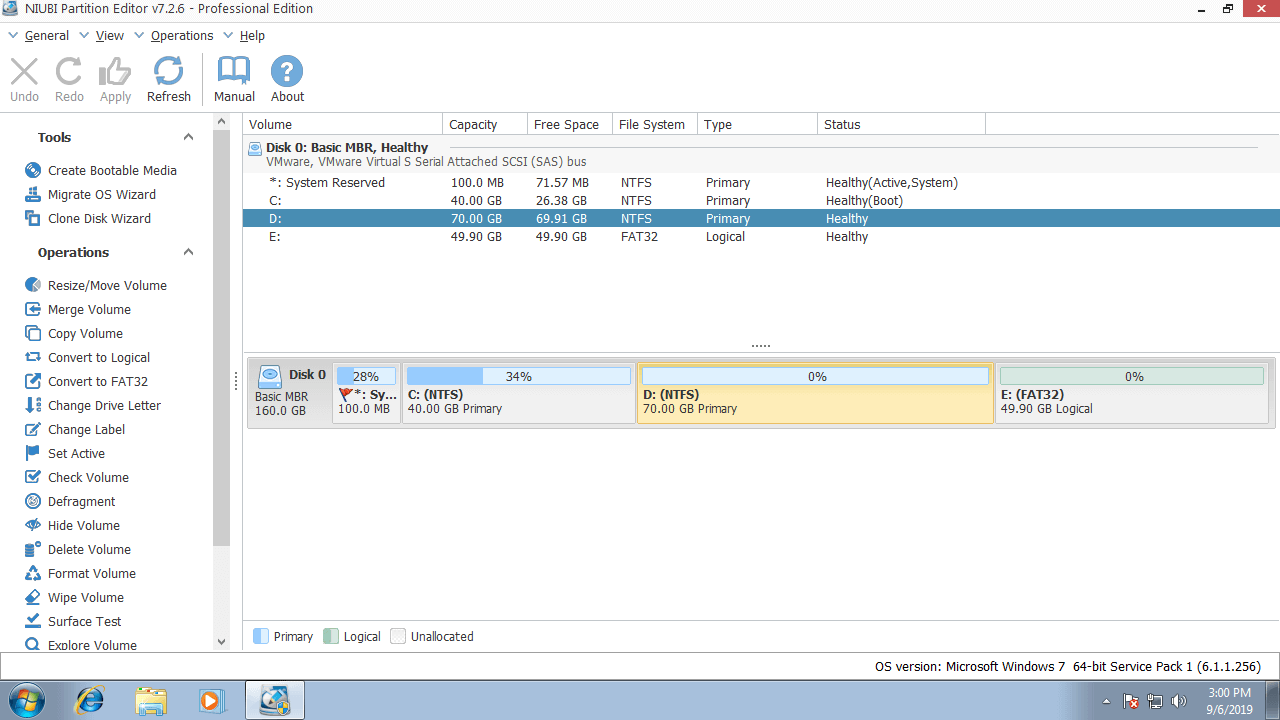
How to shrink Windows 7 hard drive with NIUBI Partition Editor:
Right click the volume that you want to shrink (here is D:) and select "Resize/Move Volume", then you have 2 options in the pop-up window.
If you drag left border towards right or enter an amount in the box of Unallocated space before

Then Unallocated space is made on the left side of drive D.
If you drag right border towards left or enter an amount in the box of Unallocated space after
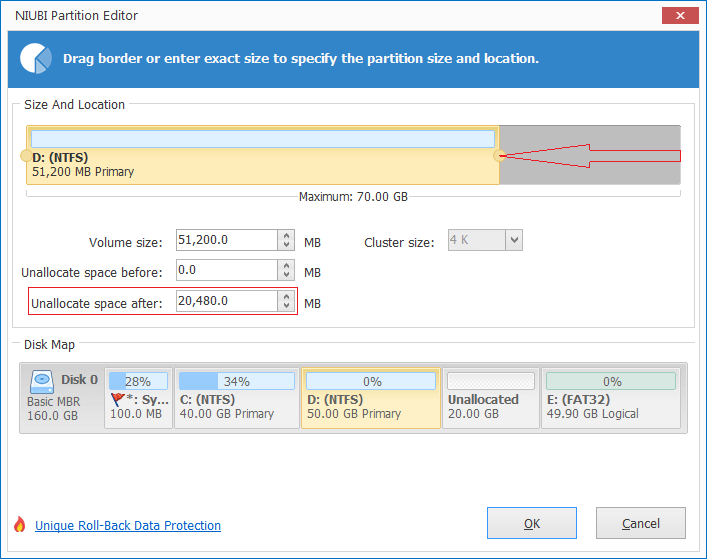
Then Unallocated space is made on the right side of drive D.
Watch the video how to shrink partition volume in Windows 7 32/64 bit:
Besides shrinking and extending partition, NIUBI Partition Editor helps you do many other operations such as merge, convert, defrag, hide, wipe, format, scan.