This article explains why cannot shrink volume in Windows 10 Disk Management and the solution if Shrink Volume is disabled or Windows 10 can’t shrink partition beyond the limit.
Can't shrink partition beyond the limit
If you install Windows 10 to a new hard disk but forget to create partitions, you'll get single C: drive and the system reserved partition. As we know, it is not good to throw everything into C drive, so you'd better shrink it to create more partitions. Microsoft provides Shrink Volume in native Disk Management console, with which you can shrink a partition on the fly without losing data.
However, many people feedback that they are unable to shrink partition with Disk Management.
1 of the most reason is conflicting available free space.
When shrinking a partition with Shrink Volume, Disk Management will calculate the disk space and give you maximum available space by default. In my test computer, the available space is 150264MB.
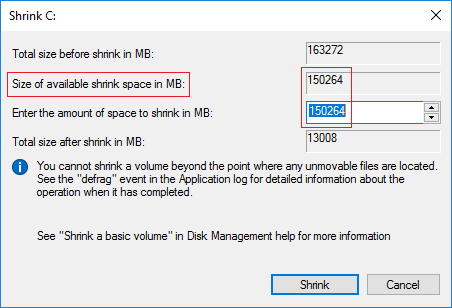
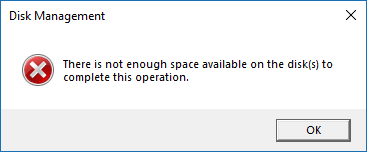
As we know, many types of files are writing into C drive continuously, so the available space maybe less than 150264MB. That means, you can't shrink this partition with default maximum space. If you do this, you may receive the error message "There is not enough space available on the disk(s) to complete this operation."
In this situation, shrink partition with less amount of space.
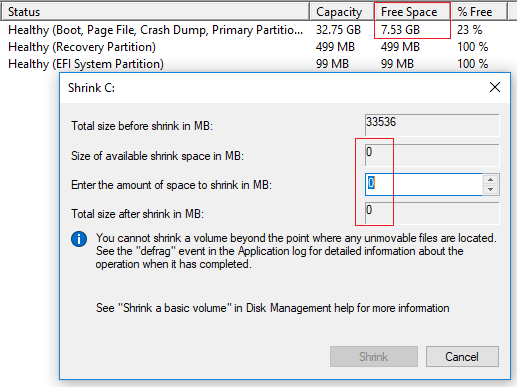
In my another Windows 10 laptop, there is 7.53GB free space in C: drive, but the available space to shrink is zero. Why?
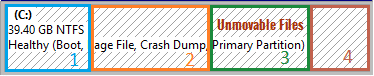
2nd reason as the tip explains, you cannot shrink a volume beyond the point where any unmovable files are located.
For example, C drive is made up of 4 blocks. If the unmovable files are located in block 3, you cannot shrink this partition to block 2 or 1, although there is free space there.
In this situation, you need NIUBI Partition Editor, which is able to move the "unmovable" files, so you can shrink partition to minimum size if you want.
Shrink Volume is disabled
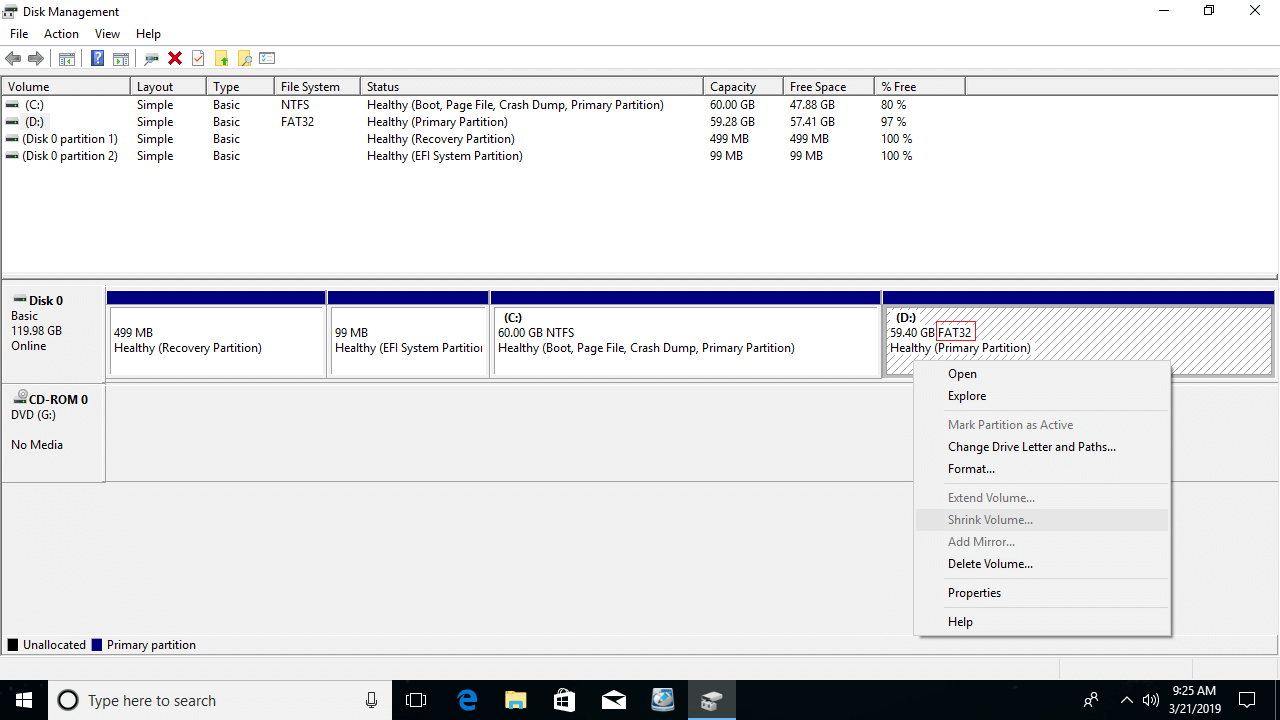
When you shrink drive D or other data volume, you may find that Shrink Volume is disabled. In fact, both Shrink and Extend Volume support NTFS partition only, so you can't shrink FAT32 partition or other types of partition.
To NIUBI Partition Editor, there is no difference shrinking a NTFS or FAT32 partition.
Cannot shrink partition towards right
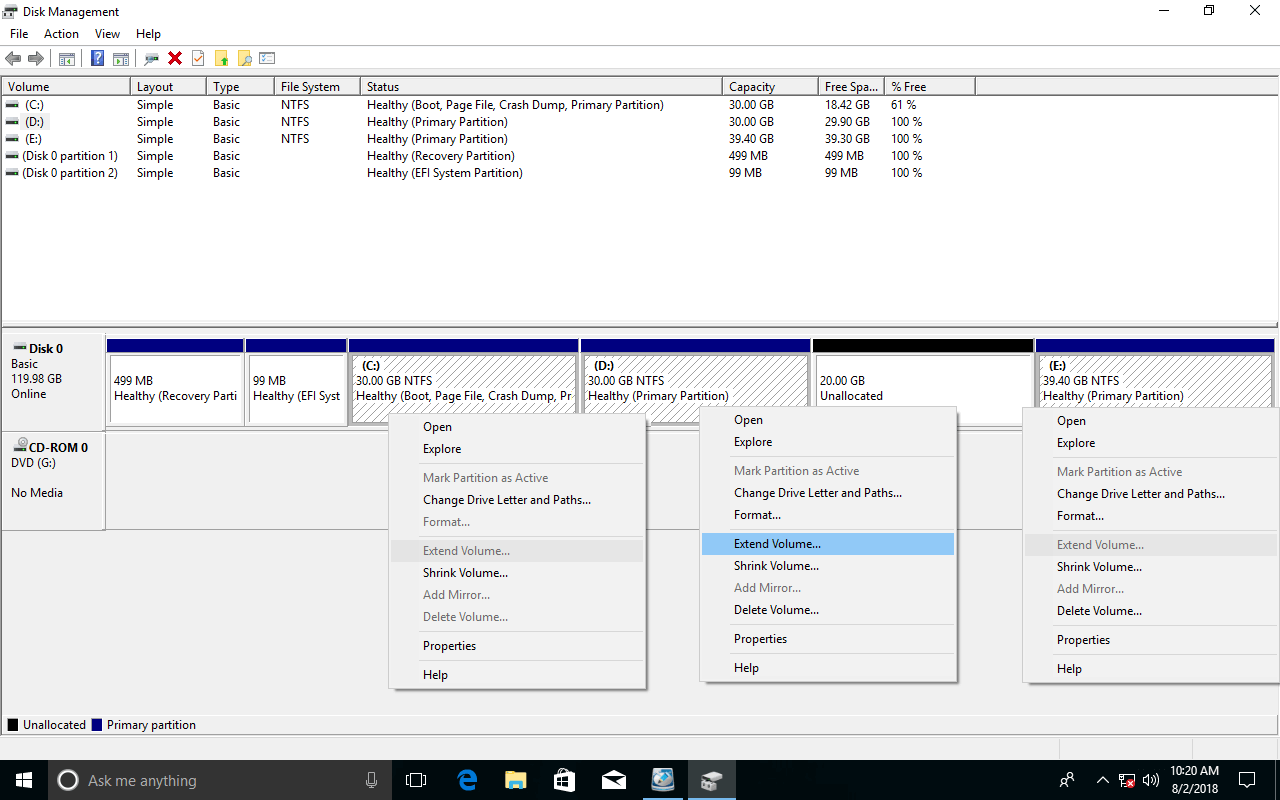
When you shrinking a volume with Disk Management, it only gives you an option to enter amount of space. Then this partition will be shrank towards left and corresponding Unallocated space will be made on the right side.
I doesn't matter if you just want to shrink a drive to create new, but it causes issue if you want to expand other drive. Extend Volume function only works when there is adjacent Unallocated space on the right side of the drive that you want to expand.
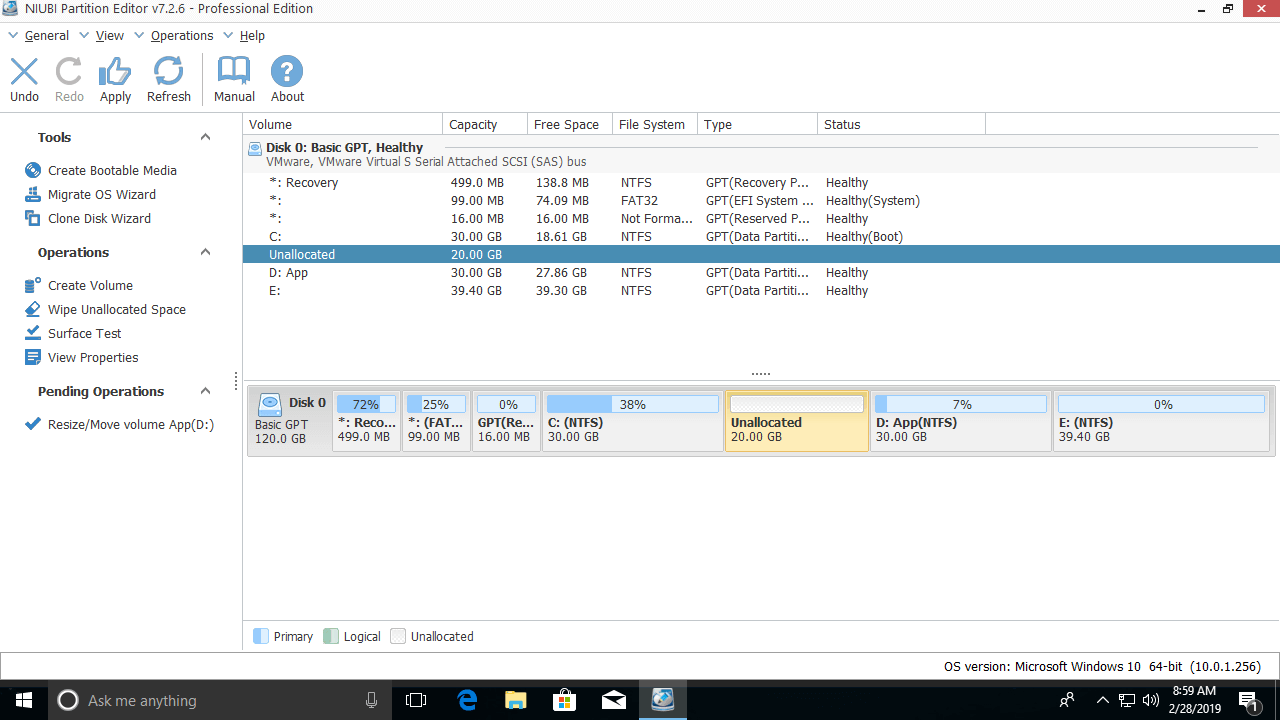
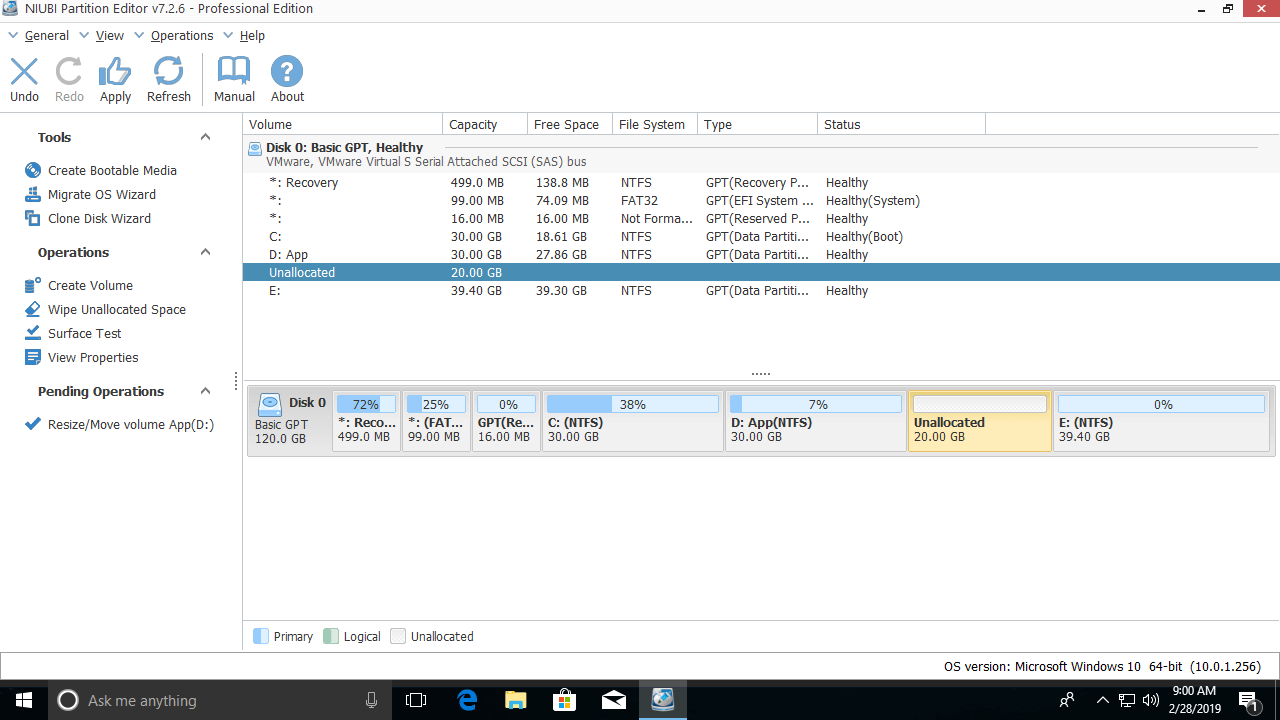
As you see in my computer, Unallocated space is on the right side of D after shrinking. Extend Volume is disabled for both C and E drive.
If you want to expand drive C or E, follow the steps to extend disk partition on Windows 10.
What to do if unable to shrink partition
If you cannot shrink partition because of non-supported FAT32 partition or there are unmovable files located, NIUBI Partition Editor can help you easily.
Download it and you'll see all disk partitions with structure, detailed parameters and available operations.
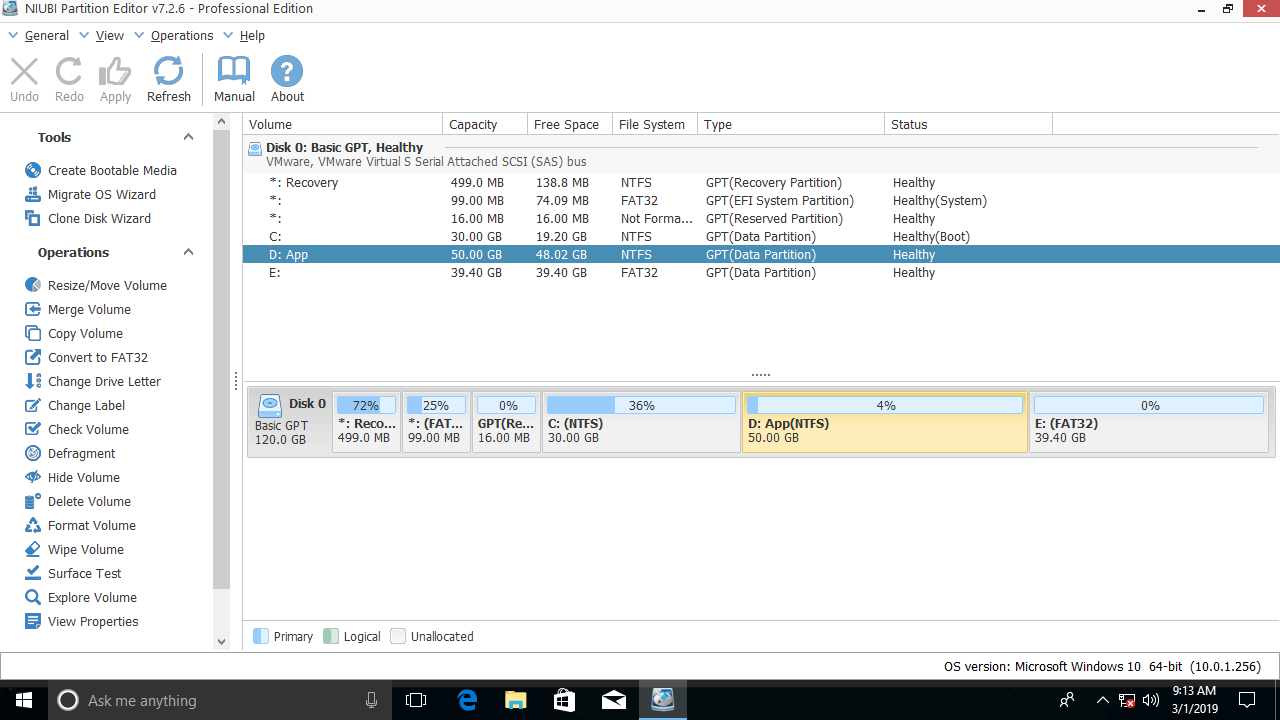
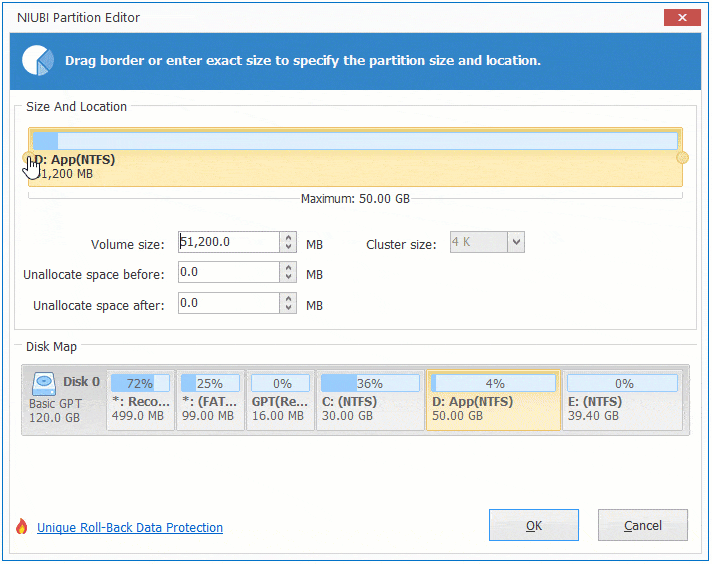
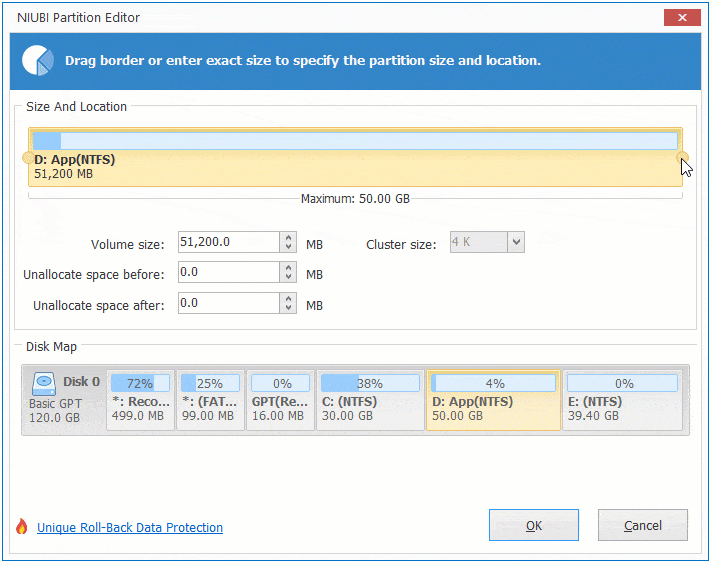
Right click this partition (here is D:) and select "Resize/Move Volume" feature.
Option 1: If you drag left border towards right in the pop-up window,
Unallocated space will be made on the left side.
Option 2: If you drag right border towards left in the pop-up window,
Unallocated space will be made on the right side.
Besides shrinking and extending partition, NIUBI Partition Editor helps you move, merge, clone, convert, defrag, hide, create, delete, format, wipe, scan partition, etc.