Most of Windows computer users have to do management to disk partition. For example: there's only C: drive on system disk and you need to shrink it and create more volumes for different purpose. On the contrary, C drive is getting full and you have to merge partitions or shrink D to extend C drive. To shrink partition in Windows 10/11 computer, you may try native Disk Management tool or disk partition software. Disk Management has "shrink volume" function but it can only shrink NTFS partition. Disk partition software is much easier and more powerful to shrink Windows 10 hard drive, but you'd better run safe software. This article introduces how to shrink volume in Windows 10/11 with both kinds of tools.

How to shrink volume on Windows 10 with Disk Management
It is easy and fast to decrease partition size with Disk Management. However, it's not 100% safe. My partitions were damaged by this native tool several times. Pay more attention when there are both primary and logical partitions on a disk. In addition, because of some limitations, Disk Management cannot shrink volume in some cases.
To shrink volume in Windows 10/11 with Disk Management:
- Press Windows and X on the keyboard, and then select Disk Management.
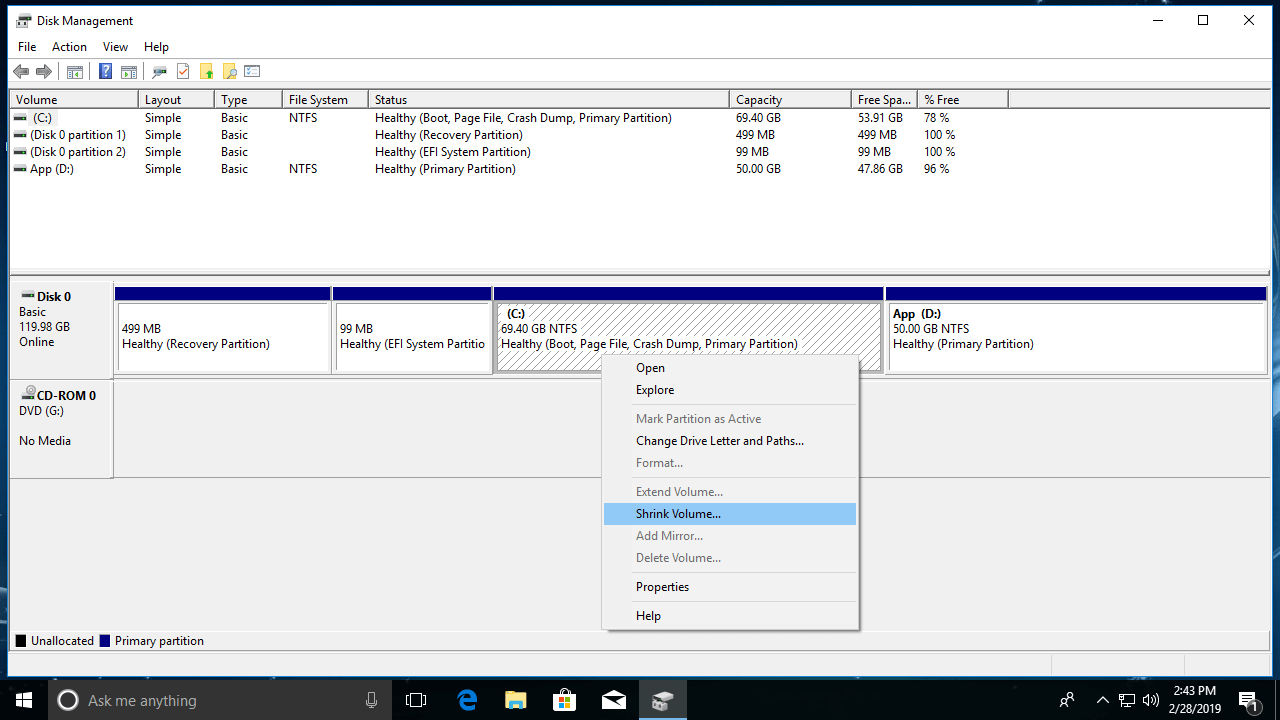
- Right click the partition that you want to decrease and select Shrink Volume.
- Enter the amount of space to shrink in MB (1GB=1024MB), and then click Shrink to proceed.
If this hard disk is GPT style, the EFI and System Reserved partition can't be shrunk or extended by Disk Management.
Limitations to shrink Windows 10 partition with native tool
Windows inbuilt "shrink volume" function can only decrease a partition towards left and make unallocated space on the right. The serious issue is, this unallocated space can't be combined to its right partition or any non-adjacent partitions via another "extend volume" function. That means, if you want to shrink C drive to expand D, or shrink D to expand C or E drive, it is impossible with Disk Management.
Other limitations includes:
- Only NTFS partition be shrunk.
- In some special situation, you can't shrink C drive even if there is enough free space.
- You can only shrink little space if there are unmovable files located in the partition that you want to shrink.
Better way to shrink partition on Windows 10/11
Comparing with the Windows 10 built-in tool, disk partition software is much more powerful. To Windows 11/10/8/7/Vista/XP home computer users, NIUBI Partition Editor has free edition. When shrinking a partition, this tool can:
- Make unallocated space on either left or right.
- Support both NTFS and FAT16/32 partitions.
- Shrink a volume to minium size even if there is unmovable files.
- Move unallocated space and combine to any contiguous or non adjacent partitions on the disk.
How to shrink volume on Windows 10/11 with free partition manager:
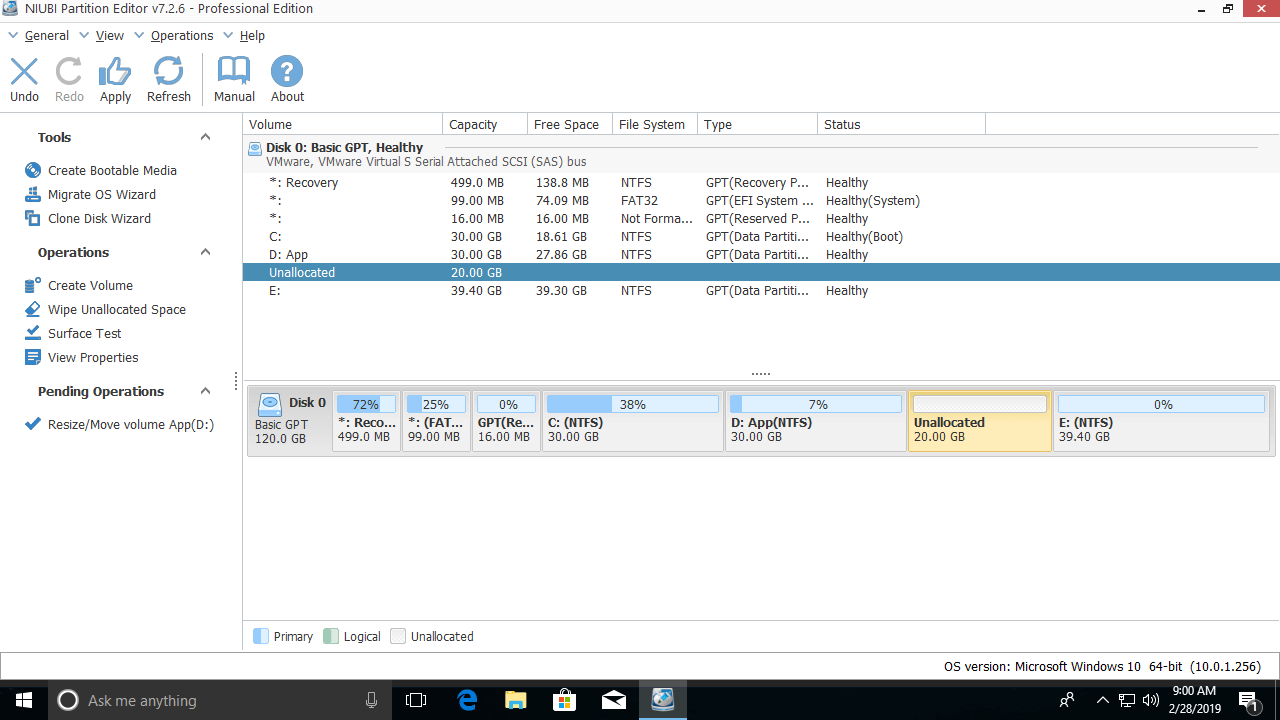
Download NIUBI Partition Editor, right click drive D and select "Resize/Move Volume", drag either border towards the other side, then it will be shrank.
If you drag left border towards right in the pop-up window,
Unallocated space will be produced on the left side.
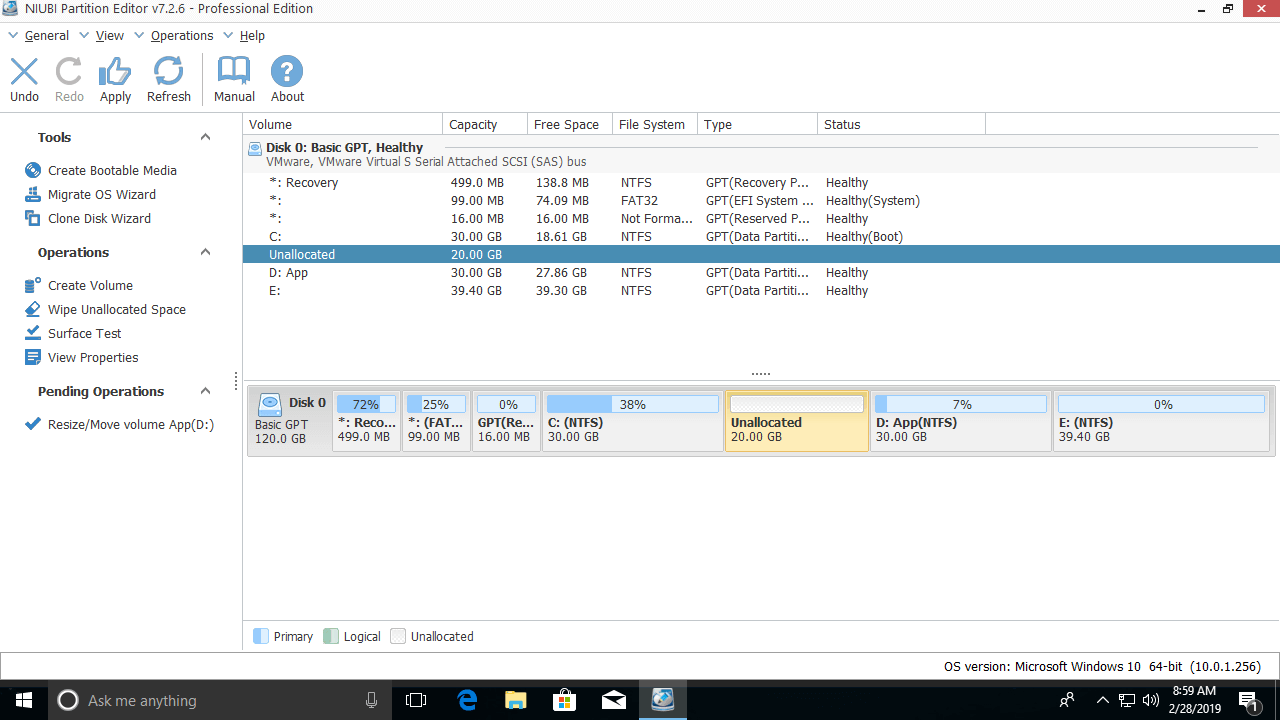
If you drag right border towards left in the pop-up window,
Unallocated space will be produced on the right side.
If you want to create new partition, right click the unallocated space and select "Create Volume".
If you want to expand C or E drive, right click it and select "Resize/Move Volume" again, drag the border to combine the unallocated space.
Besides shrinking partition in Windows 11/10/8/7/Vista/XP, NIUBI Partition Editor help you extend, merge, copy, convert, defrag, wipe, check, hide, scan partition, etc.