The same with previous versions, C drive is running out of space in Windows 10/11 computer. When it happens, nobody wants to reinstall operating system and all programs. It also costs a long time to recreate partitions and restore from backup. In most cases, there's another D drive with plenty of free space. Many people ask whether it's possible to shrink D drive and transfer free space to C drive. The answer is yes but third party software is required, because Windows inbuilt Disk Management and diskpart command cannot help you. This article introduces how to shrink D drive to extend C drive in Windows 10/11 with free but safe disk partition software.
Can't shrink D to extend C drive in Windows 10 with native tool
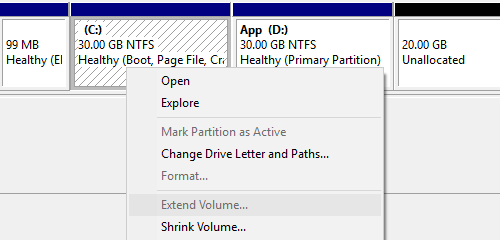
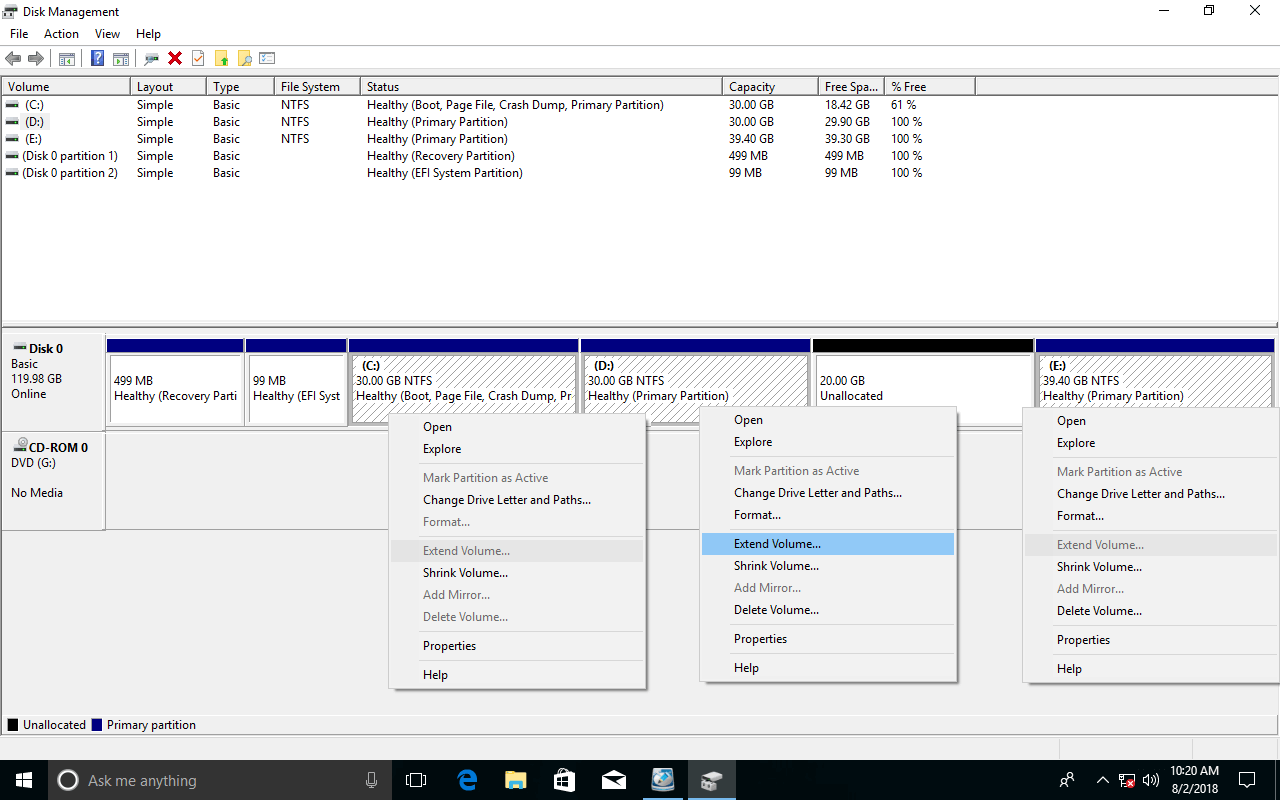
From Windows Vista, Microsoft added advanced Shrink Volume and Extend Volume feature in Disk Management tool. When C drive is full, some people try to extend it with this native tool, thinking this problem can be solved without reinstalling Operating System. Windows 10 inherited these two feature without any improvement, so many people feedback that they cannot extend C drive after shrinking D via Disk Management, because Extend Volume is always greyed out.
If you have tried to shrink a partition, you'll find that the only option is entering an amount, then Shrink Volume will decrease this partition and produce unallocated space on the right side. There is no option to produce on the left side.
Another "Extend Volume" feature can only expand the partition with adjacent unallocated space on the right. Therefore, after shrinking D drive, Extend Volume is only available for D, all other partitions cannot be used.
In this situation, you need partition editor software to move unallocated space from right side of D to the left.
If you did not shrink D in Disk Management, you can shrink with NIUBI Partition Editor and produce unallocated space on the left side directly.
How to shrink d and extend C drive in Windows 10/11
To accomplish this task, NIUBI Partition Editor has free edition for Windows 11/10/8/7/Vista/XP home computer users. You just need to drag and drop on the disk map.
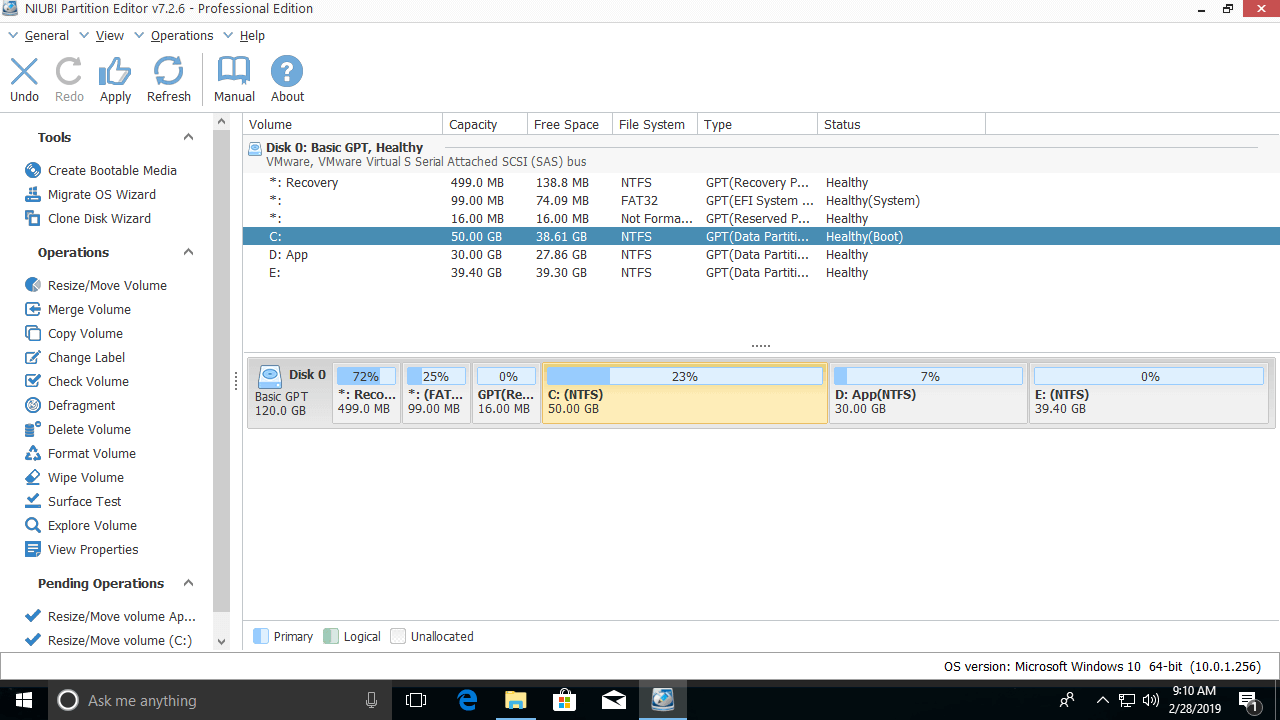
Download the free partition editor, you'll see the main window with detailed disk partition information and available operations.
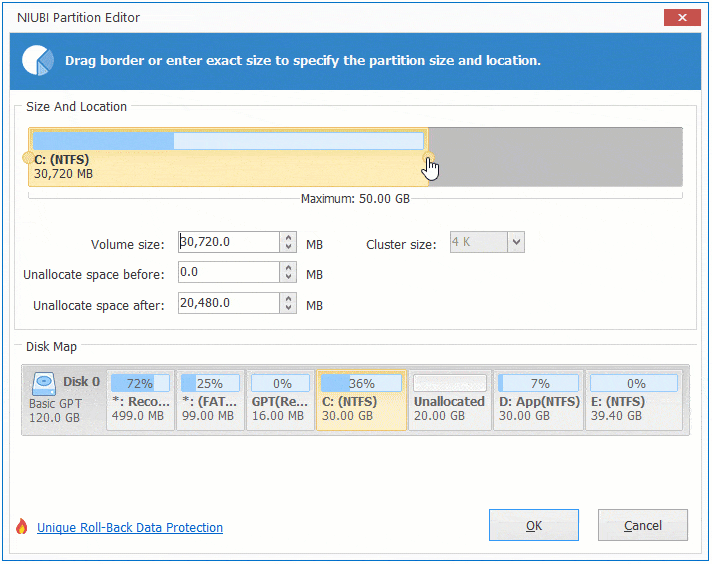
Step:1 Shrink partition D and generate unallocated space on the left side.
Right click drive D and select "Resize/Move Volume", drag left border towards right in the pop-up window.
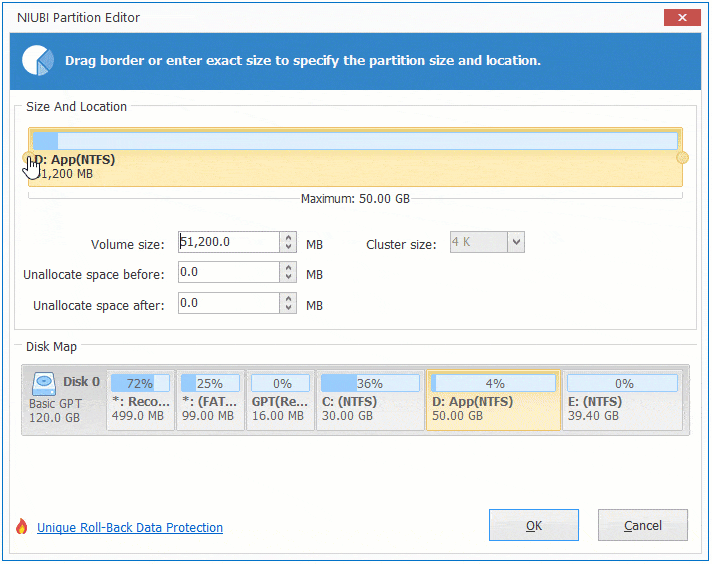
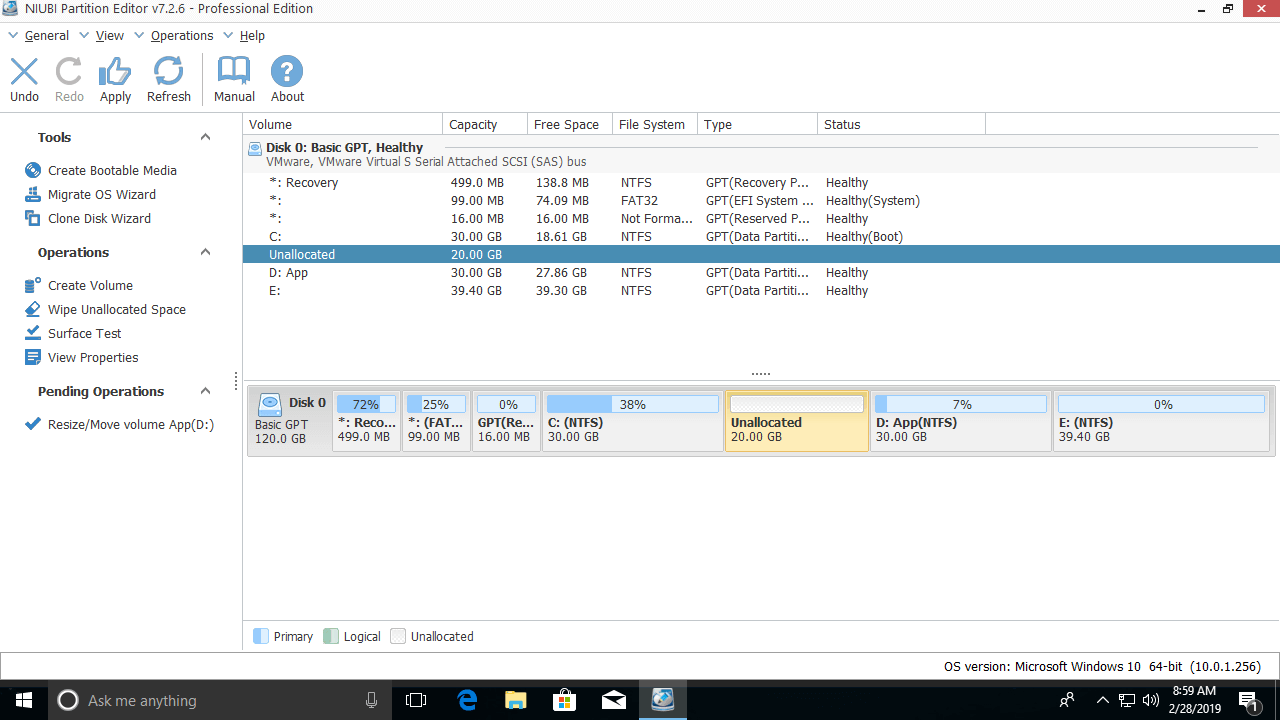
As you see, unallocated space is produced on the left side of D.
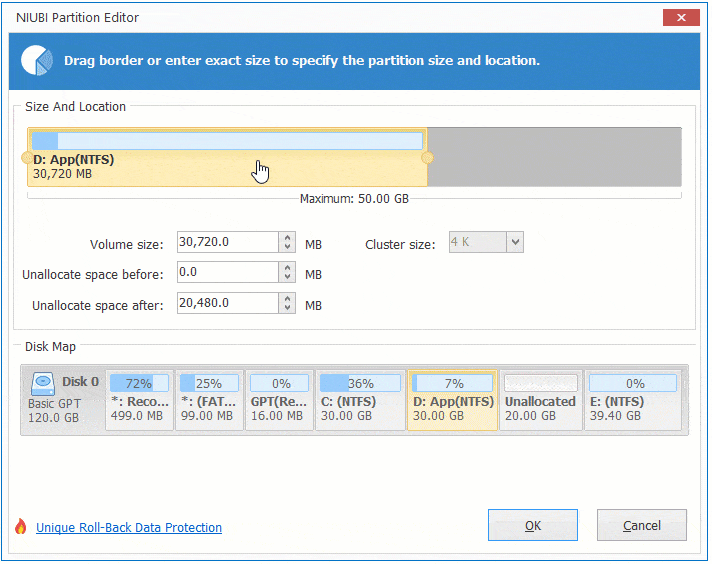
Step:2 Extend C drive with this unallocated space.
Right click drive C and select "Resize/Move Volume" again, drag right border towards right in the pop-up window.
As you see, C drive is extended by merging the unallocated space.
This software is designed to work in virtual mode first, real disk partition won't be modified until click Apply to confirm. Before this, you can preview, undo and redo the pending operations.
How to shrink E to extend C drive in Windows 10/11
If you want to get free space from the non adjacent volume E, right click it and follow Step 1 to shrink it and generate unallocated space on the left side. Then you need to move partition D before extending C drive:
Right click D and select "Resize/Move Volume", drag the middle position towards right in the pop-up window.
Then follow Step 2 above to expand C drive.
If you have shrunk partition D with Disk Management, use the same method to move partition to the right, unallocated space will be moved to the left at the same time.
Besides shrinking, moving and extending partitions, NIUBI Partition Editor help you do many other disk partition management operations such as clone, convert, defrag, wipe, check, scan, hide partition, etc.