This article introduces how to increase partition size in Windows 7/8/10 (32/64 bit) without losing data, 3 ways with detailed steps.
The same with previous Windows XP and Vista, disk partitions in Windows 7 also run out of space, especially to system C drive and the partitions for backup, multimedia and projects. To data partition, you can transfer files easily, but to system partition C, you can't do like that. This is the reason why many people want to increase partition size without losing data. Nobody likes to reinstall Operating System and programs.
In this article, I'll show you detailed steps to increase partition size in Windows 7 with both native and 3rd-party software.
1. Increase partition size with Disk Management or diskpart
Windows 7 has 2 native tools - Disk Management and Diskpart. Disk Management has Extend Volume Wizard with graphical interface, Diskpart works via command prompt. To increase partition size with either Windows native tool, your disk partition must meet the requirements below:
- The partition that you want to expand must be formatted with NTFS file system, FAT32 and any other types of partitions are not supported.
- There must be adjacent Unallocated space on the right of the partition that you want to extend.
If you want to increase C drive space by shrinking D or E, it is impossible with both native tools.
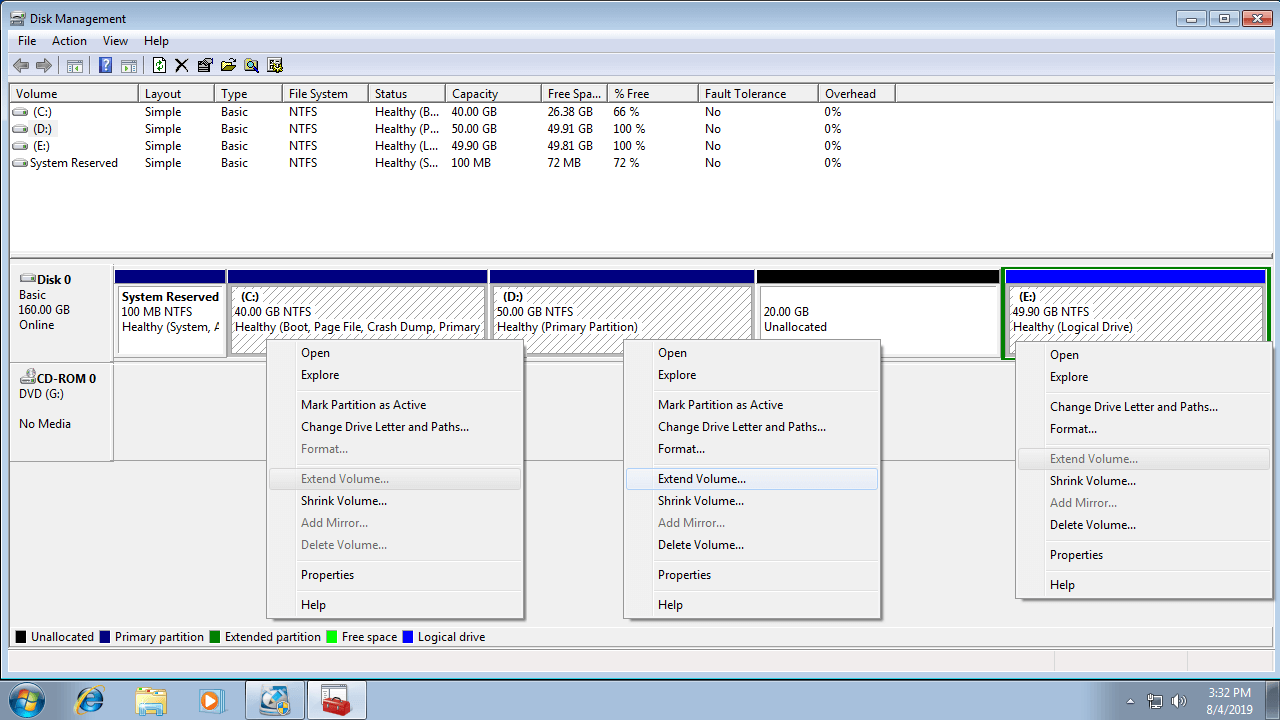
As the screen shot shows, Disk Management cannot extend drive C: or E: after shrinking D. This is because:
- Shrink Volume function can only make Unallocated space on the right while shrinking a partition.
- Extend Volume function can only add Unallocated space to the contiguous partition on the left.
After shrinking D: drive, Unallocated space is non adjacent to C drive, E: drive is on the right. Therefore, Extend Volume is disabled for both partitions.
The only way to increase size of C drive with Windows 7 Disk Management or Diskpart is by deleting D to get contiguous Unallocated space. To extend E drive, neither native tool can help you.
To common computer users, diskpart command is a bit complicated, here I only show you how to enlarge partition with Disk Management. If you want to expand C drive, the contiguous D drive will be deleted, so make sure there's no program installed in D. In addition, transfer files before deleting this partition.
Steps to increase partition size in Windows 7 Disk Management by deleting another one:
- Press Windows and R keys together, input diskmgmt.msc and press Enter to open Disk Management.
- Right click partition D and select "Delete Volume", D is the contiguous partition on the right of C.
- Right click C: drive and select "Extend Volume", simply click Next till Finish in pop-up dialog box.
If D is a Logical drive, its disk space will be changed to Free after deleting. Unlike Unallocated space, this space can't be added to C drive in Disk Management. In other words, your D drive must be a Primary partition.
2. How to increase volume size with free partition editor
Third party software are more powerful. They can shrink D and make Unallocated space on the left, so C drive can be extended easily. As long as there's free space in any partition on the same disk, you can shrink it to extend another one. No matter these partitions are NTFS or FAT32, Primary or Logical, contiguous or not.
However, you'd better back up first, because there's potential data loss risk with unreliable partitioning software. Better than other tools, NIUBI Partition Editor has powerful technologies to protect system and data:
- Virtual Mode - avoid incorrect operations by listing all as pending for preview, real disk partitions won't be modified until click Apply to confirm.
- Cancel-at-will - cancel incorrect ongoing operations without causing damage.
- 1 Second Rollback - automatically reverts computer to original status in a flash if encounter any error.
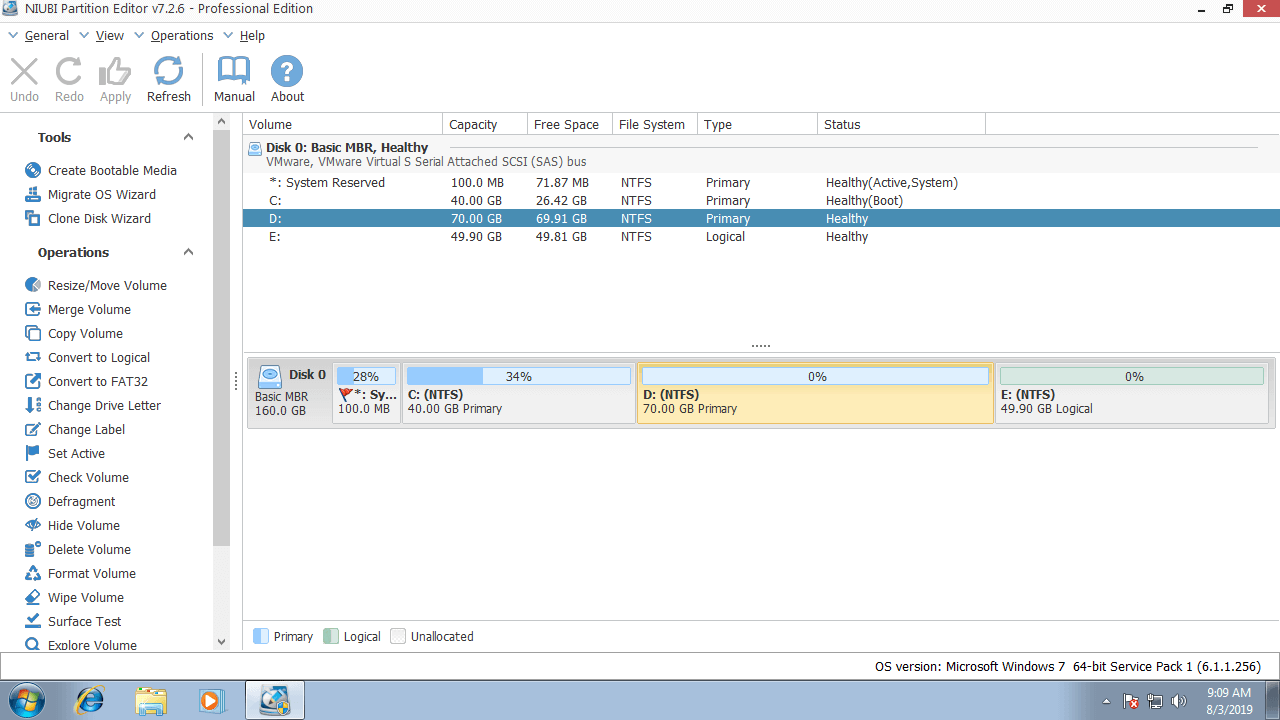
Download NIUBI Partition Editor and you'll see the main window with disk partition structure and other information.
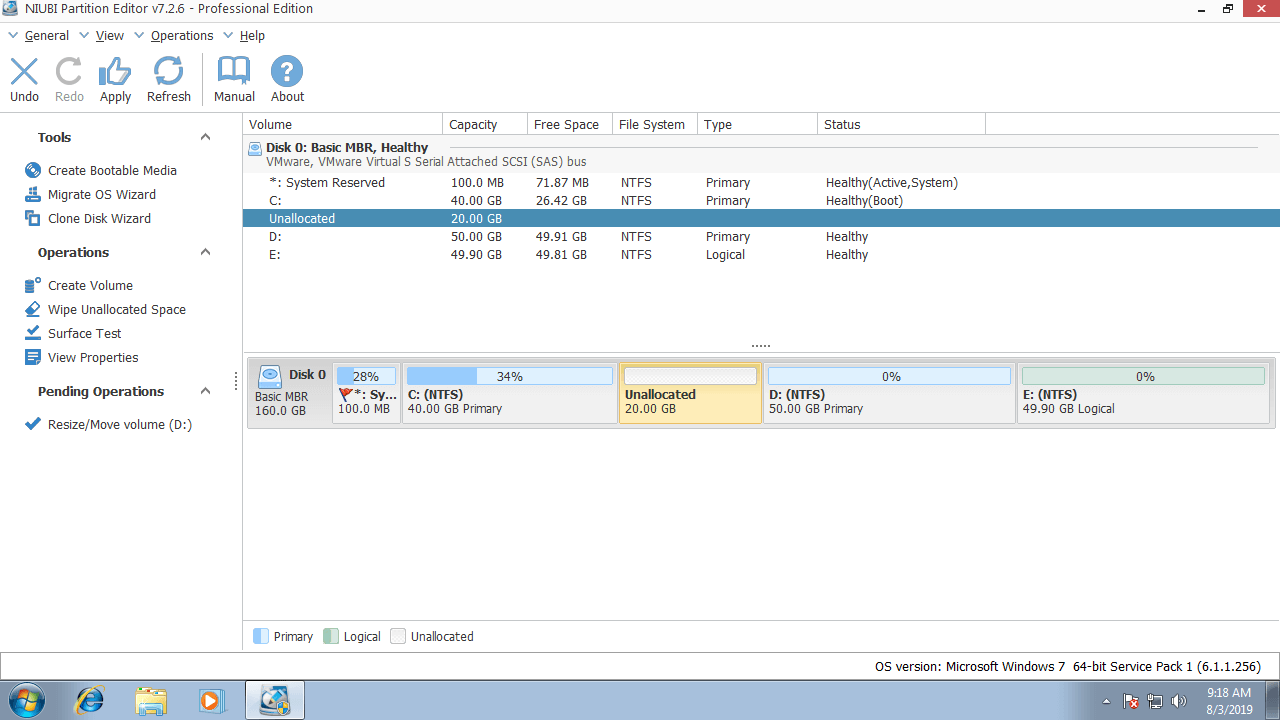
How to shrink D to increase size of partition C in Windows 7:
① Right click D: and select "Resize/Move Volume", drag left border towards right in the pop-up window or enter an amount in Unallocated space before.
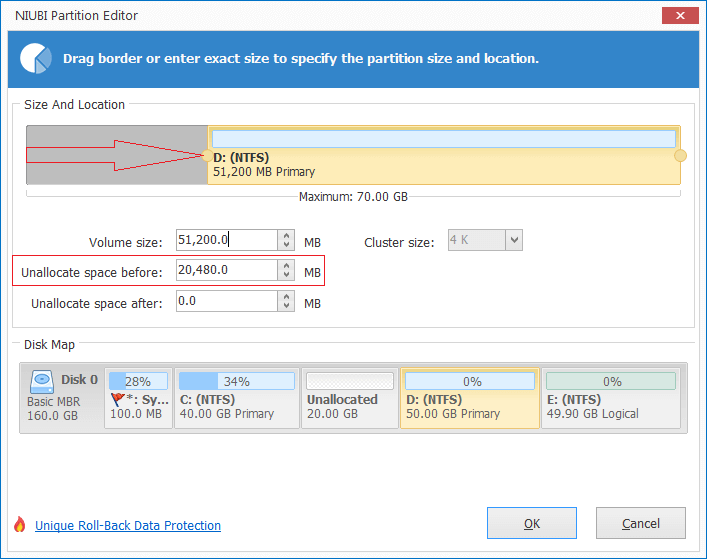
Then D: drive is shrunk and Unallocated space is made on the left.
② Right click C: drive and select "Resize/Move Volume" again, drag right border towards right to combine this Unallocated space.
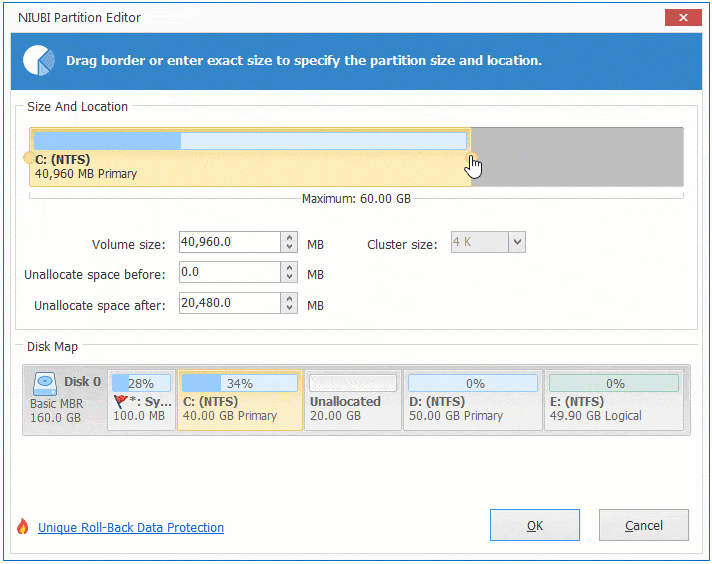
Then C drive size is increased from 40GB to 60GB.
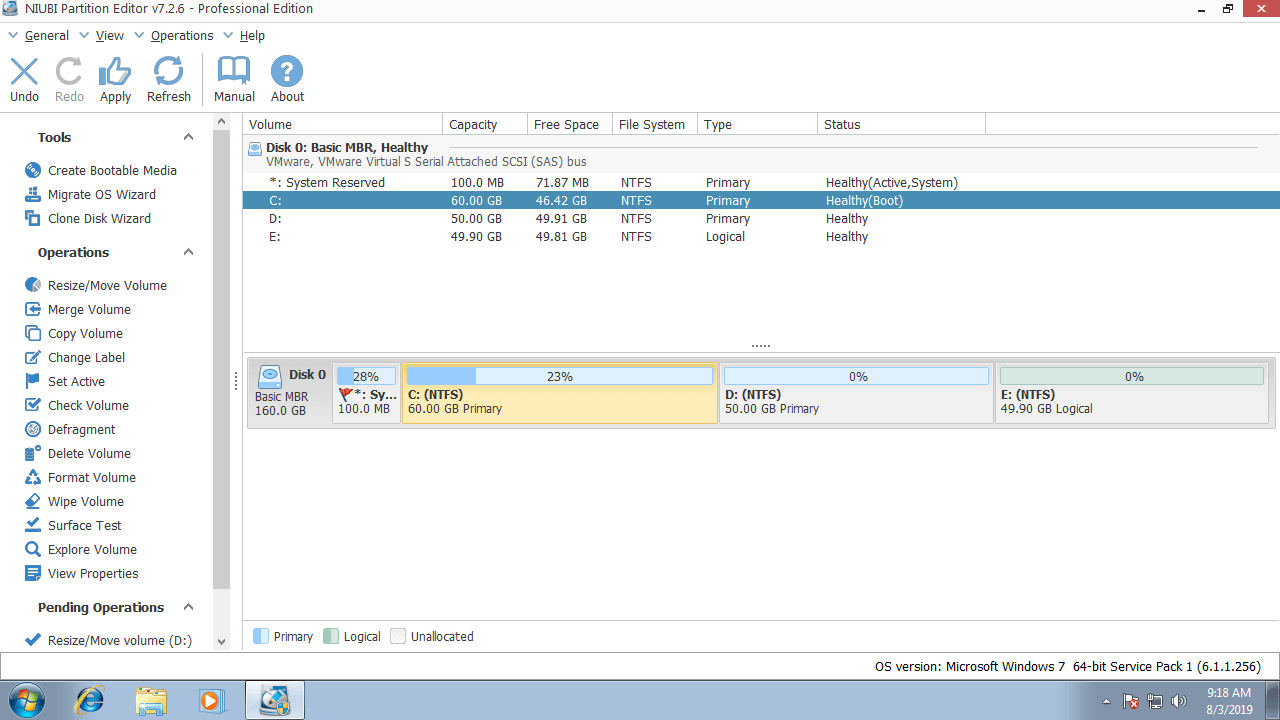
③ Click Apply on top left to execute, done.
How to increase size of partition C:
How to increase size of partition D:
3. How to increase size of partition with another disk
In some Windows 7 computers, system disk is small and there may be not enough free space. In that case, you can clone this disk to a larger one and increase partition size with additional disk space. If you don't want to copy whole disk, you may move single partition to another disk, then delete it and add its space to C drive.
In Summary
To increase partition size in Windows 7/8/10, the built-in Disk Management or Diskpart tool only works by deleting the right contiguous partition, in addition, these 2 partitions must be the same Primary or Logical partition. You need 3rd-party partitioning software in most cases. Among these software, NIUBI Partition Editor is much safer and faster because of its unique technologies and algorithm. Besides decreasing and increasing partition size, it helps you do many other disk and partition management operations.