
When the C: drive runs out of space, many users want to expand it using free space from other partitions. If successful, this can resolve the low disk space issue quickly, without needing to restore from a backup or start from scratch. The Extend Volume function in Disk Management allows you to extend both the system partition and data volumes quickly and without losing data. However, many users report that the Extend Volume option is grayed out, even after shrinking other partitions. This article explains why Extend Volume is greyed out in Windows Server 2012/2016/2019/2022 and how to solve this problem easily.

Why Extend Volume Is Greyed Out in Disk Management
There are several reasons why Extend Volume is greyed out in Windows Server 2012/2016/2019/2022 Disk Management, which are explained below.
Reason 1: No Adjacent Unallocated Space on the Right
As we know, the size of a hard disk is fixed; a 500GB disk cannot be reduced to 250GB or increased to 1TB. Before extending a partition, there must be unallocated space. You can generate this space by either deleting or shrinking another partition. If there is no unallocated space on the same disk, the Extend Volume option will be grayed out for all partitions. Many server administrators are aware of this, so they shrink other allocated partitions, such as the D drive, but the Extend Volume option is still disabled for the C: drive.
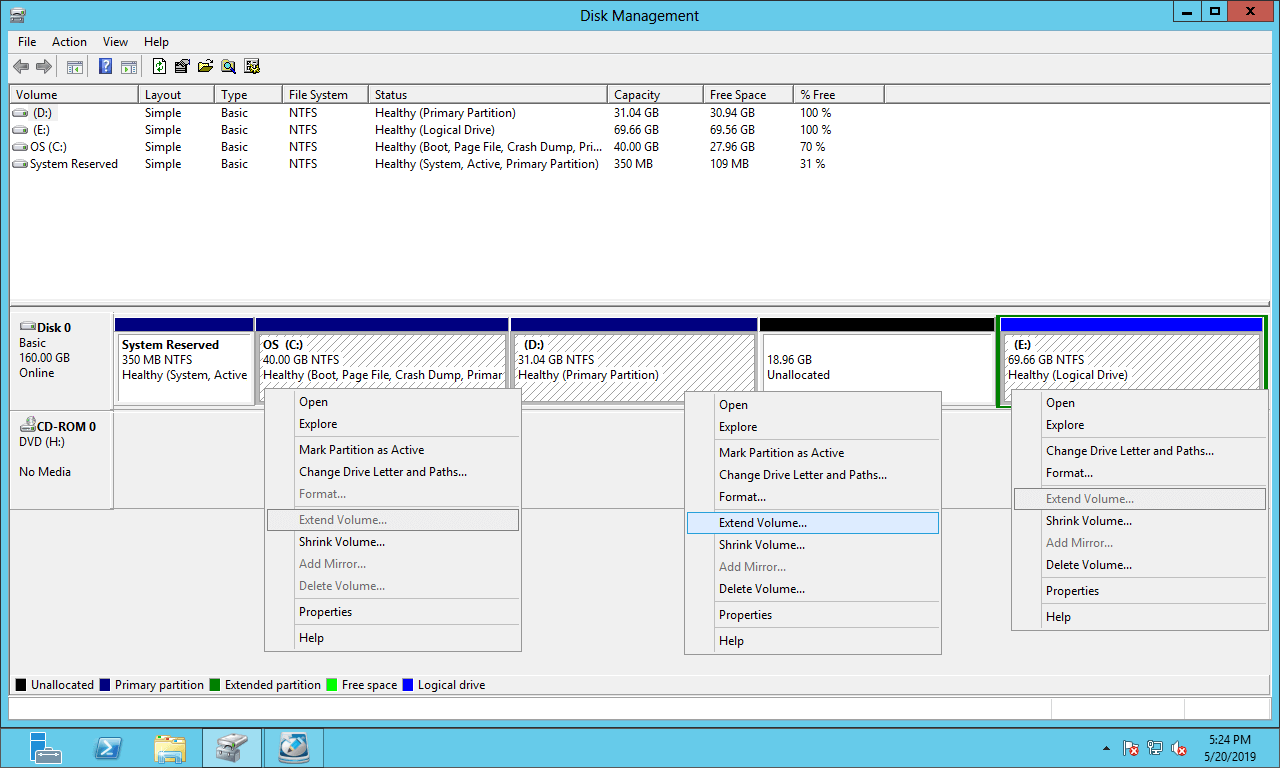
As shown in the test server:
There is 18.96GB of unallocated space generated from shrinking the D: drive. Extend Volume is greyed out for both the C: and E: drives.
This is because:
- The "Shrink Volume" function can only generate unallocated space on the right side while shrinking a partition.
- "Extend Volume" can only merge unallocated space into the adjacent partition on the left.
The C: drive is non-adjacent to the unallocated space, and the E: drive is on the right side; therefore, "Extend Volume" does not work for either of them.
For the same reason, Extend Volume is greyed out for the D: drive after shrinking the C: and E: drives in Disk Management.
This is the most common reason why "Extend Volume" is greyed out in Windows Server 2012/2016/2019/2022 Disk Management.
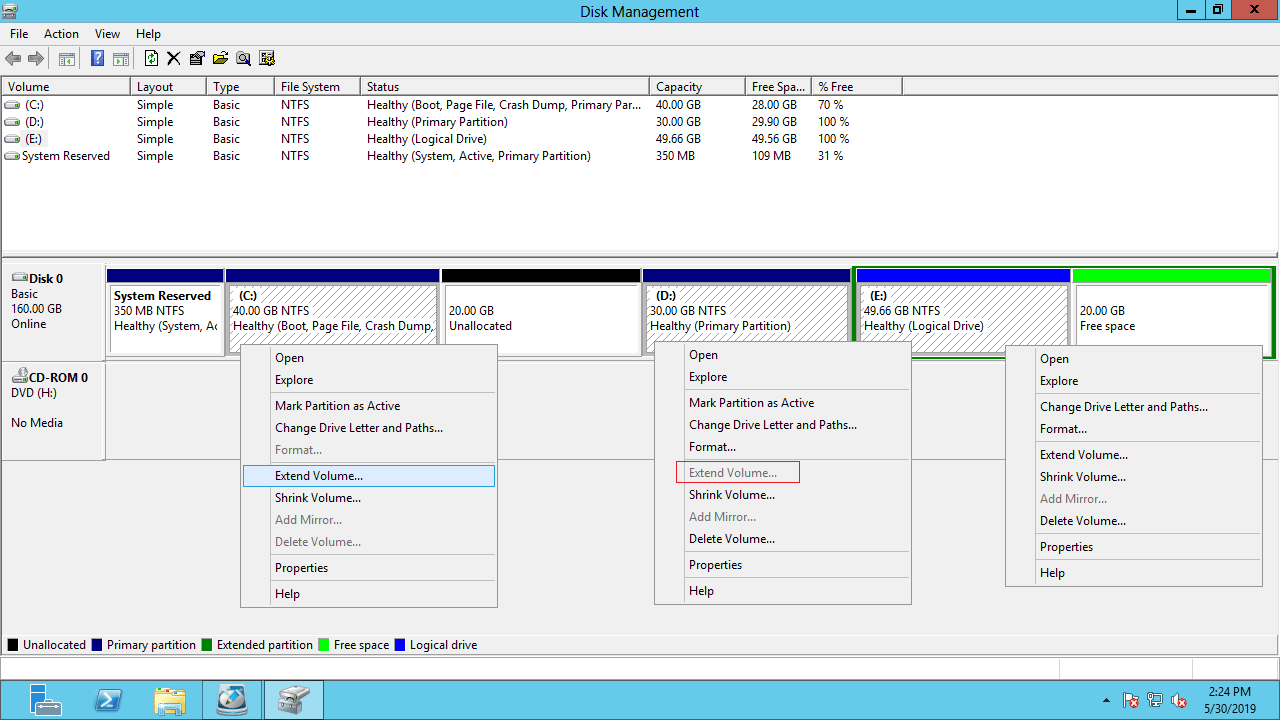
Reason 2: Limitation of MBR Disks
After deleting the right-adjacent partition, you will get the required unallocated space, and then Extend Volume will be enabled. On most servers, programs or some Windows services run from the D drive, so you cannot delete it to expand C. However, if you want to extend the D: drive, you can do so by deleting another data volume, such as the E drive (if one exists). However, if the partition types of D and E are different, Disk Management will cause additional issues.
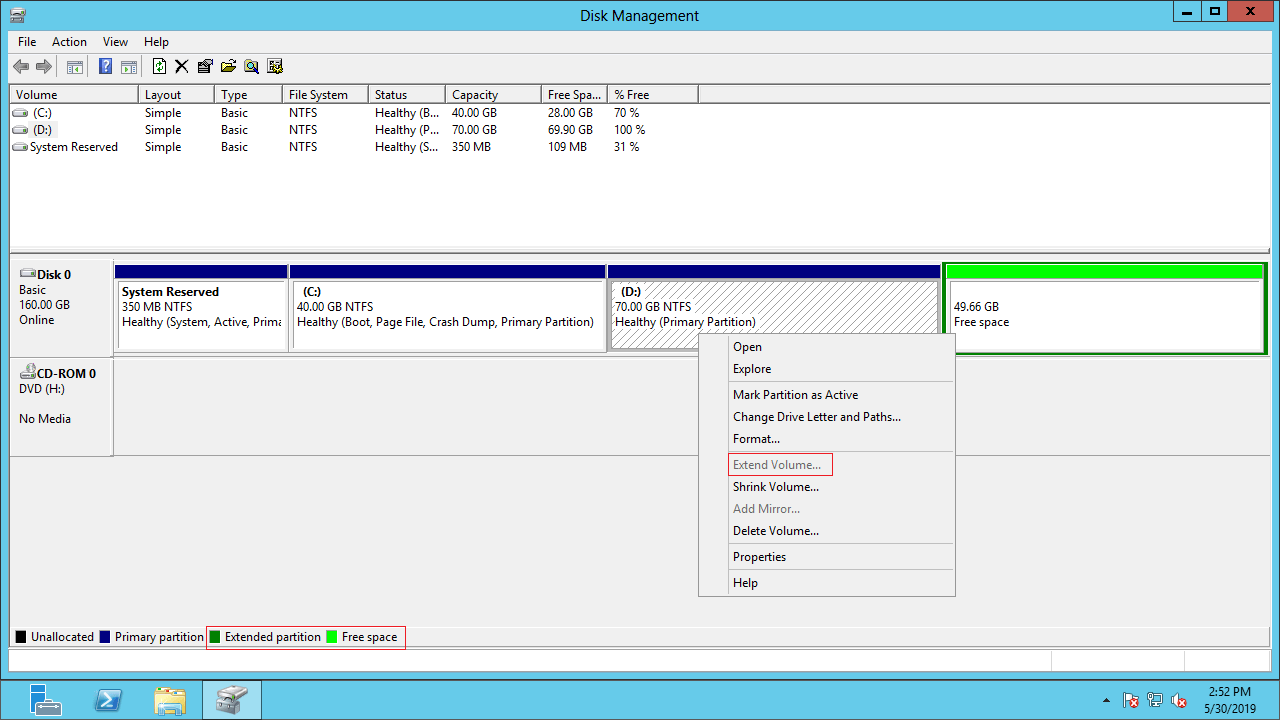
As shown in the screenshot, Extend Volume is still greyed out for the D: drive after deleting E.
On an MBR disk, "Unallocated space" generated from a primary partition cannot be extended into any logical drive, and "Free space" generated from a logical drive cannot be extended into any primary partition. This is another significant restriction of Disk Management.
If you use a GPT disk, there is no such issue.
Reason 3: Partition Type Is Not Supported
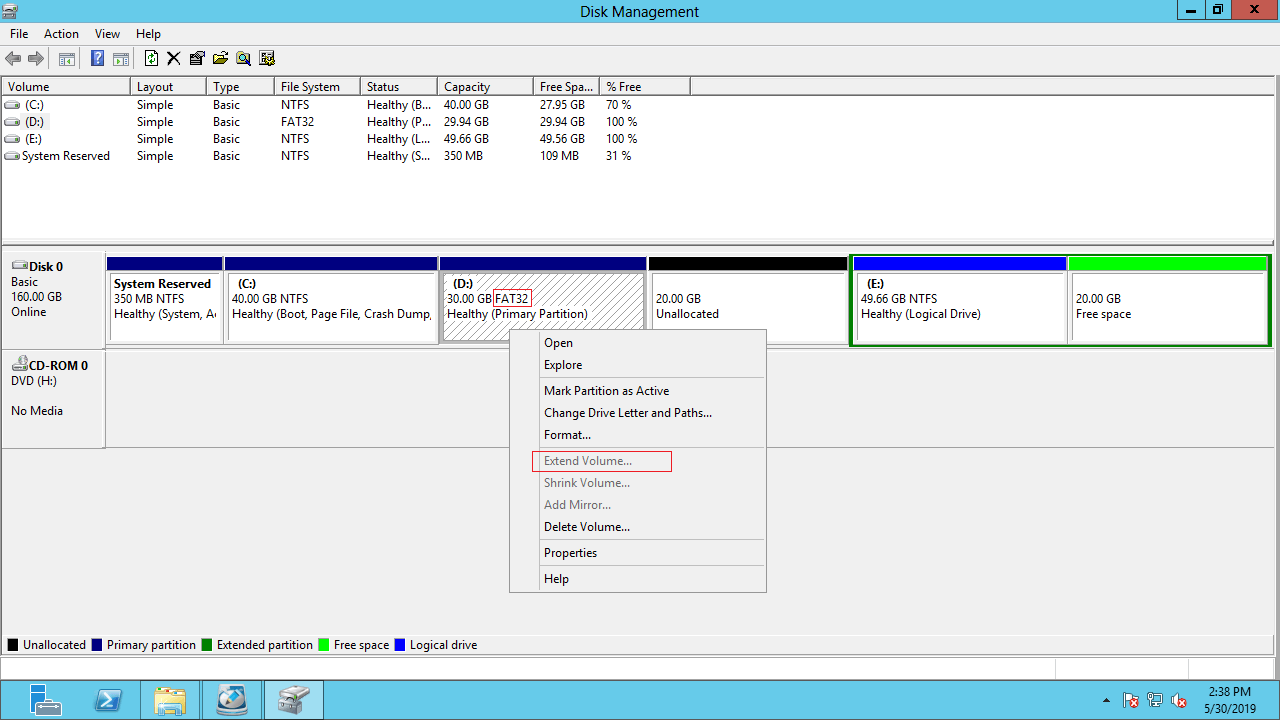
Both the Shrink and Extend Volume functions only support partitions that are formatted with NTFS or are unformatted (RAW).
To demonstrate this limitation, the D drive was converted to FAT32. As shown in the screenshot, Extend Volume is now grayed out, even though there is 20GB of unallocated space next to it.
What to Do When Extend Volume Option Is Grayed Out
It seems difficult, but it is easy to solve this problem. First, let's see what to do if you have shrunk the D: drive in Disk Management.
Download NIUBI Partition Editor, and you will see the main window with the disk partition structure and other information. There is 20GB of unallocated space that was shrunk from the D drive via Disk Management.
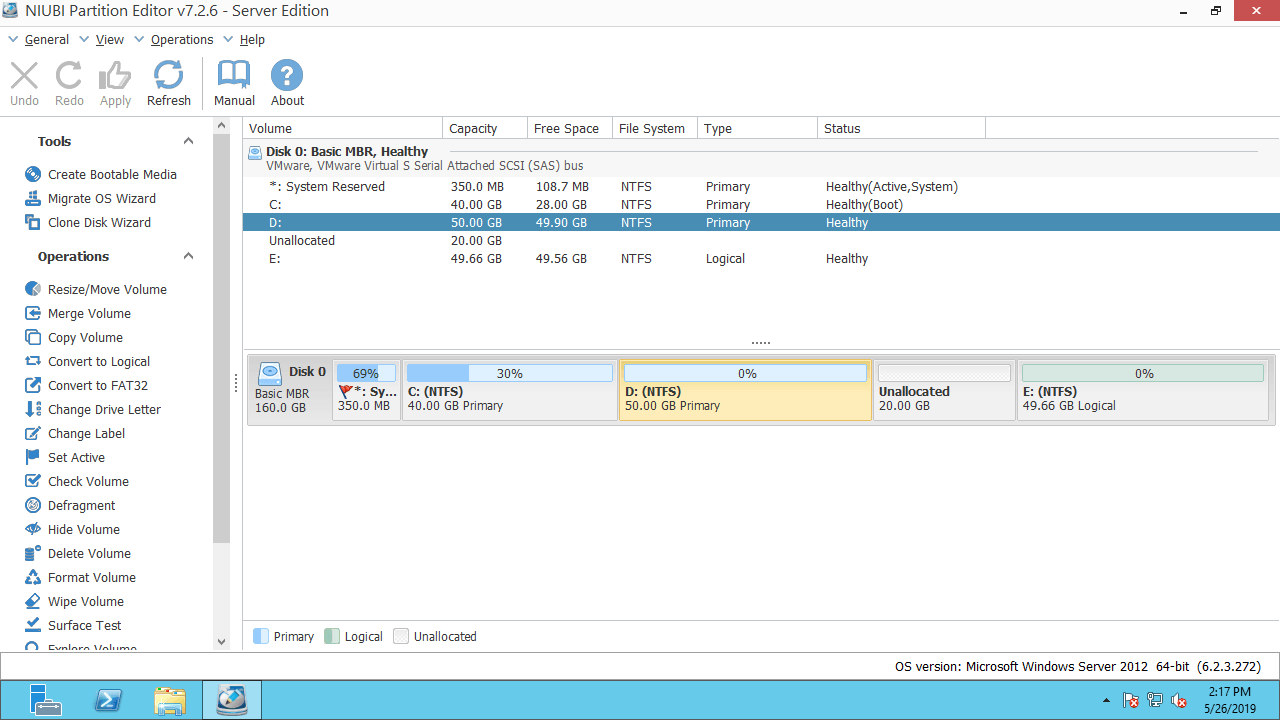
How to address the "Extend Volume is greyed out" issue on Server 2012/2016/2019/2022:
Step 1: Right-click the D: drive and select "Resize/Move Volume", then drag the middle of this partition to the right in the pop-up window:
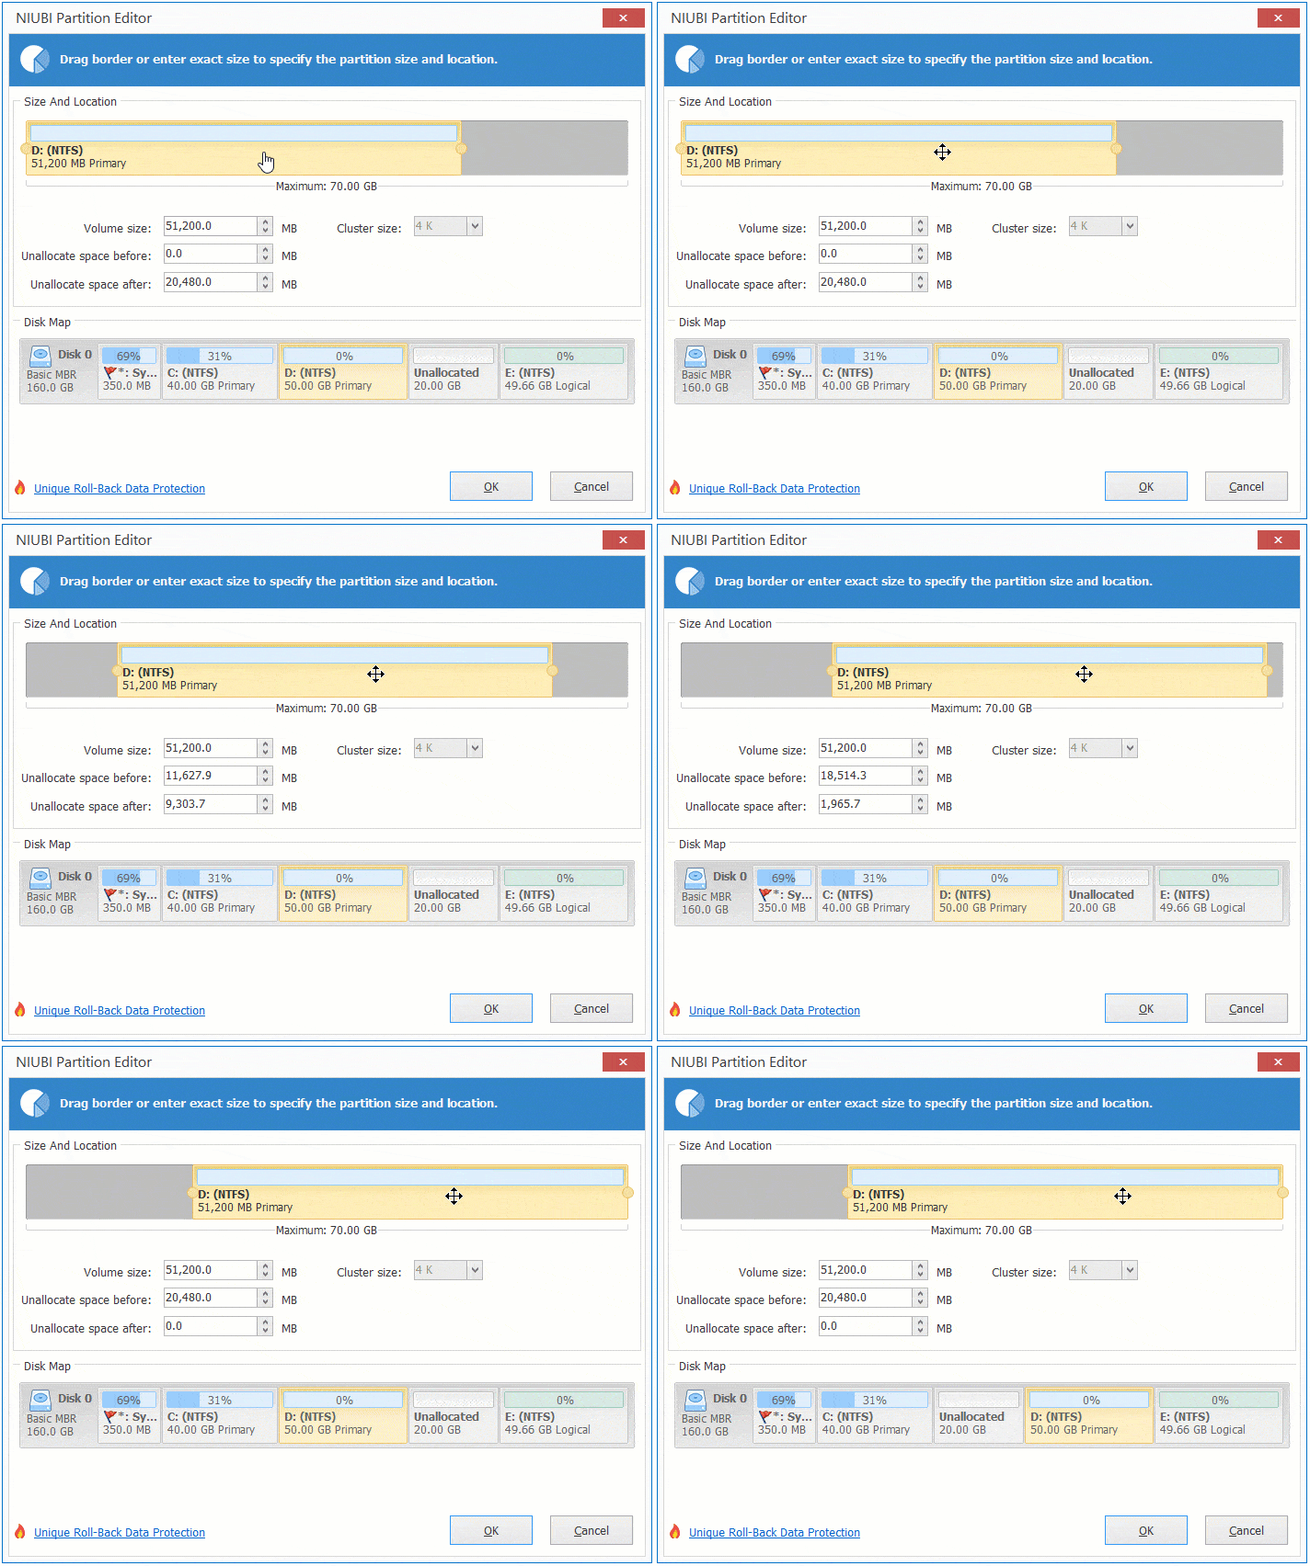
Then, unallocated space is moved to the left side.
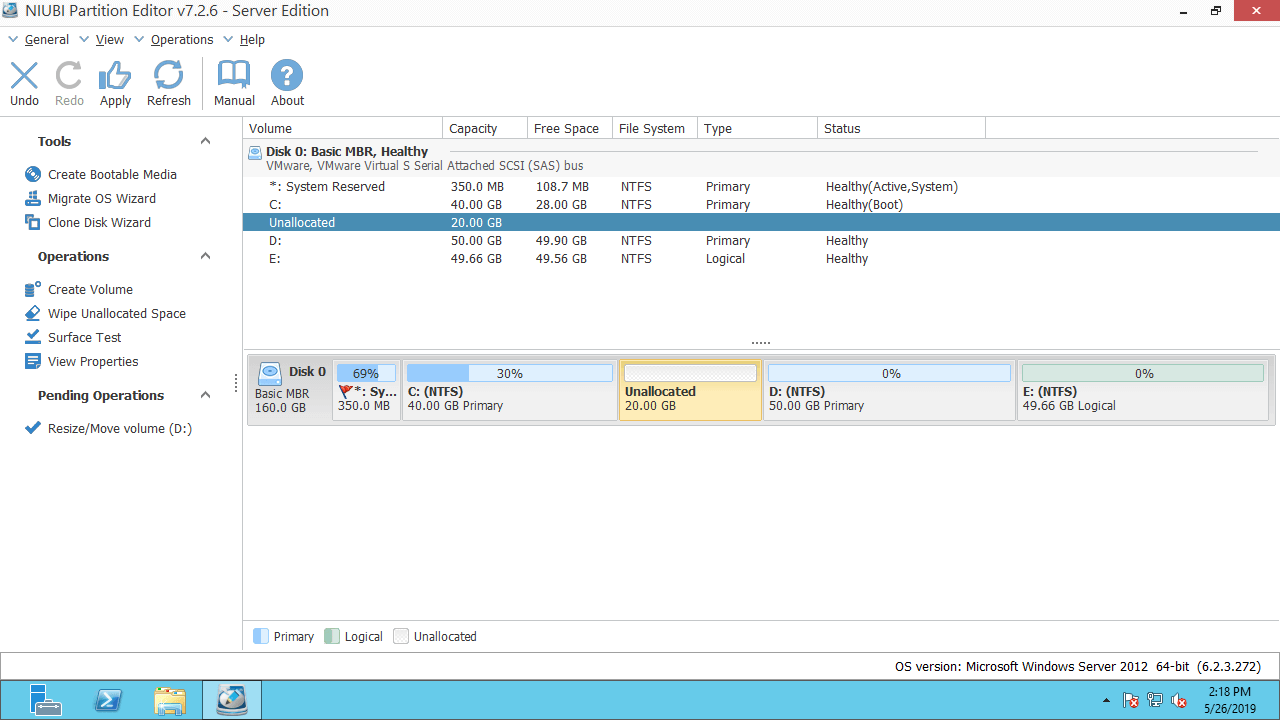
Step 2: Right-click the C: drive and select "Resize/Move Volume" again, then drag the right border to the right in the pop-up window.
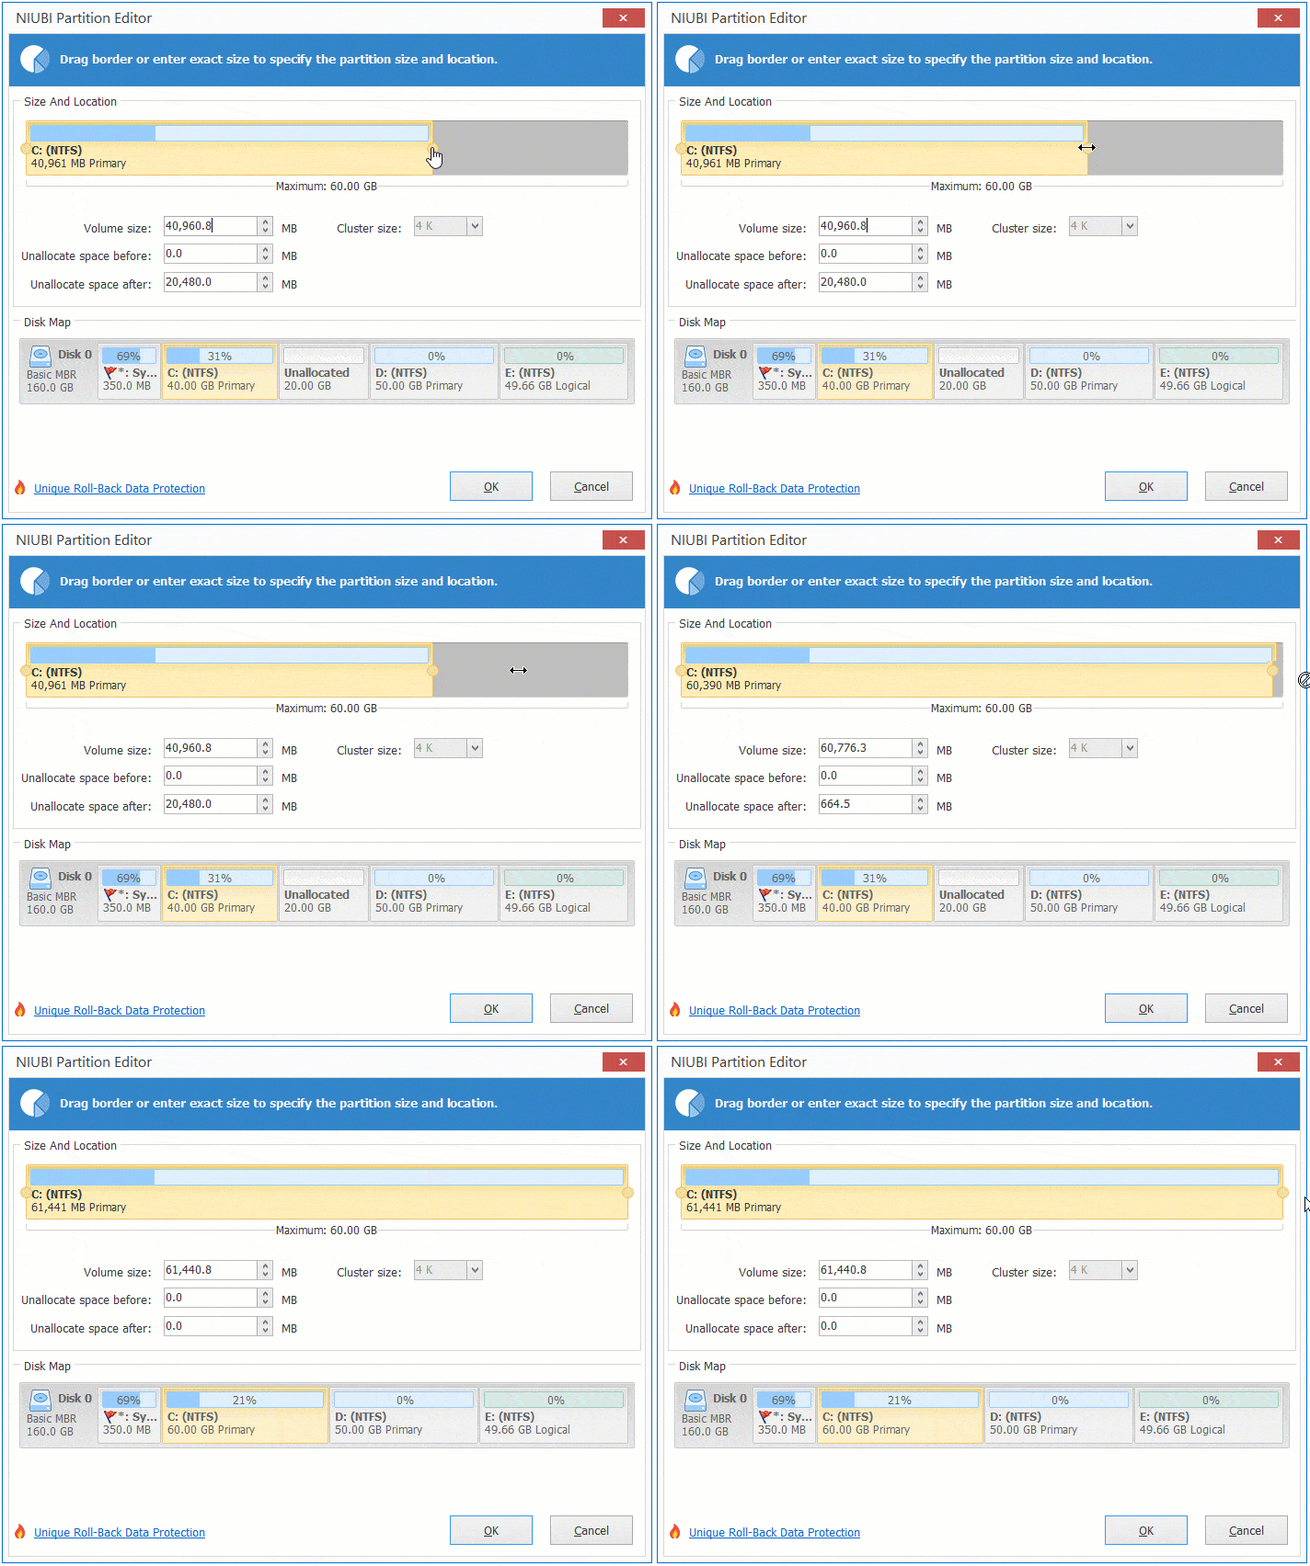
Then, unallocated space is added into the C: drive.
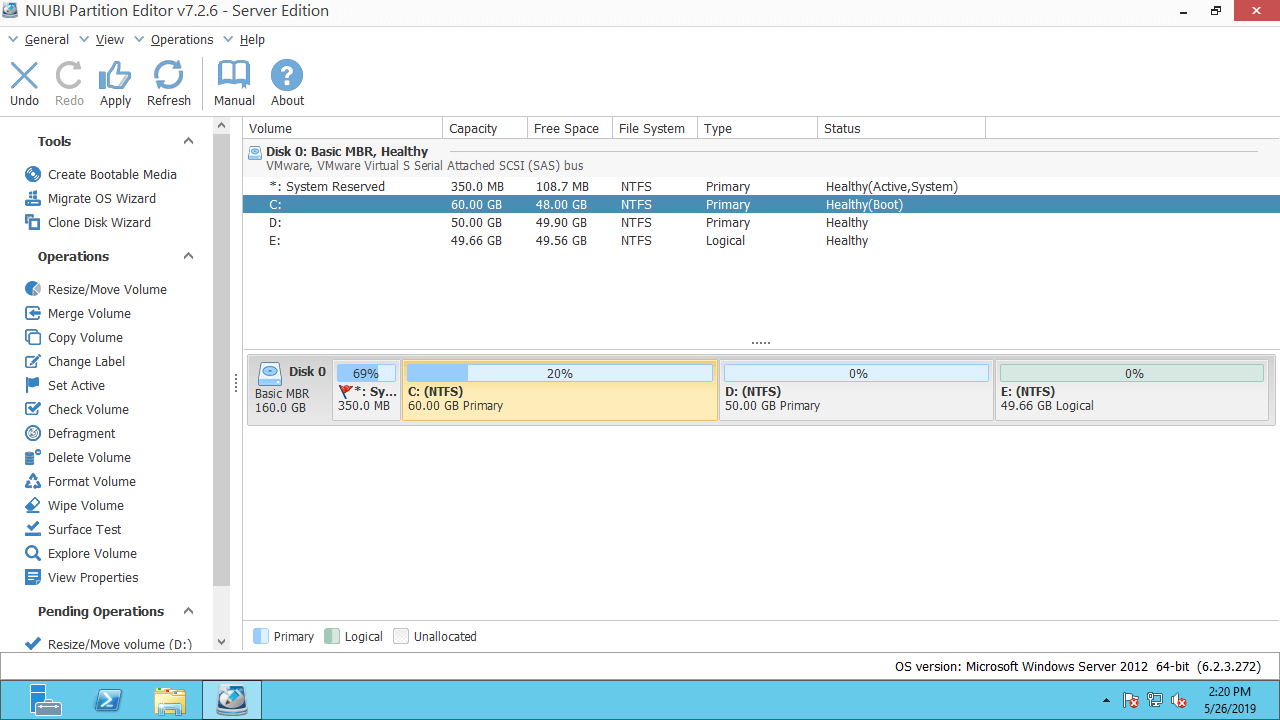
Step 3: Click "Apply" on the top left to execute. (Operations before this step only work in virtual mode.)
If the Extend Volume grayed out issue is caused by an unsupported FAT32 partition or the restriction between primary and logical drives, follow the steps in the video:

The rules after right-clicking a partition and selecting the "Resize/Move Volume" feature:
- Drag one border toward the other to shrink the partition and generate unallocated space on either side.
- Drag one border away from the other to extend the partition by merging adjacent unallocated space.
- Drag the middle of the partition to the other side to exchange the position of the partition with the adjacent unallocated space.
Take Care of Data While Shrinking and Extending Partitions
Resizing a disk partition carries a potential risk of system damage and data loss, so be sure to back up or clone the disk partition beforehand and use reliable partitioning software.
Better than other tools, NIUBI Partition Editor offers powerful technology to resize partitions more safely and efficiently.
- Hot Clone - Clone disk partitions in Windows for backup, migration, and fast disk swapping.
- Virtual Mode - All operations are listed as pending for preview, and real disk partitions won't be modified until you click "Apply" to confirm.
- Cancel-at-Will - If you applied incorrect operations, you can safely cancel the ongoing operations at any stage before completion.
- 1 Second Rollback - If any error is detected while resizing partitions, it can immediately and automatically revert the disk partitions to their previous state.
- Advanced File-Moving Algorithm: Resize and move partitions 30% to 300% faster, saving significant time, especially when handling a large number of files.
 © 2009 - NIUBI Technology All Rights Reserved. |