Resize hard drive on Windows Server 2016 without data loss
After running the server for a period of time, you need to resize hard disk drive. The typical example is that system C: drive is getting full, the drives for exchange, database and backup also runs out of space. By resizing hard drive, you can re-allocate disk space without starting over. To do this, there are two options with Windows native Disk Management utility and third party partitioning software.
This article shows how to resize hard drive on Windows Server 2016 without reinstalling Windows or losing data.

Resize hard drive with Disk Management
Some people like to use Windows built-in utilities, to resize hard disk drive on Server 2016, there is native Disk Management tool indeed. The built-in Shrink Volume and Extend Volume functionalities can be used to decrease and increase partition size. However, NOT all partition drives can be resized. Before using this native utility, you should know the precondition, otherwise you’ll wast time.
- Both Shrink and Extend Volume support NTFS partition only.
- Shrink Volume can only produce Unallocated space on the right side.
- Sometimes you cannot or can only shrink little space, learn more.
- Extend Volume can only extend the hard drive with adjacent Unallocated space on the right side.
The most common issue is that you cannot extend C drive by shrinking D. When you decrease drive D with Shrink Volume, Unallocated space is generated on the right side, but to expand C drive with Extend Volume, the Unallocated space must be on the left side of D. When you right click C drive, Extend Volume is greyed out.
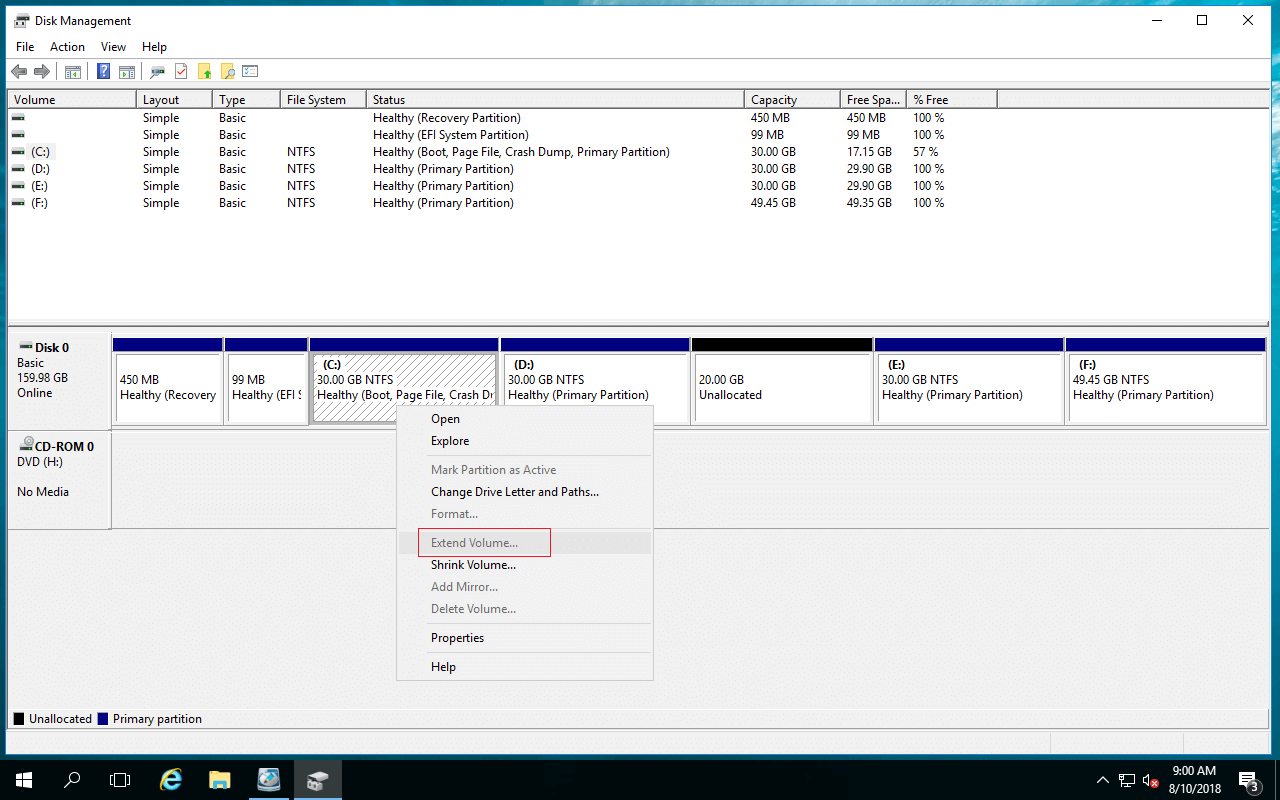
When resizing hard drive in Server 2016 Disk Management, the only option you can do (for example to drive D:):
- Shrink D and produce Unallocated space on the right side to create new volume.
- Extend D by deleting the right adjacent drive (E:)
If you want to resize drive C in Server 2016 Disk Management, it is impossible, you cannot delete drive D to get adjacent Unallocated space, because programs and some Windows services are running from it. You cannot shrink D to expand C as I explained above. In this situation, you need partition software for Server 2016.
Resize disk drive with partition software
With partitioning software such as NIUBI Partition Editor, there are no such limitations and it’s much easier. All that you need to do is dragging and dropping on the disk map. You can shrink D and produce Unallocated on the left side to extend C drive directly. If you have shrank D in Disk Management or there is not enough free space in drive D, you can move Unallocated space and add into C drive.
For example how to resize hard drive D and C on Windows Server 2016:
Download NIUBI Partition Editor, you’ll see all disk partitions with detailed info and graphical configuration on the right. Available operations to highlighted disk or partition are listed on the left side.
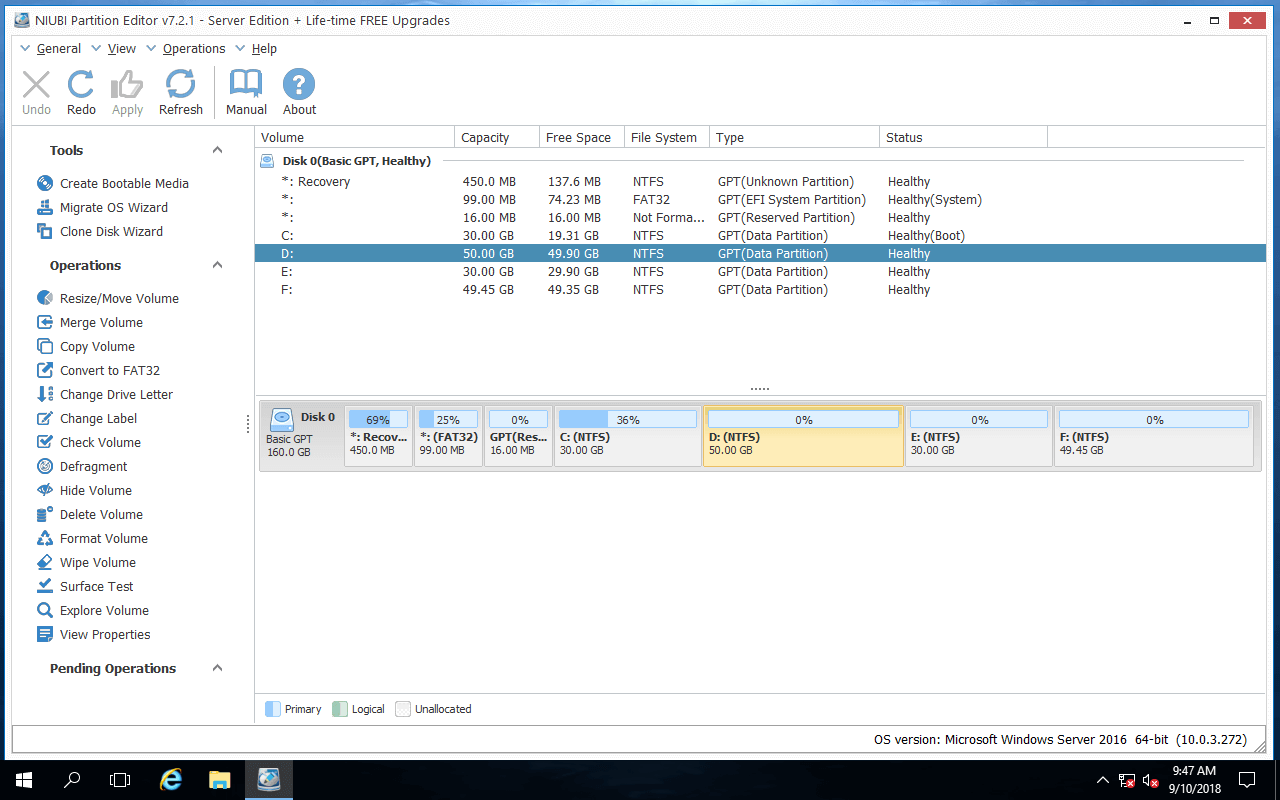
![]() Right click drive D and select “Resize/Move Volume“, drag the left border rightwards in the pop-up window to shrink it.
Right click drive D and select “Resize/Move Volume“, drag the left border rightwards in the pop-up window to shrink it.
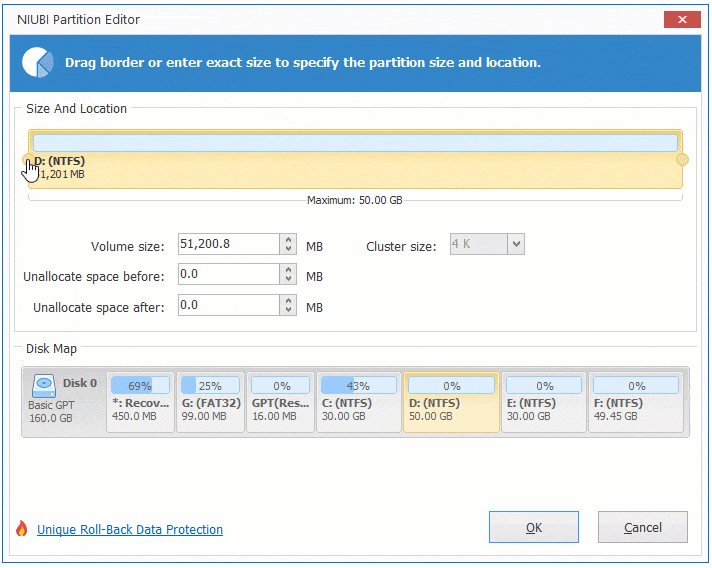
Hard drive D is resized to 30GB and 20GB Unallocated space is produced on its left side. (If you drag the right border leftwards, Unallocated will be produced on the right side.)
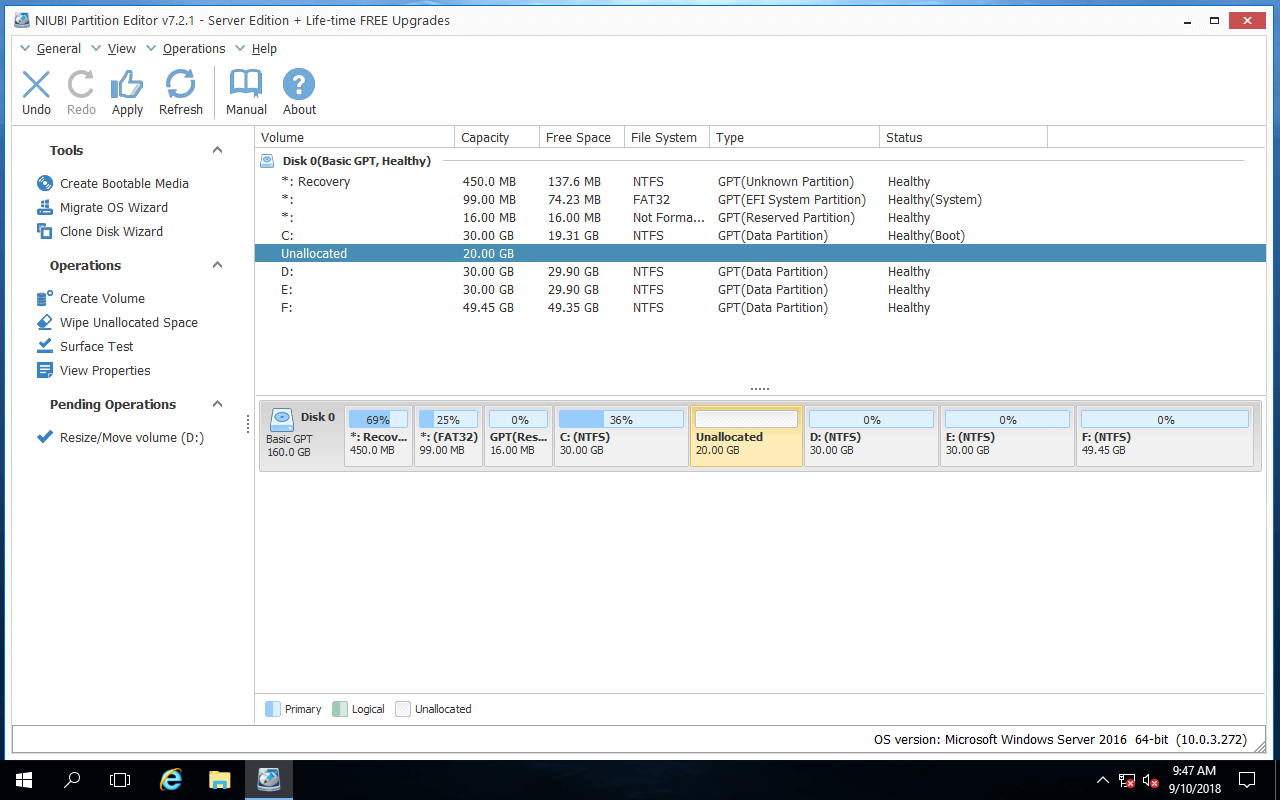
![]() Right click drive C and select “Resize/Move Volume” again. Drag the right border rightwards to hold the Unallocated space.
Right click drive C and select “Resize/Move Volume” again. Drag the right border rightwards to hold the Unallocated space.
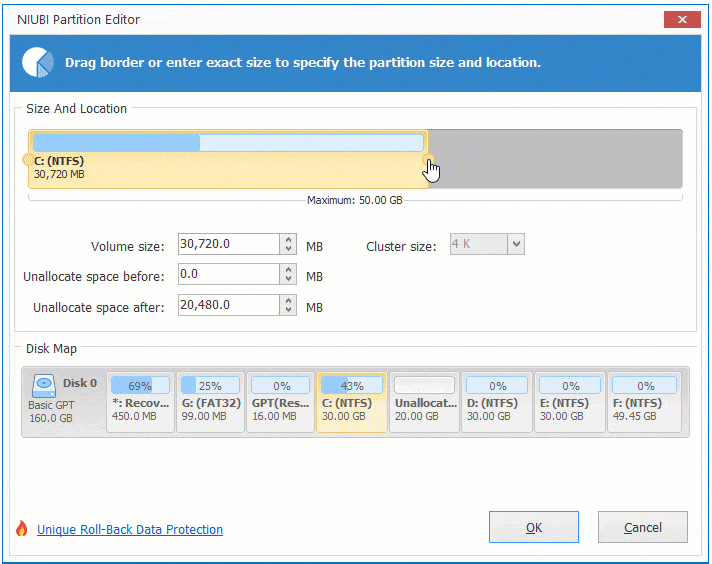
Click OK, hard drive C is resized to 50GB, click Apply on top left to execute.
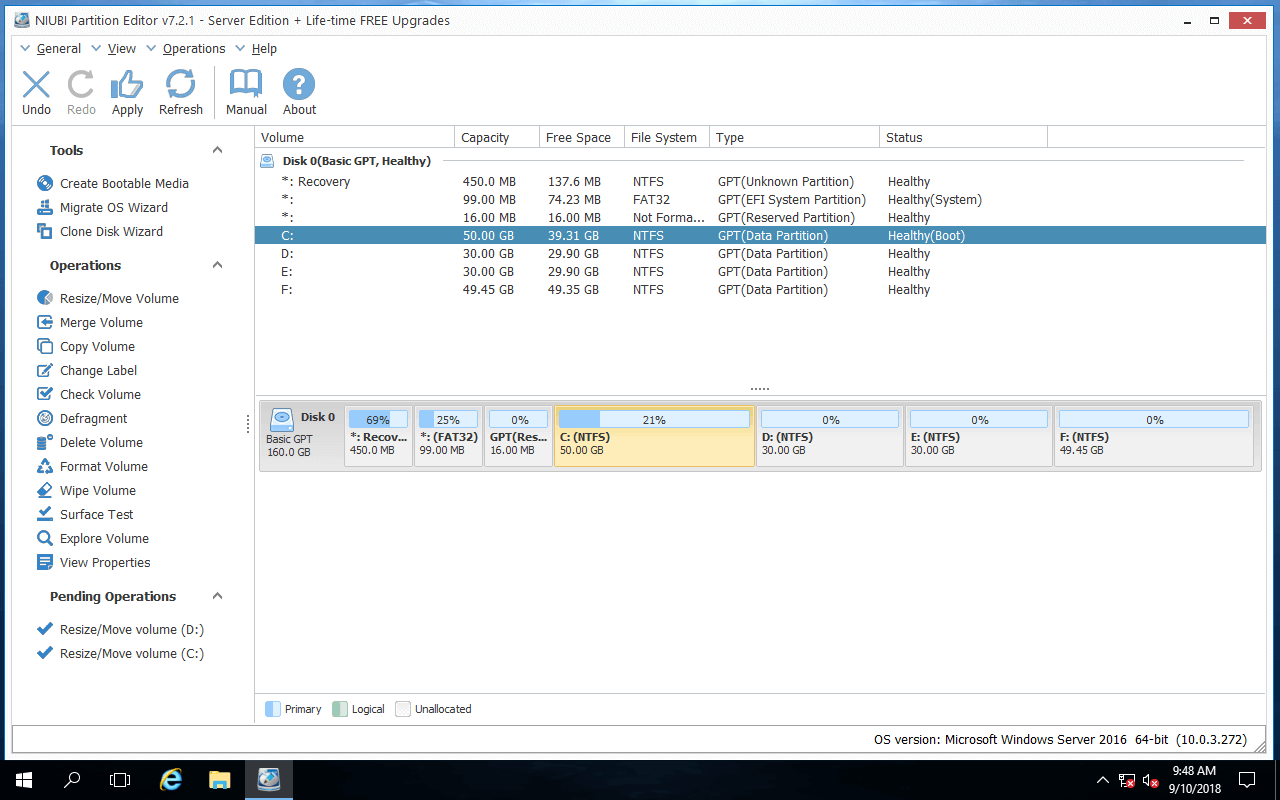
![]() This partition software is designed to work in its virtual mode, real disk partitions won’t be modified until click Apply button to confirm. You can undo and redo the pending operations on bottom left before clicking Apply.
This partition software is designed to work in its virtual mode, real disk partitions won’t be modified until click Apply button to confirm. You can undo and redo the pending operations on bottom left before clicking Apply.
The pending operations marked with ![]() can be done in desktop without rebooting server.
can be done in desktop without rebooting server.
Video guide
To better understand how to resize hard drive on Windows Server 2016, watch the videos:
How to shrink partition drive:
How to extend C by shrinking other drives:
In Summary
To resize hard disk drive on Windows Server 2016, the native Disk Management utility can do little help and 3rd-party partitioning software is better. However, you’d better run the safe tool, otherwise there is system and data damage risk.
Besides the virtual mode technology to avoid mistake, NIUBI Partition Editor has other advantages such as:
- 1 Second Rollback technology to ensure system and data intact. It automatically reverts the server to original status in a flash if any software or hardware issue occur while resizing hard drives.
- Unique file-moving algorithm helps resize disk drives 30% – 300% faster.
- Cancel-at-will technology allows you to cancel the ongoing unwanted operations without losing data.
- Hot-Resize technology to help resize partition drive on the fly.