If there's only C drive on the system disk of your server, you'd better shrink it and create more volumes, at least a separate partition for programs. Don't install all programs and save everything to C drive. If C drive or the partitions for exchange, database are getting full, you'd better shrink other large drive and transfer free space to these partitions. Many people ask whether it's possible to shrink partition in Server 2019/2022 without losing data. The answer is yes. In this article I'll introduce how to shrink volume in Windows Server 2019/2022 with native tool and safe partition software.
How to shrink partition in Server 2019/2022 without software
The same with previous versions, Windows Server 2019 and 2022 has Disk Management tool to manage disk partitions. It has Shrink Volume function to shrink NTFS partition without losing data. However, comparing with server partition software, this native tool has many limitations. In fact, Disk Management is not 100% safe to shrink partition, because it damaged my partitions several times. Pay more attention if there are both primary and logical partitions on a disk.
Steps to shrink volume in Windows Server 2019/2022 with Disk Management:
- Press Windows + X on your keyboard and click Disk Management in the list.
- Right click a NTFS partition and select Shrink Volume.
- Enter an amount of space and click Shrink. If you do not enter an amount, the maximum available free space will be used by default.
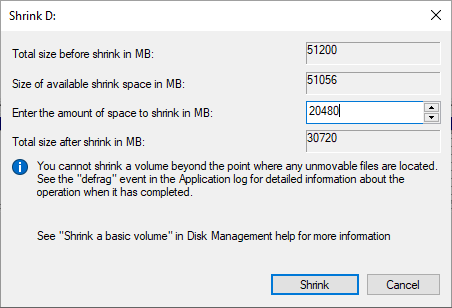
In a short while, this partition will be shrunk and some unallocated space will be made on the right of this partition.
Shortages of "Shrink Volume" in Windows Server 2019/2022
As I said above, Disk Management is not the best tool to help shrink partition in Server 2019/2022, because it has some shortages.
1. Only NTFS partition is supported
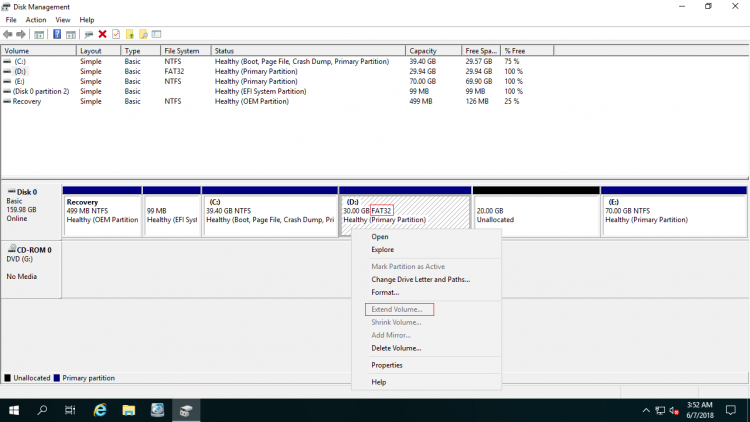
Disk Management can only shrink NTFS partition, FAT32 and other other types of partitions are not supported. When you right click a FAT32 partition, Shrink Volume is greyed out.
2. It can only shrink partition towards left
When you shrinking volume in Server 2019/2022 with Disk Management, you can only shrink this volume towards left and make unallocated space on the right of this volume. Disk Management does not give you any other option except entering an amount of space.
3. It cannot shrink volume beyond the point of unmovable files
There is a notice in the shrinking window -"You cannot shrink a volume beyond the point where any unmovable files are located."
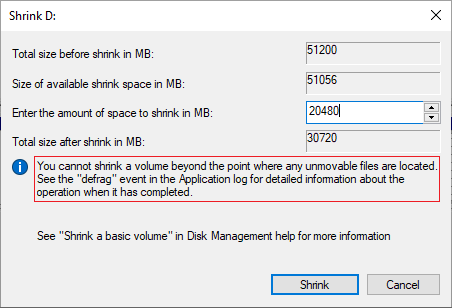
For example: there're 4 blocks in the data area of C drive. If the unmovable files are located in block 3, you cannot shrink volume to block 2 or 1 even if there is free space.

This is the reason why many people feedback that they cannot shrink volume beyond half limit. They can only shrink little space although there is plenty of free space in this drive. These "unmovable" files include Paging file, hibernation and other large files.
Better way to shrink partition in Server 2019/2022
Comparing with Disk Management tool, NIUBI Partition Editor supports both NTFS and FAT32 partitions. It can make Unallocated space on either left or right while shrinking a partition. Furthermore, it can move these "unmovable" files, so it can shrink a drive to minimum size if you want. It can also move and merge Unallocated space to either contiguous or nonadjacent partition on the same disk.
How to shrink volume in Server 2019/2022 with NIUBI Partition Editor:
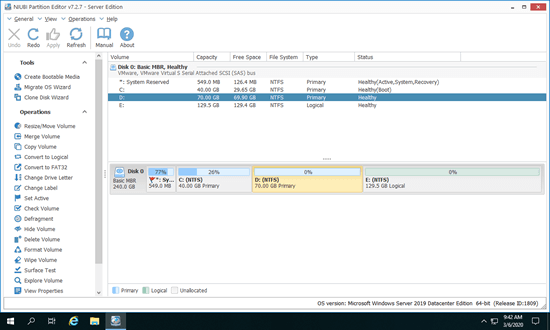
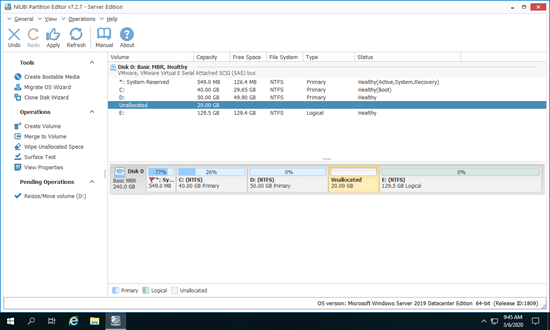
Download the server edition, you'll see disk partition with structure and other information on the right, available operations to selected disk or partition are listed on the left and by right clicking.
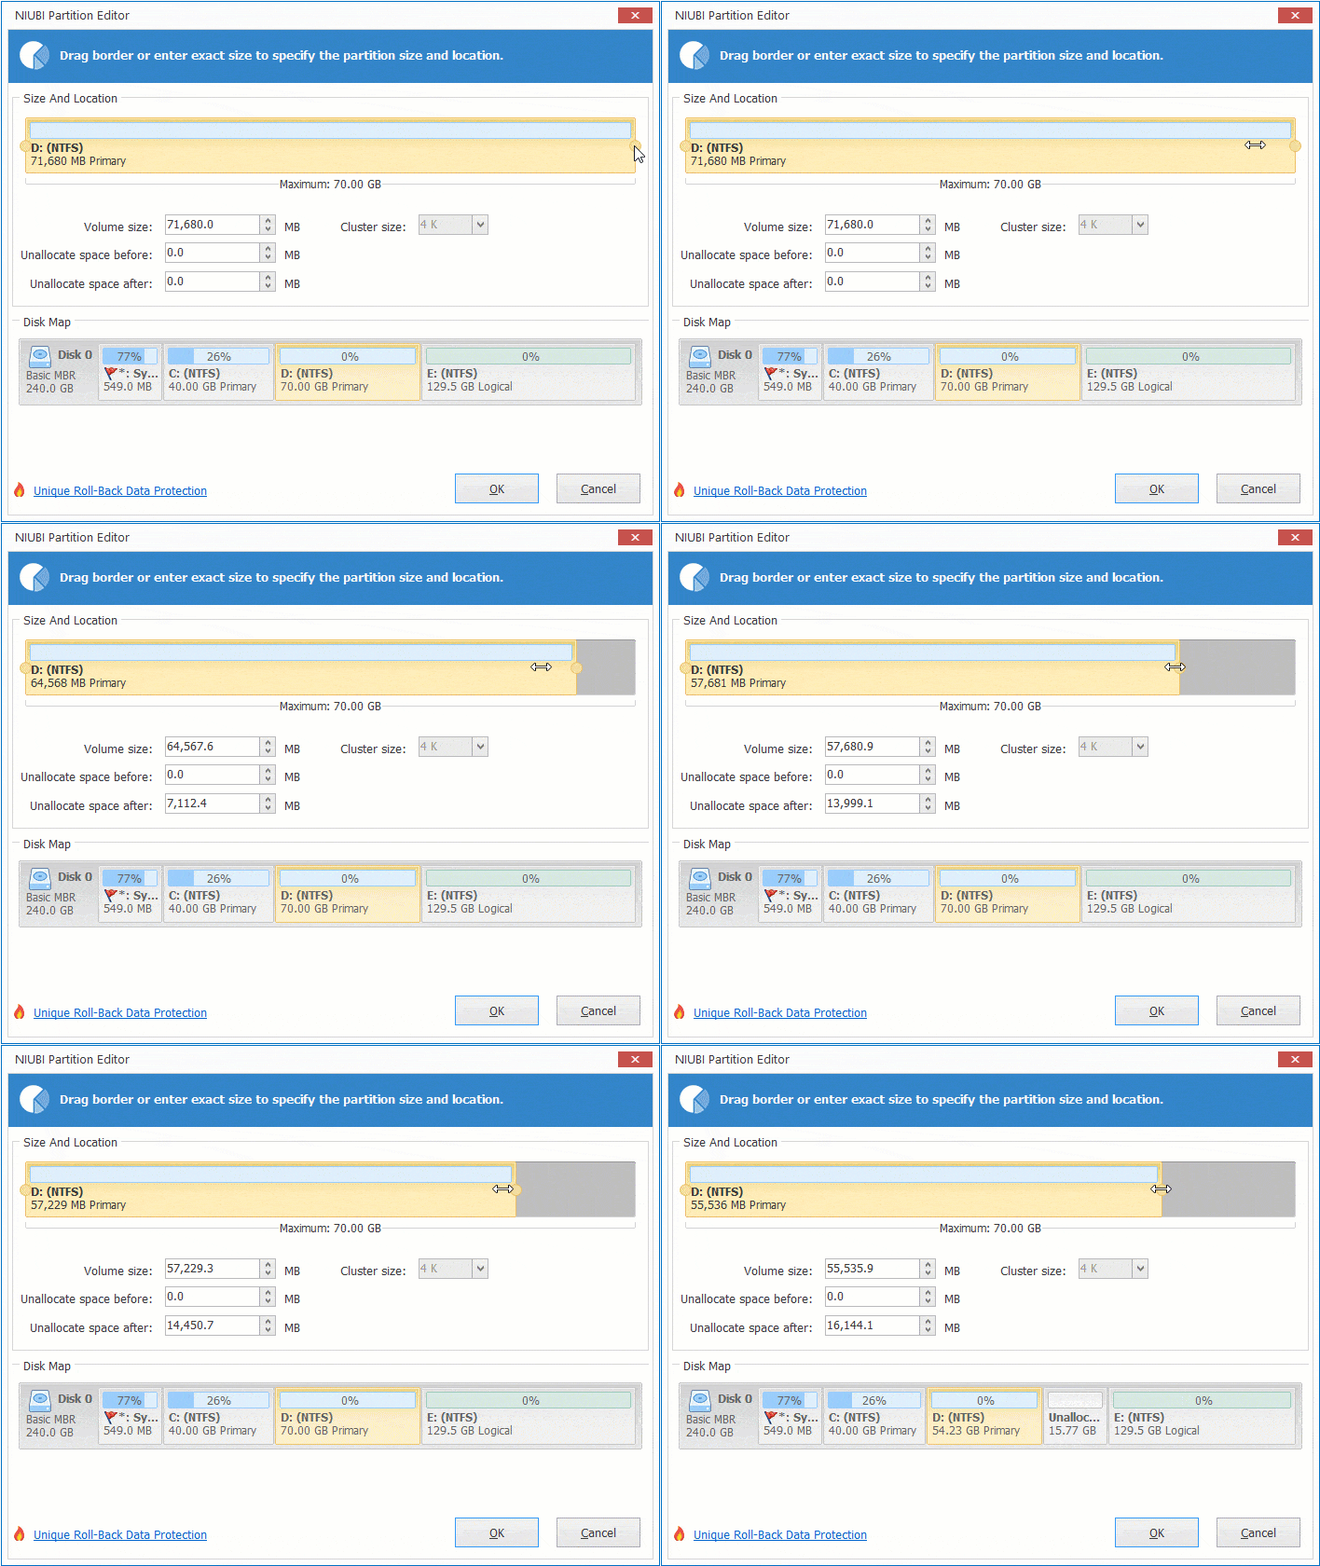
Right click the drive that you want to shrink (here is D) and select "Resize/Move Volume". In the pop-up window, you have two options.
If you drag left border towards right or enter an amount in the box of Unallocated space before:
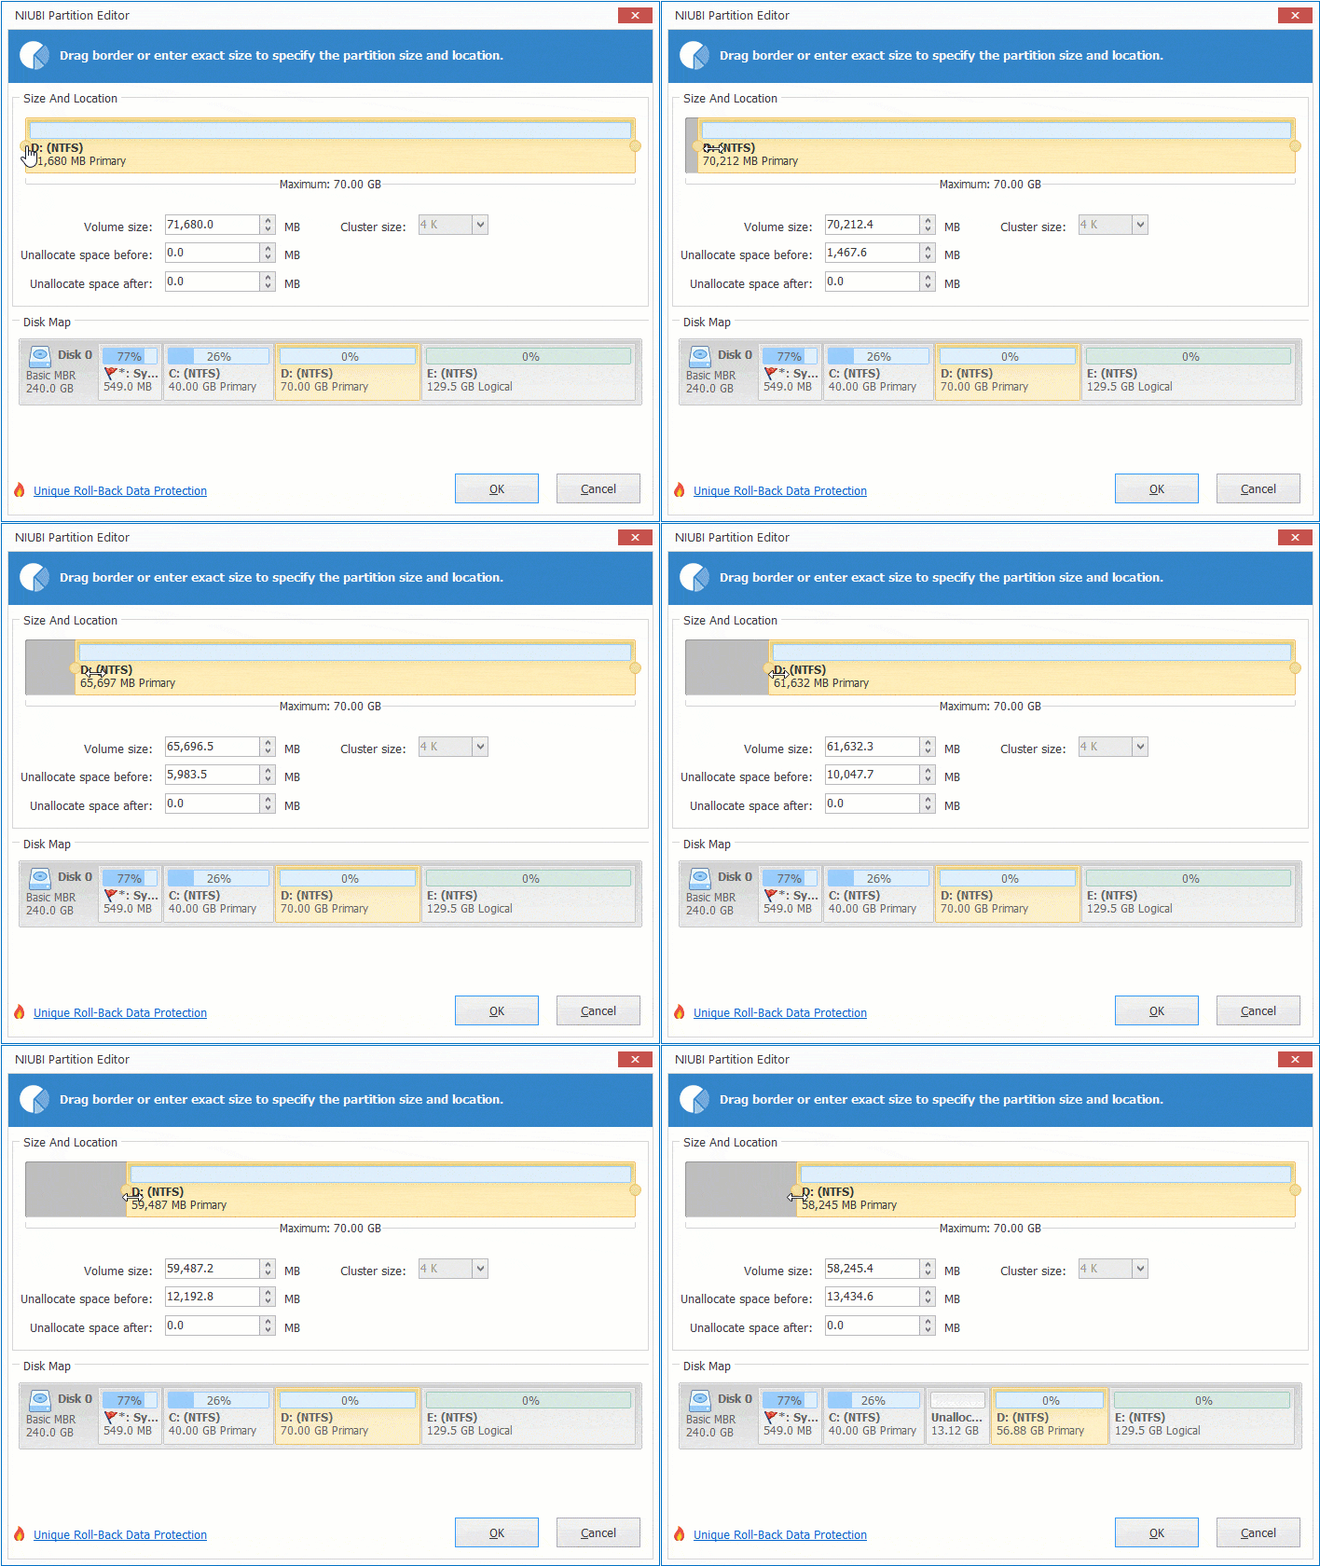
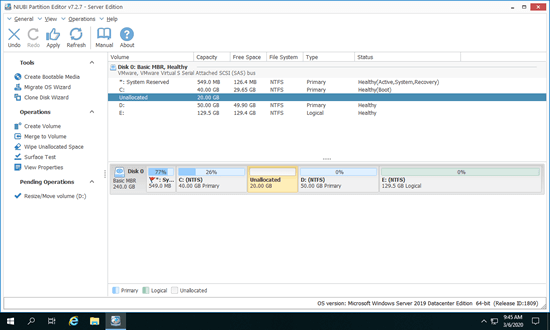
Then Unallocated space is made on the left of this partition.
Watch the video how to shrink volume in Windows Server 2019/2022 without losing data:
If you want to create new volume, right click the Unallocated space and select "Create Volume". If you want to extend a partition with this unallocated space, right click this partition in NIUBI and select "Resize/Move Volume" option. In the pop-up window, drag the border to the other side to combine this Unallocated space.
Besides shrinking and extending disk partition in Windows Server 2019/2022/2025 and previous Server 2003/2008/2012/2016, NIUBI Partition Editor help you do many other operations such as move, merge, copy, convert, defrag, optimize, hide, wipe partition and scan bad sectors, etc.

