Sometimes you need to shrink volume in Windows 2008 server, for example: there's only C drive on system disk, so you need to shrink C drive and create more volumes for different purpose. In some server, C drive is running out of space, so you need to shrink other volume to extend C drive. To shrink volume in Windows Server 2008 (R2), there are 3 kinds of tools: Diskpart command tool, Disk Management and NIUBI Partition Editor. This article introduces how to shrink Server 2008 partition with each tool.
1. Shrink partition in Server 2008 R2 with Diskpart command
Some server administrators like to use command line tool. To shrink volume in Windows 2008 server, there's a native command tool - Diskpart. Unlike Disk Management, Diskpart only displays single partitions with part of parameters, it doesn't display disk partition layout or any unallocated space. If you don't know everything about your disk partition, it is not suggested to use this tool.
Other shortages to shrink partition in Server 2008 R2 with Diskpart cmd:
- It can only shrink NTFS partition, FAT32 and any other types of partitions are not supported.
- It can only shrink partition towards left and make unallocated space on the right.
- If there are unmovable files in the partition, it cannot shrink partition beyond the point where unmovable files are located.
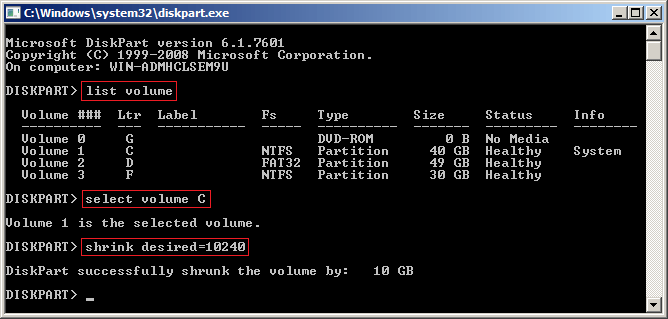
How to shrink volume in Windows Server 2008 r2 with diskpart command:
- Press Windows and R together on the keyboard, type diskpart and press Enter.
- Input list volume and press Enter in diskpart command prompt window, then you'll see all partitions in a list.
- Input select volume C and press Enter. C is drive letter or number of the partition that you want to shrink.
- Input shrink desired=XX and press Enter. XX is the amount of space that you want to shrink from this partition (in MB).
In general, this partition should be shrunk in a short time if there's no file system or other error.
2. Shrink volume in Windows Server 2008 via Disk Management
Disk Management has the same shortages listed above while shrinking hard drive partition. The benefit is that Disk Management shows disk with partition layout and detailed information of each partition visually. In addition, you'll see clearly where unallocated space is generated after shrinking a partition. If you don't want to use third party software, you' may try "Shrink Volume" function in Server 2008 Disk Management.
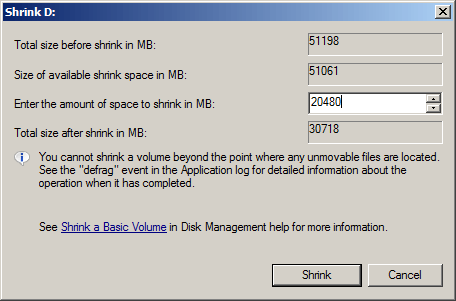
How to shrink volume in Windows Server 2008 R2 with Disk Management:
- Press Windows + R to open Run, type diskmgmt.msc and press Enter.
- Right click a NTFS partition and select Shrink Volume from the list.
- Maximum available space is given by default, you may click Shrink button directly or enter an smaller amount by yourself.
Common issue while shrinking partition in Server 2008 R2 using Disk Management:
- If there is plenty of free space in this partition, but Disk Management give you 0 space to shrink, that means there's file system error. You need to run chkdsk X:/v/f command to repair file system and shrink again (X is the drive letter of the partition that want to shrink).
- If there is plenty of free space in this partition, but Disk Management give you little space to shrink, it means that there are unmovable files in this partition. In that case, you have to run third party software.
- If you want to extend a partition in Server 2008 after shrinking another one, neither Windows native tool can help you.
Diskpart command and Disk Management can only make unallocated space on the right while shrinking a partition. They can only add unallocated space to left contiguous partition. As you see in the screenshot, after shrinking D drive, unallocated space is made on the right of D. C drive nonadjacent and E is on the right of this unallocated space. Therefore, "Extend Volume" option is grayed out.

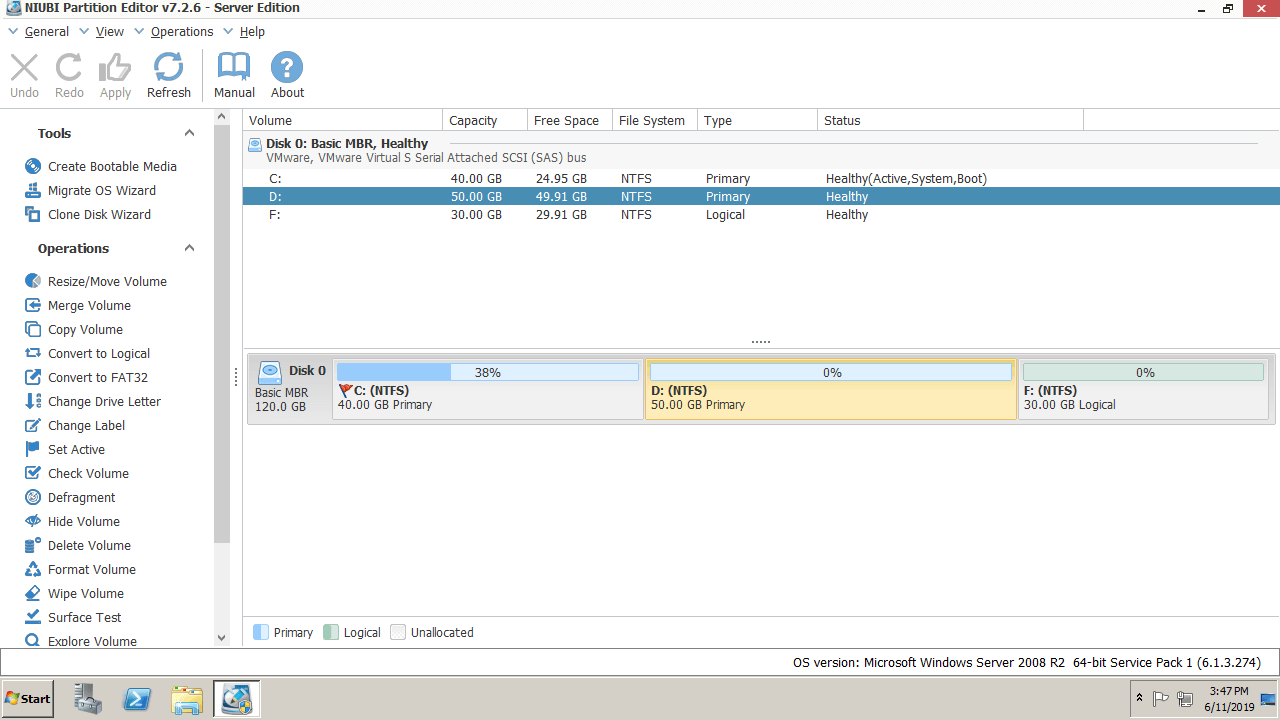
3. How to shrink server volume with NIUBI Partition Editor
Comparing with these native tools, NIUBI Partition Editor is much more powerful, it is able to:
- Shrink and extend both NTFS and FAT32 partition.
- Shrink partition beyond the point where unmovable files are located.
- Make unallocated space on either left or right side when shrinking partition.
- Extend partition by merging either contiguous unallocated space by 1 step.
- Move unallocated space and combine to any nonadjacent partitions on the same disk.
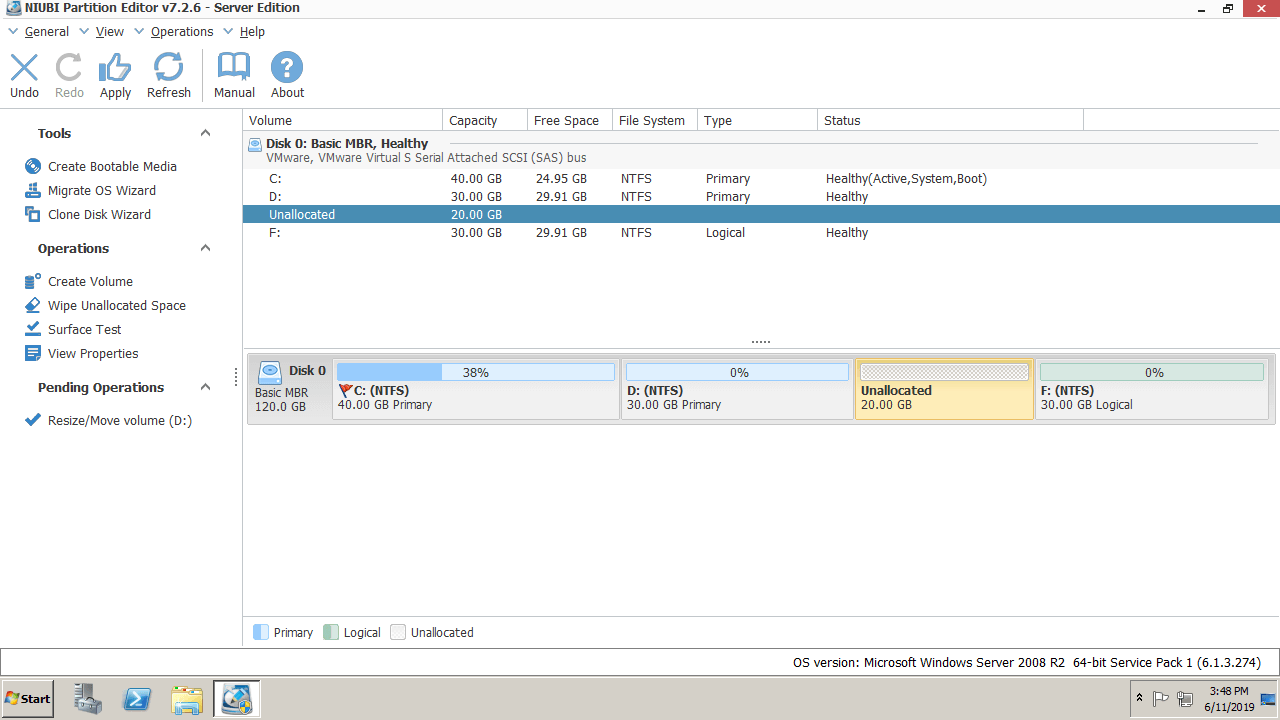
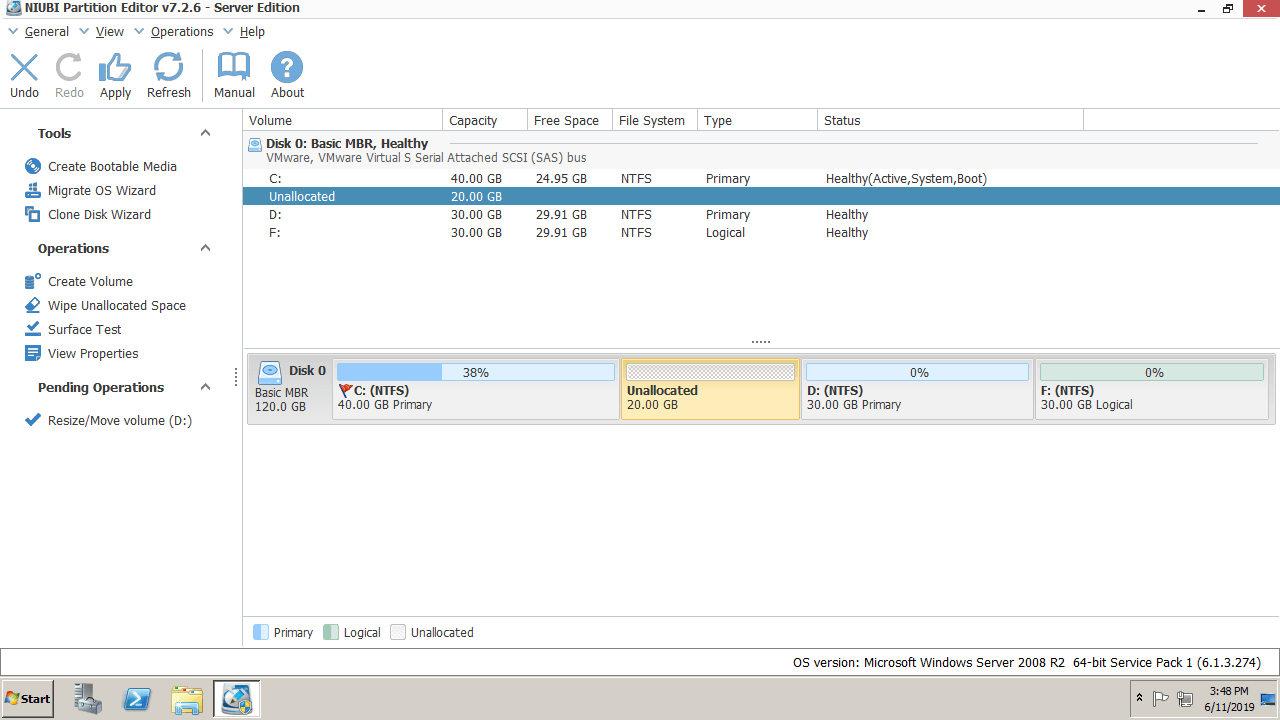
Download NIUBI Partition Editor and you'll see all storage devices with partition layout and other information on the right, available operations to selected disk or partition are listed on the left and by right clicking. Unavailable operations are hidden automatically.
How to shrink volume in Windows Server 2008 R2 without losing data:
Right click any NTFS or FAT32 partition and select "Resize/Move Volume", you have 2 options in the pop-up window.
① If you drag right border towards left, or enter an amount in the box of "Unallocated space after":
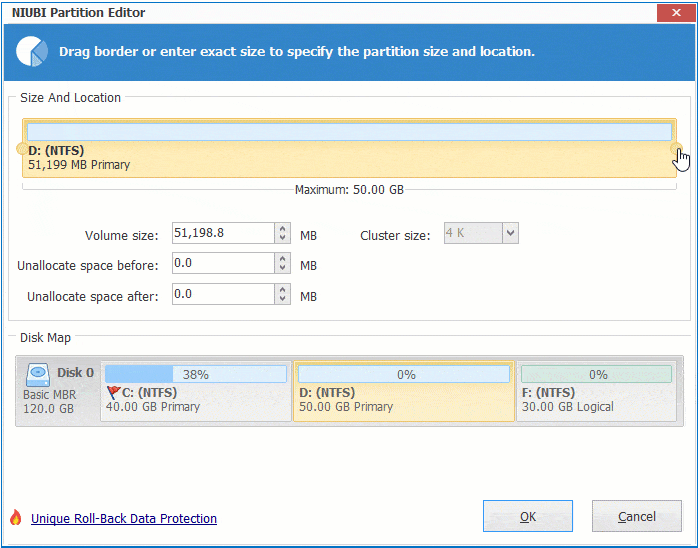
Then unallocated space is made on the right side.
② If you drag left border towards right, or enter an amount in the box of "Unallocated space before":
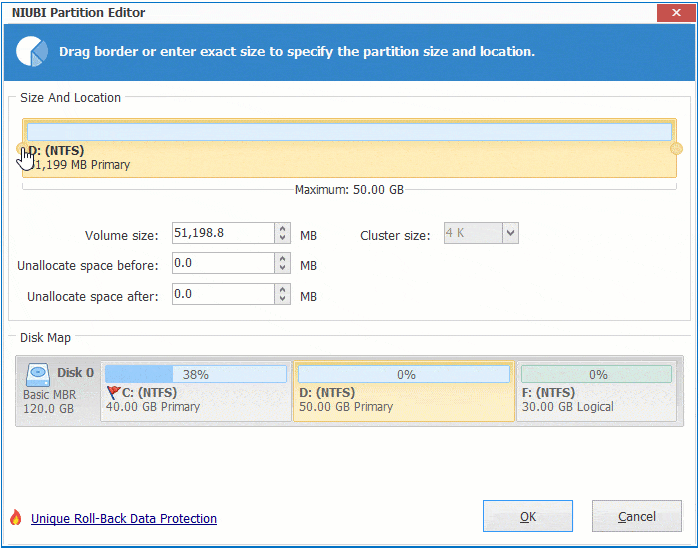
Then unallocated space is made on the left side.
Video guide to shrink partition volume in Windows Server 2008 R2:
Follow the steps if you want to extend Server 2008 partition after shrinking a volume. If you want to create more partitions, simply right click the unallocated space in NIUBI and select "Create Volume".
Besides shrinking and extending partition in Windows Server 2008/2012/2016/2019/2022, NIUBI Partition Editor helps you merge, copy, convert, defrag, hide, wipe, scan partition and much more. Better than other tools, it has unique 1-Second Rollback, Virtual Mode, Cancel-at-will and Hot Clone technologies to protect system and data.