This article introduces how to shrink volume on Windows PC and Server without losing data, 3 ways to shrink partition with Disk Management, diskpart and NIUBI Partition Editor.
Applies to: Windows 10, Windows 8, Windows 7, Windows Vista, Windows XP, Windows Server 2019, Windows Server 2016, Windows Server 2012 (R2), Small Business Server 2011, Windows Server 2008 (R2) and Windows Server 2003 (R2).
In some situations you need to shrink an allocated partition. For example, forgot to edit partition while installing Operating System, so C drive occupied all disk space, then you can create new volumes by shrinking C drive. Another typical example is that C drive runs out of space but there is plenty of free space in another volume such as D. So many people want to shrink D to extend C drive. In this article, I'll show you detailed steps to shrink partition on Windows Server and PC with 3 different tools.
1. How to shrink partition with Windows Disk Management
Disk Management is a Windows built-in component that shows connected storage device as well as the detailed info of each volume. You can only do some basic operations such as create, format and delete partitions in Windows XP and Server 2003. In Windows 7 and subsequent versions, Microsoft integrated Shrink Volume and Extend Volume functions to help resize partition without losing data (in most cases). However, because of many shortages, Disk Management is not the best tool.
Steps to shrink volume in Windows 10/8/7 and Server 2019/2016/2012/2008 Disk Management:
- Press Windows and R together on the keyboard, input diskmgmt.msc and press Enter to open Disk Management.
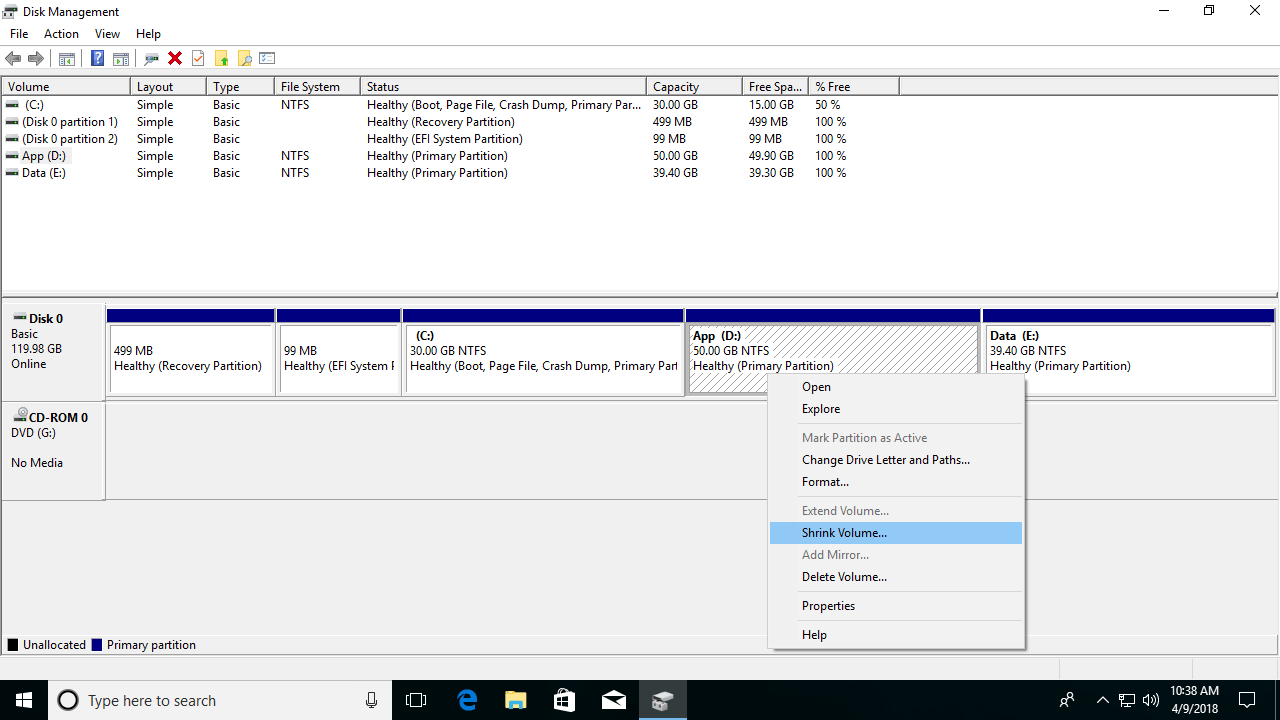
- Right click the drive you want to decrease (such as D:) and select Shrink Volume.
![Shrink Volume]()
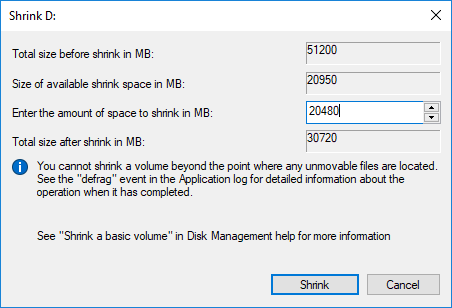
- Maximum available free space will be used by default, if you want to shrink only part of free space, enter an amount by yourself and then click Shrink.
![Enter amount]()
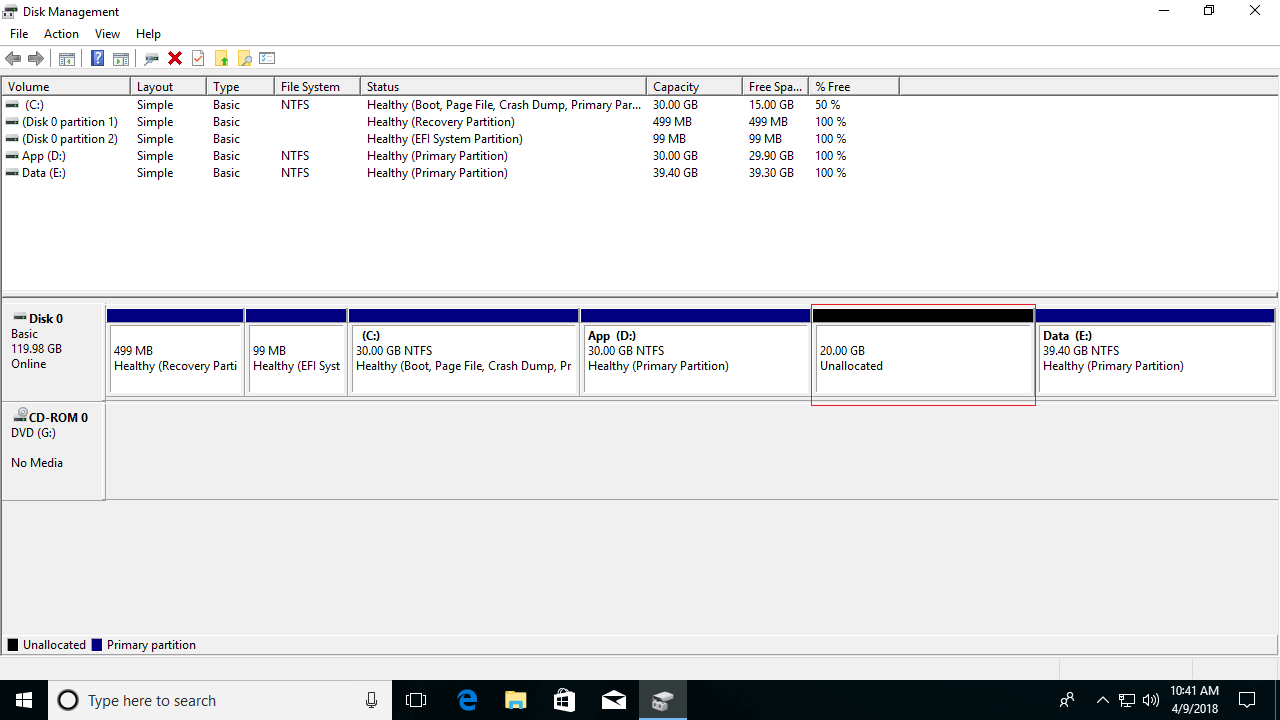
In a while, volume D is shrunk and 20GB Unallocated space is generated behind D.
Shortages of Disk Management Shrink Volume function:
- It can only shrink NTFS partition, FAT32 and any other types of partitions are not supported.
- As the tips in the shrinking window, you cannot shrink a volume beyond the point where any unmovable files are located.
- Unallocated space can only be made on the right when shrinking a partition, this space can't be extended to other volumes with Disk Management.
2. How to shrink partition using DiskPart cmd
Diskpart is a command prompt tool. Comparing with GUI Disk Management, diskpart is more difficult to common users. In Disk Management you'll see partition structure and detailed information of each volume, but in diskpart command window, Unallocated space and many information won't be displayed.
As I said above, Windows XP and Server 2003 Disk Management has no Shrink Volume function. Therefore, to shrink partition in these platform, Diskpart is the only Windows native tool. Another point, Diskpart version in these 2 OS is lower, it cannot shrink system partition.
Steps to shrink partition using Diskpart in Windows 10/8/7/Vista/XP and Server 2019/2016/2012/2008/2003:
- Press Windows and R keys together to open Run, input diskpart and press Enter.
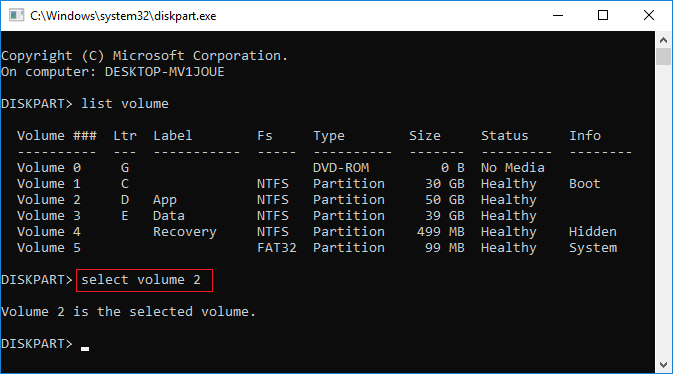
- Input list volume in diskpart command prompt window, then you'll see all partitions in a list.
![List Volume]()
- Input select volume X (X is drive letter or number of the partition that you want to shrink).
![Select Volume]()
- Input shrink desired=XX (XX is the amount of space to shrink in megabytes).
![Shrink Volume]()


Diskpart works in different way, but it has same shortages with Disk Management.
How to shrink volume with NIUBI Partition Editor
Comparing with Disk Management and diskpart, NIUBI Partition Editor has more advantages such as:
- Both NTFS and FAT32 partitions can be shrunk and extended.
- Unallocated space can be made on either left or right while shrinking a partition.
- It is able to shrink a partition to minimum size because it can move the "unmovable" files.
- It is able to merge Unallocated space to either contiguous and any nonadjacent partition on the same disk.
To shrink partition on Windows PC or Server, you just need to drag and drop on the disk map. There's free edition for Windows 10/8/7/Vista/XP home computer users.
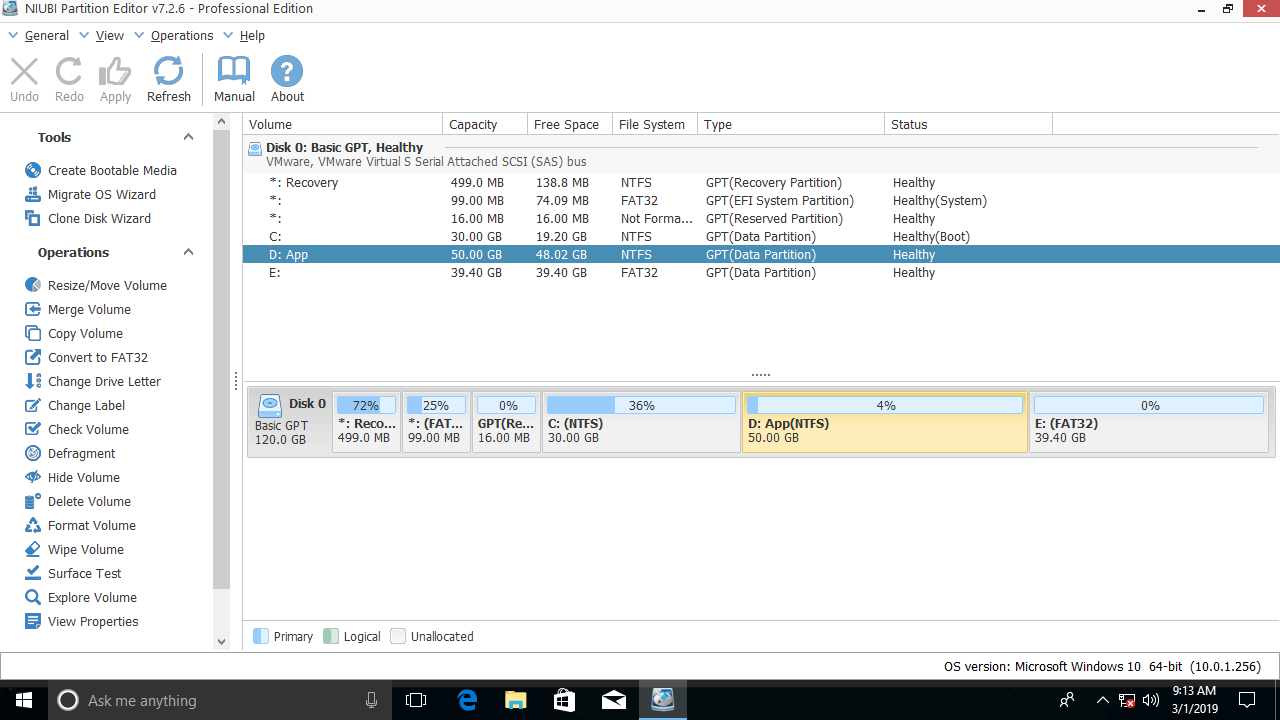
Download NIUBI Partition Editor, you'll see the main window with disk partition structure and other information on the right, available operations to selected disk or partition are listed on the left and by right clicking.
Right click a partition such as D: and select "Resize/Move Volume" feature. You have two choices in the pop-up window:
1. If you drag left border towards right in the pop-up window,
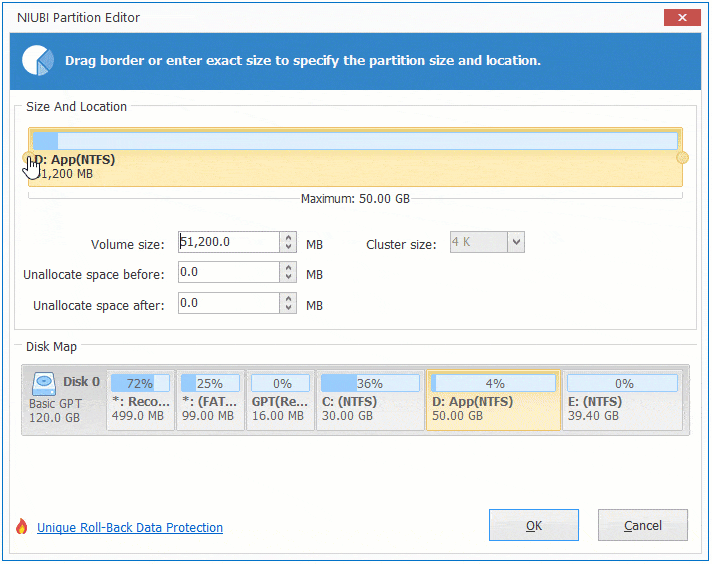
Unallocated space will be made on the left of D drive.
2. If you drag right border towards left in the pop-up window,
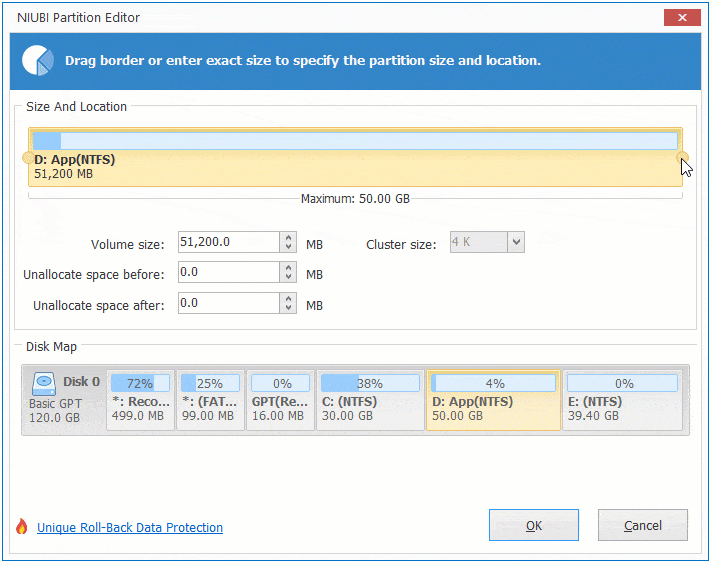
Unallocated space will be made on the right of D drive.
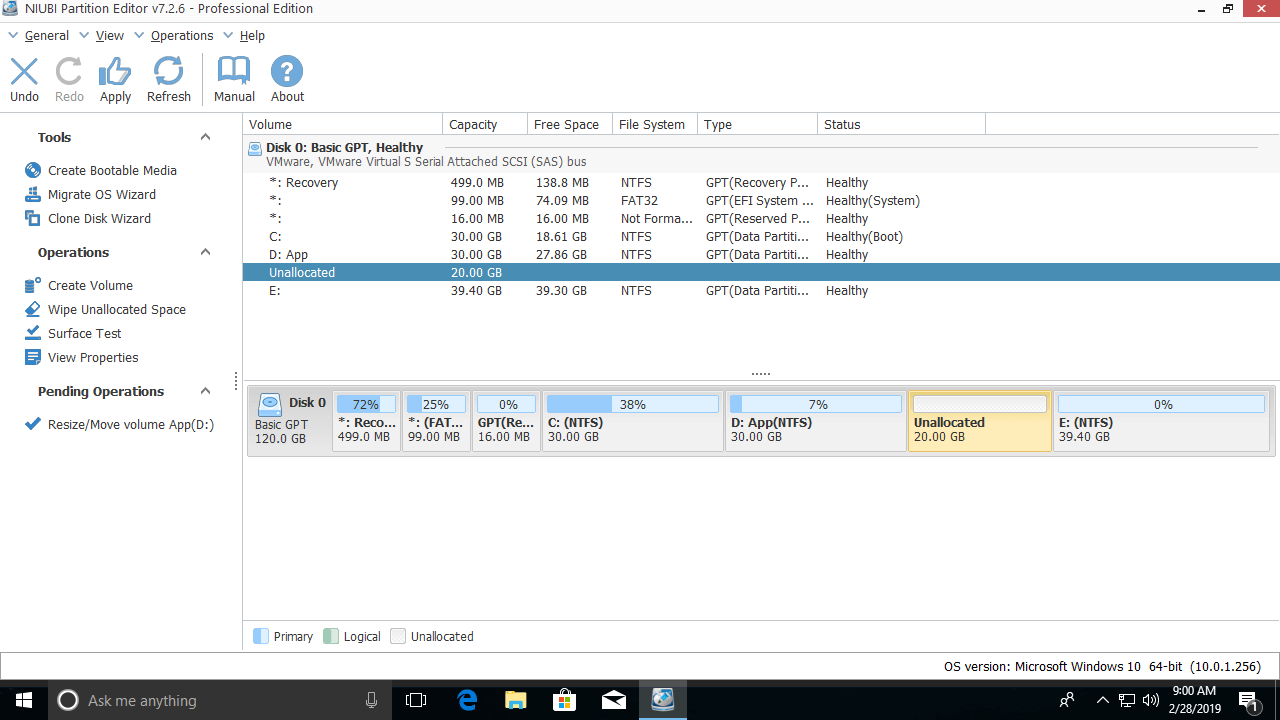
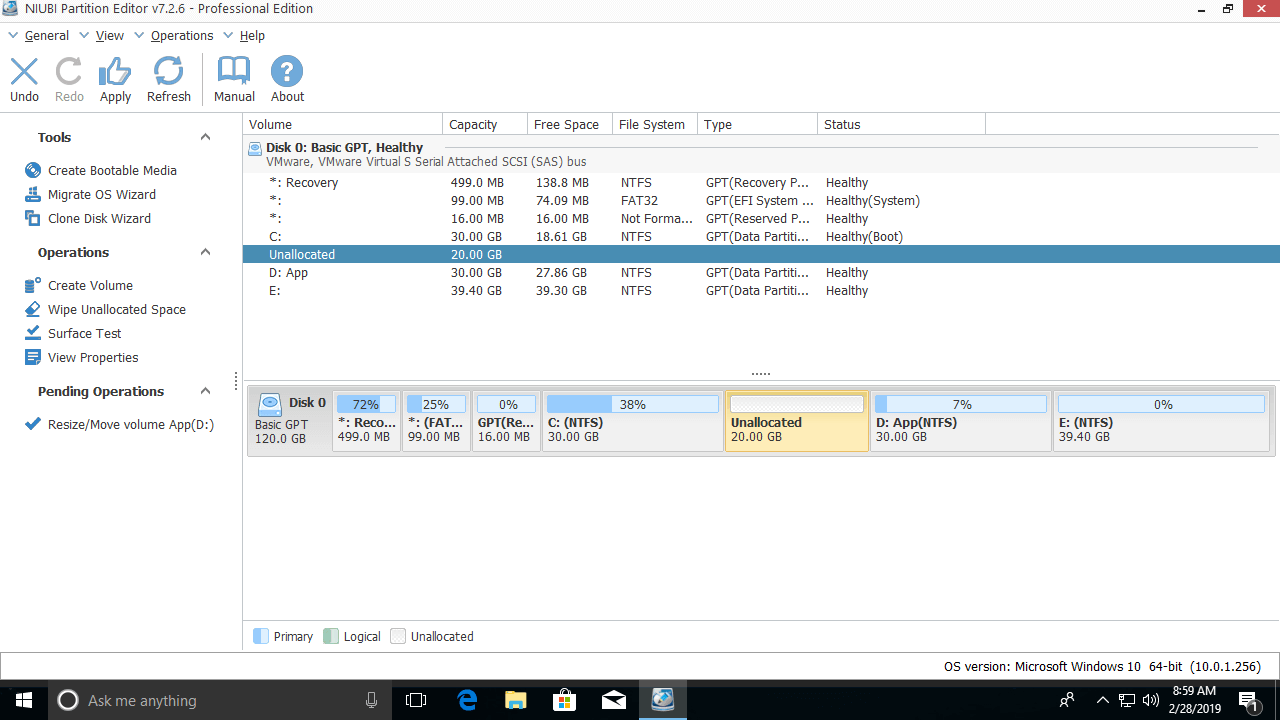
Different with Disk Management or Diskpart that take effect immediately, NIUBI Partition Editor is designed to work in virtual mode to avoid mistake. Only after you click Apply button on top left to confirm, real disk partitions will be changed.
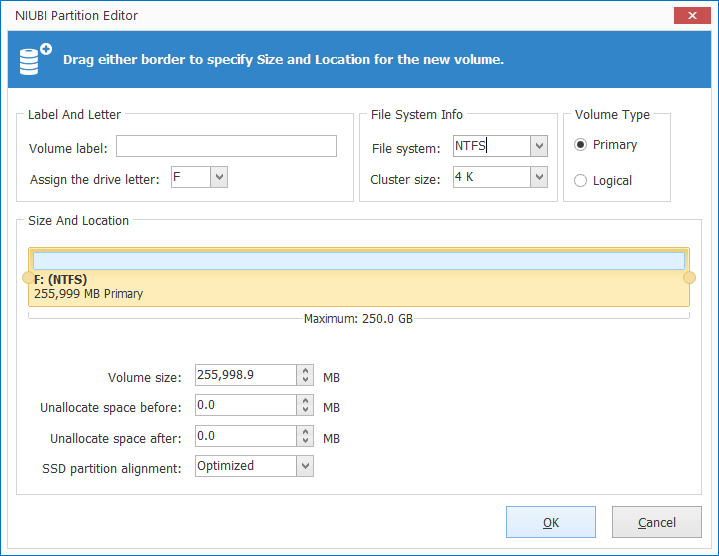
After shrinking a partition to get Unallocated space, you may create more volumes or add this Unallocated space to other partition on the same disk. To create more partitions, right click the Unallocated space and select "Create Volume". You can select partition type, file system, cluster size, add/modify partition label, change drive letter and edit partition size/location in the pop-up window.
Follow the steps if you want to add Unallocated space to C drive or other volume. Besides shrinking and extend volume, NIUBI Partition Editor helps you move, merge, copy, defrag, convert, hide, wipe, create, format partition, scan bad sectors, etc.