
Many server administrators need to resize allocated partitions after running the server for a period of time, especially when the system partition (C:) is running out of space. Nobody wants to waste time reinstalling Windows and programs, or recreating partitions and restoring from a backup. Microsoft offers the "Shrink Volume" and "Extend Volume" functions in the native Disk Management tool to help change partition sizes. However, both functions have limitations. This article explains how to use "Extend Volume" in Server 2012 R2 Disk Management, as well as a better method to extend a partition on Windows Server 2012/2016/2019/2022/2025.
Preconditions to Use "Extend Volume" Function
To increase a partition's size with "Extend Volume" in Server 2012 Disk Management, your disk partition configuration must meet these requirements:
- The partitions to be extended must be formatted with NTFS; other partition types are not supported.
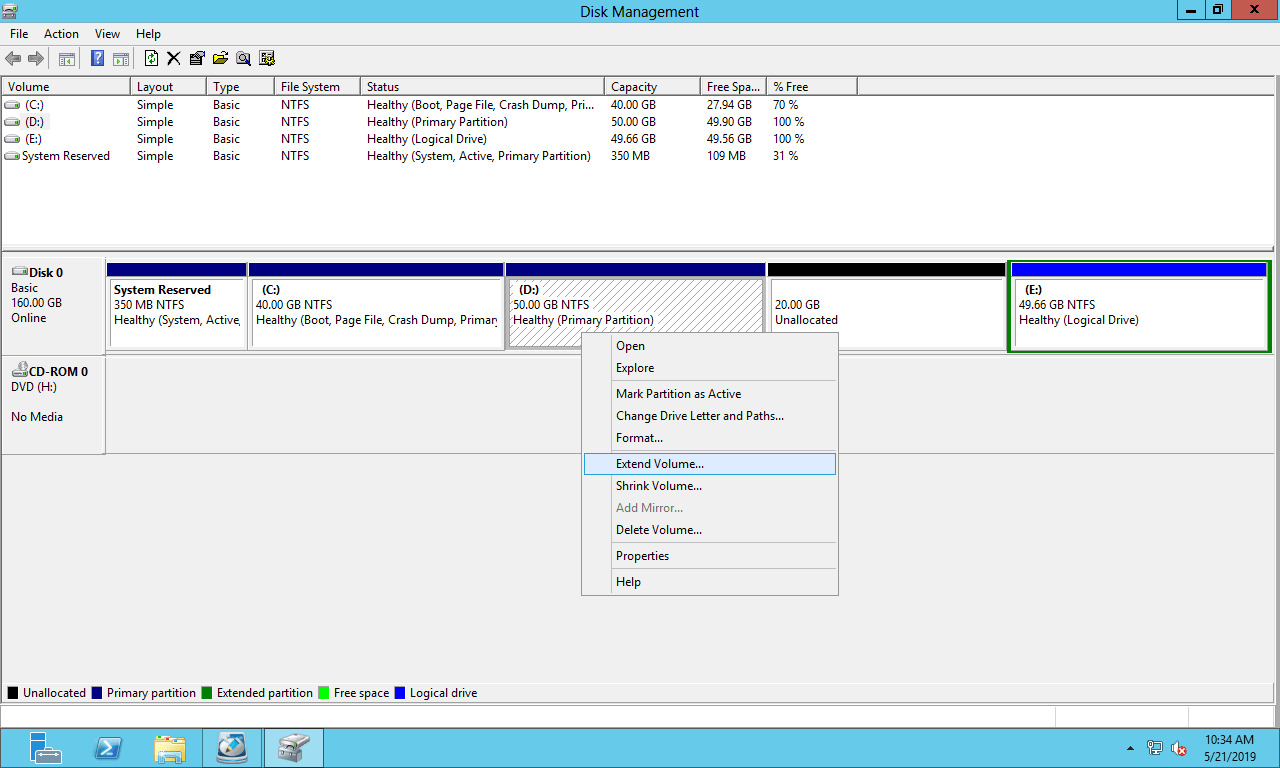
- There must be adjacent unallocated space on the right side of the drive you want to expand.
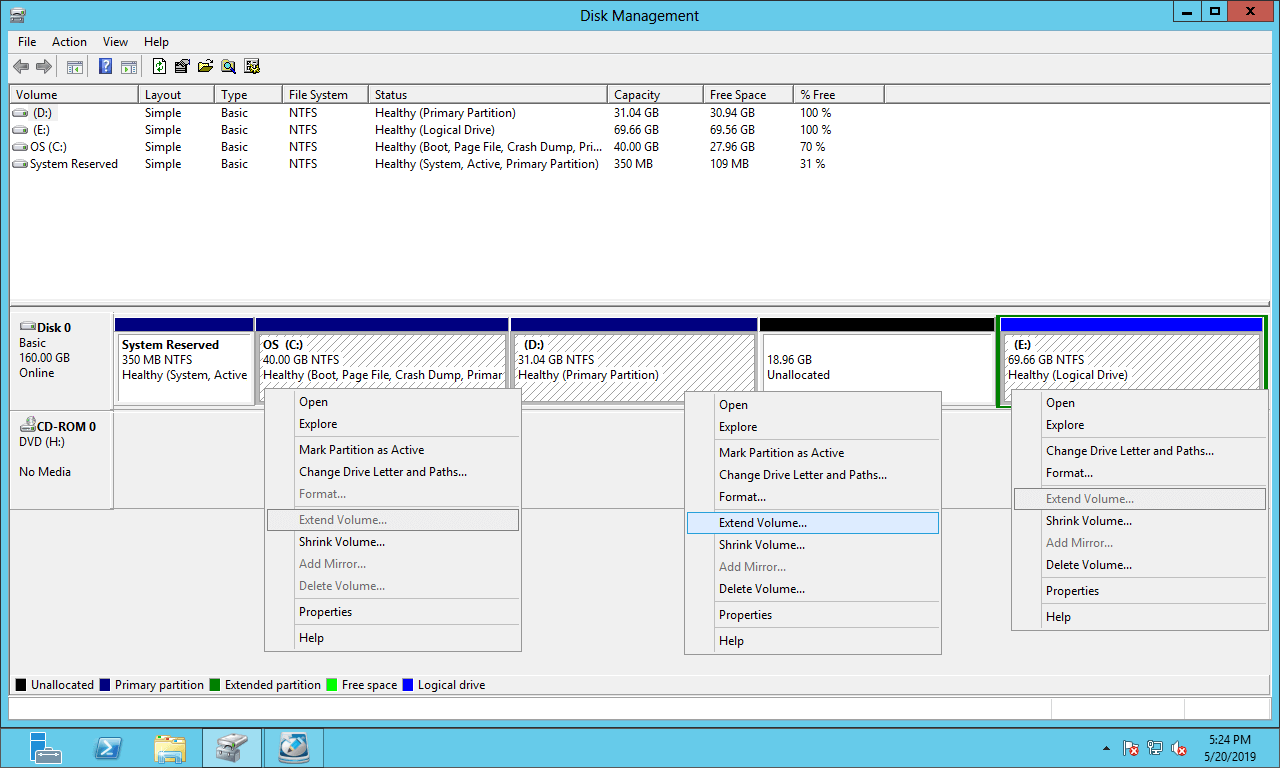
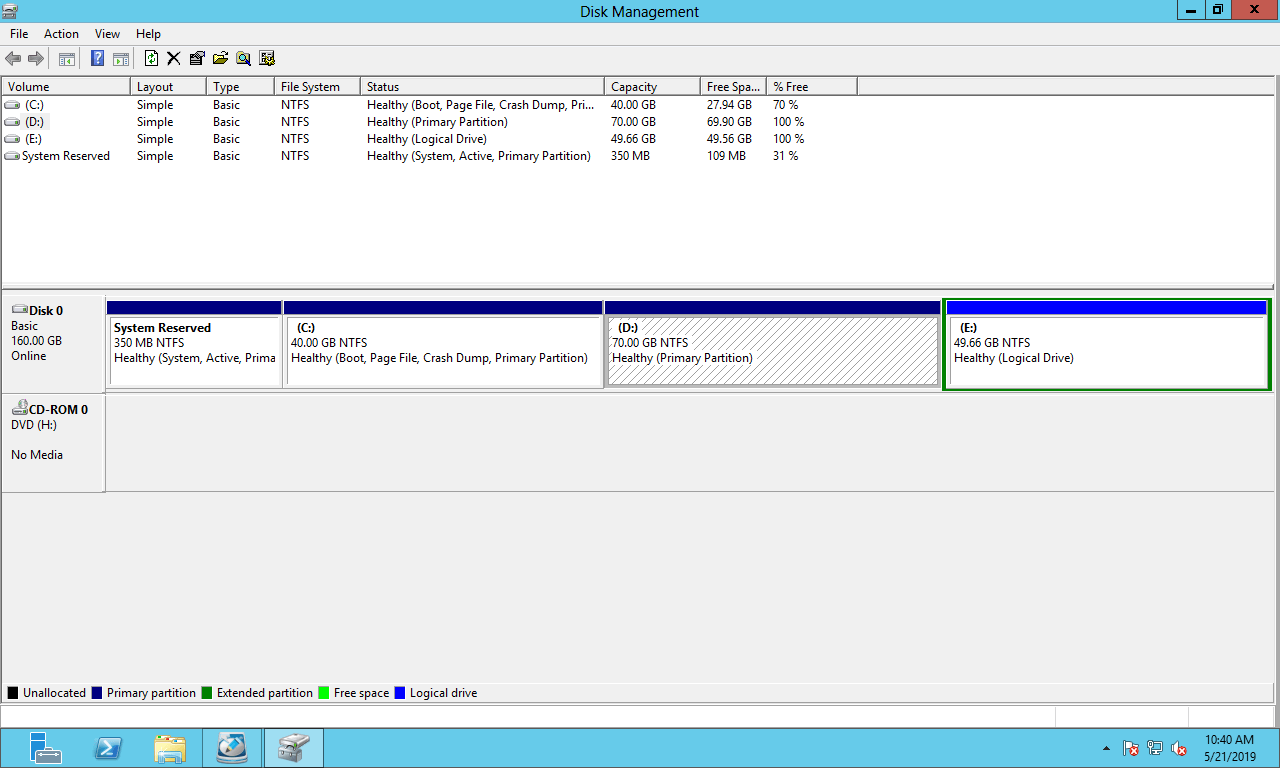
After shrinking partition D with Disk Management, you cannot extend volumes C and E because the unallocated space freed from D is not adjacent to drive C and is located to the left of drive E.
As shown in the screenshot below, "Extend Volume" is disabled for these partitions.
If there are programs or Windows services running from drive D, you cannot delete it to create adjacent unallocated space. Furthermore, if D is a logical drive, you still cannot extend volume C, even after deleting D.
How to Extend a Server Volume with Disk Management
When your disk partition configuration meets the requirements and the right adjacent partition can be deleted, it is very easy to extend a partition with Disk Management. Follow the steps below to extend a volume on Windows Server 2012/2016/2019/2022/2025.
Step 1: Open Disk Management (press Windows and X on the keyboard), right-click the partition (e.g., drive D:) and select "Extend Volume".
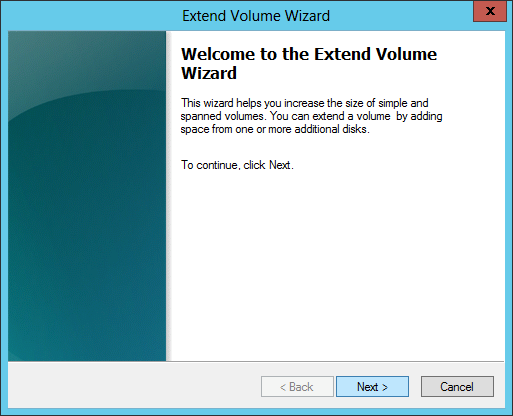
Step 2: The Extend Volume Wizard window will open; simply click Next to continue.
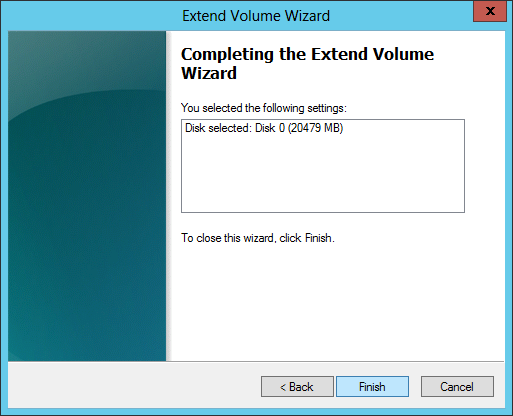
Step 3: The available disk and space are selected by default; click Next to continue or modify them manually.

Step 4: Click Finish to confirm and start extending.
In a short time, drive D is extended by merging the adjacent unallocated space.
Better Way to Extend a Volume with Partition Editor
To extend a volume in Windows Server, NIUBI Partition Editor is a better choice. Compared with the native Disk Management tool, NIUBI Partition Editor offers several advantages. For example:
- It can shrink and extend both NTFS and FAT32 partitions.
- It can create unallocated space on the left or right when shrinking a volume.
- It can merge unallocated space into either adjacent partition directly.
- It can move unallocated space and merge it into any non-adjacent partition on the same disk.
- It offers data protection technology and additional features such as cloning, converting, merging, hiding, wiping, scanning, and more.
Compared with other server partition software, NIUBI Partition Editor offers powerful technology to resize partitions more safely and efficiently:
- Hot Clone - Clone disk partitions in Windows for backup, migration, and fast disk swapping.
- Virtual Mode - All operations are listed as pending for preview, and real disk partitions won't be modified until you click "Apply" to confirm.
- Cancel-at-Will - If you applied incorrect operations, you can safely cancel the ongoing operations at any stage before completion.
- 1 Second Rollback - If any error is detected while resizing partitions, it can immediately and automatically revert the disk partitions to their previous state.
- Advanced File-Moving Algorithm: Resize and move partitions 30% to 300% faster, saving significant time, especially when handling a large number of files.
Download NIUBI Partition Editor and follow the steps in the video to extend a volume on Windows Server 2012 R2 and other versions.
 © 2009 - NIUBI Technology All Rights Reserved. |