Extend hard drive/partition on Windows 7
Windows 10 has been released for a long time, but many people still use Windows 7, because Windows 7 is much better than previous Windows XP and Vista, and there seems to be no much difference with Windows 10. What is the most common issue on Windows 7? Low disk space. Search by Google or in technical forums, there are many similar issue that system C drive is running out of space. In this situation, you can extend hard drive without reinstalling Windows.
In this article, I’ll show you how to shrink other drive to extend partition in Windows 7 (both 32 & 64 bit).
Extend partition in Windows 7 Disk Management
Windows 7 Disk Management has built-in Shrink Volume and Extend Volume feature to change partition size. If a disk drive has adjacent Unallocated space on the right side, you can extend it in Disk Management without third party partitioning software. Note: only in this condition, you can extend disk partition with Windows 7 native Disk Management.
Steps to extend partition drive in Windows 7 DM:
- Press
 and
and  on keyboard to open Run, type diskmgmt.msc and press Enter to open Disk Management.
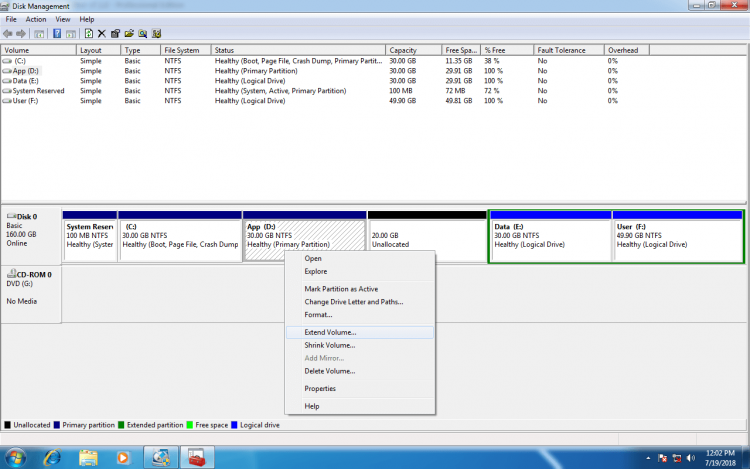
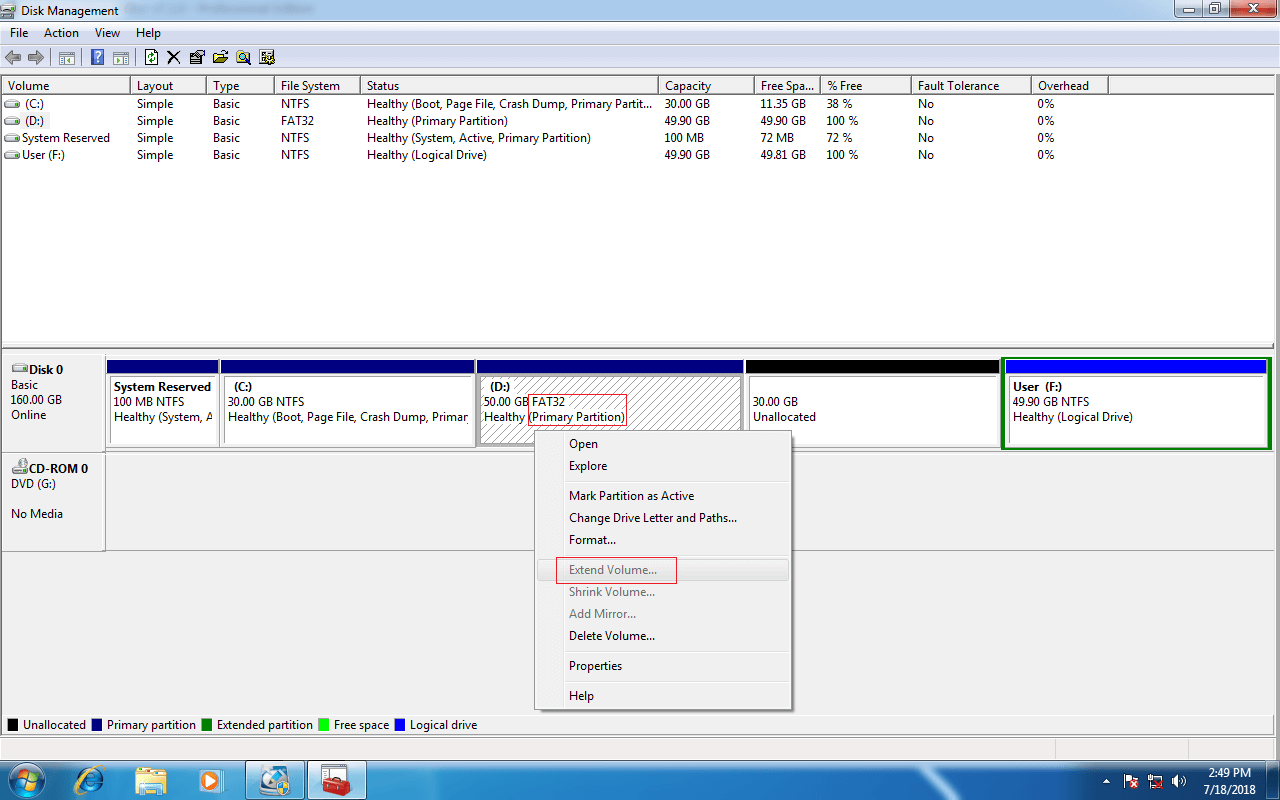
 - Right click drive D and select Extend Volume.
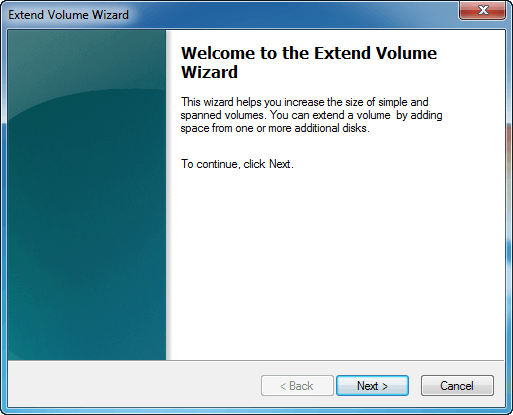
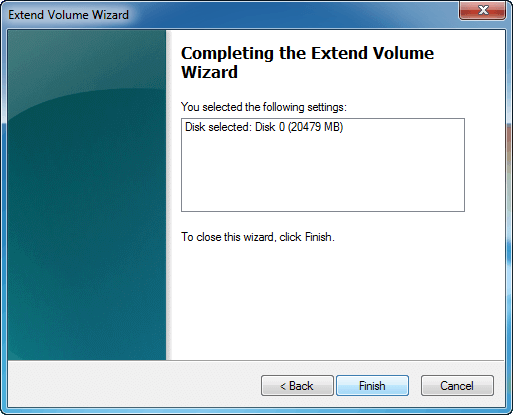
- Click Next in the pop-up Extend Volume Wizard window.
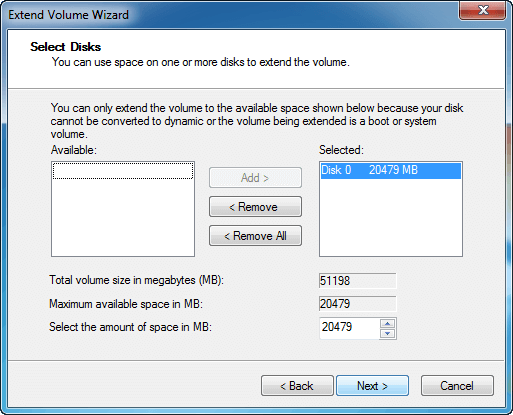
- Available disk and space will be selected by default, click Next to use all Unallocated space or change the amount of space manually.
- Click Finish to confirm and begin extending partition.

Drive D will be extended in a short time.
Restrictions to extend disk partition with DM
Windows 7 native Disk Management seems to be a semi-finished utility, because its advanced Extend Volume functionality doesn’t work in most configurations. There are many restrictions using this tool, thus, you have to use 3rd-party software to extend hard drive in Windows 7.
Restriction 1:
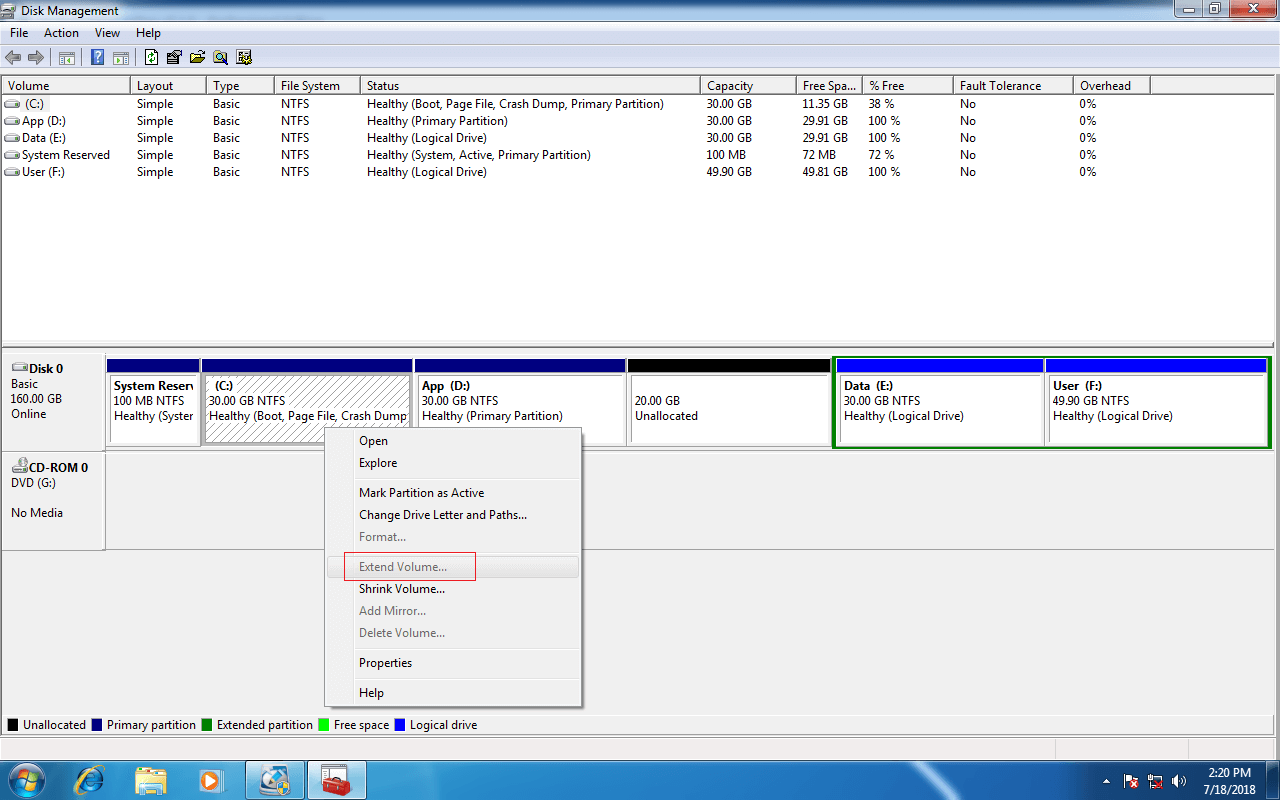
From Microsoft explanation, to extend hard drive partition with Extend Volume, there must be adjacent Unallocated space on the right side. But when you shrinking drive D with Shrink Volume, Unallocated space is generated on the right side of D, so if you right click C drive, Extend Volume is grayed out. That means, you cannot extend C drive except that you can move Unallocated space to left side of D.
Restriction 2:
Shrink Volume cannot generate Unallocated space on the left side, so some people try to delete partition to get adjacent Unallocated space. It works if this partition is Primary, but if this drive is a Logical partition, you cannot extend Primary partition on Windows 7 even if you delete it.
Note: do NOT delete drive D if programs are installed in it.
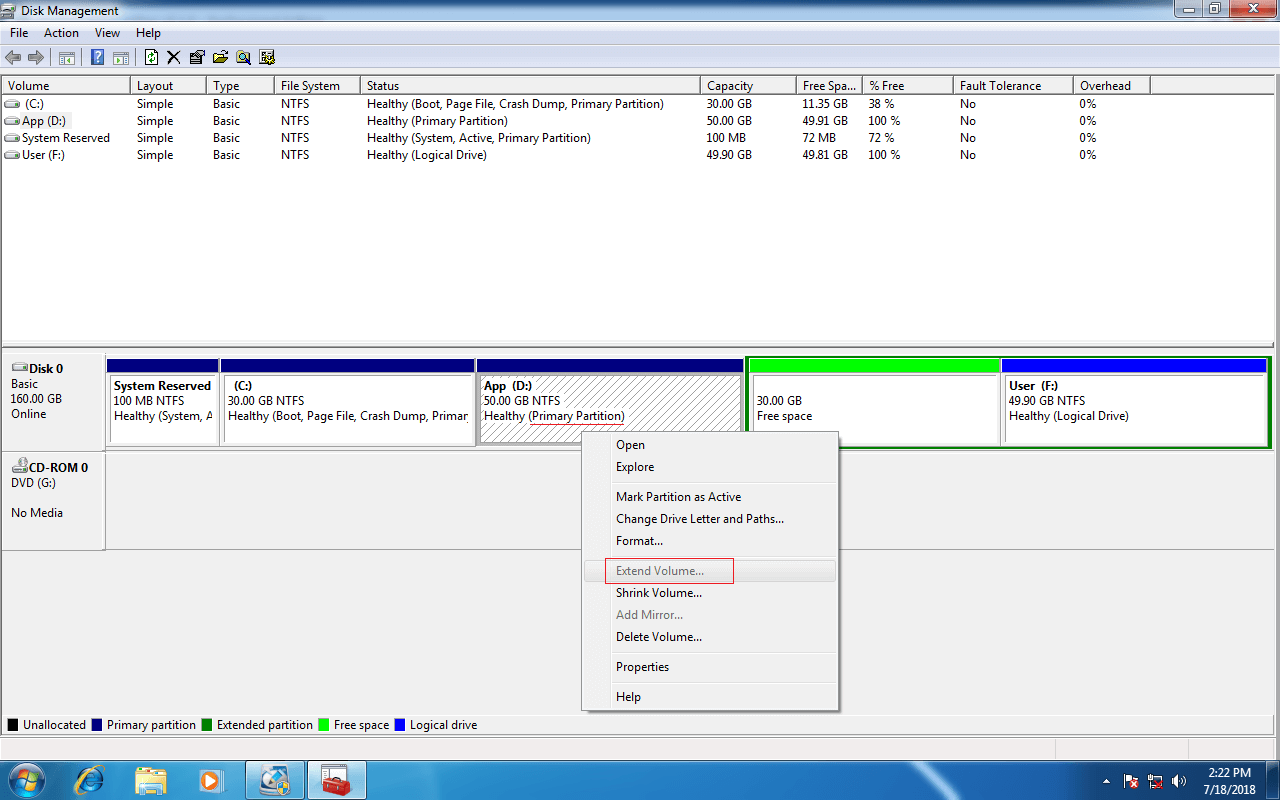
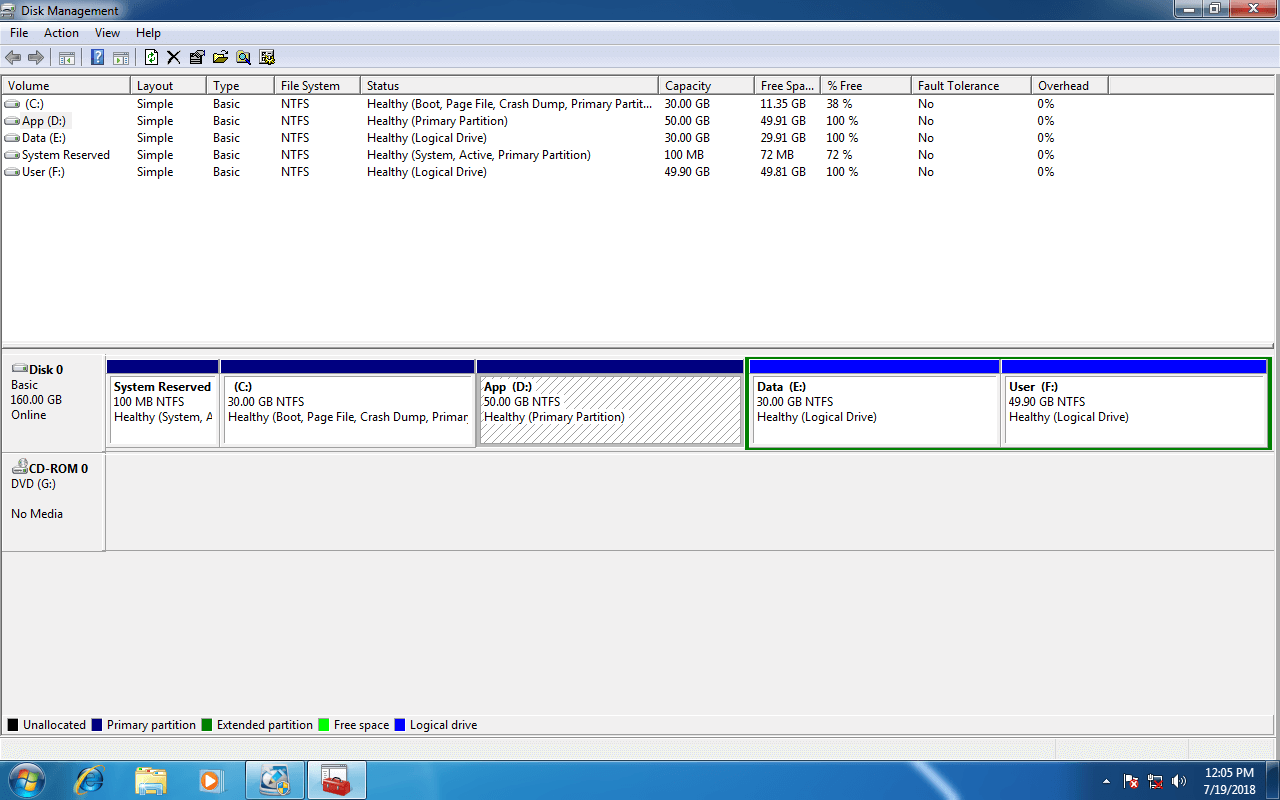
As you see in my Windows 7 Disk Management, drive E is converted to Free space instead of Unallocated after deleting. When I right click drive D, Extend Volume is disabled.
Restriction 3:
Extend Volume only supports NTFS style partition, FAT32 and other types of partitions cannot be extended under Windows 7 Disk Management.
Extend hard drive with partition software
Comparing with Windows 7 native Disk Management, professional partition software such as NIUBI Partition Editor has more advantages, for example:
- Both NTFS and FAT32 drives are supported to shrink and extend.
- Much easier, you just need to drag and drop on the disk map to resize partition.
- Unallocaetd space can be produced on either side when you shrinking a drive.
- You can extend partition on Windows 7 with Unallocated on either side.
Comparing with other partitioning software, NIUBI Partition Editor has more advantages, too, for example:
- It is integrated with unique 1 Second Rollback technology to ensure system and data intact.
- With the help of its Cancel-at-will technology, you can cancel the ongoing operations at any progress without worrying about losing data.
- Thanks to its unique file-moving algorithm, NIUBI is 30% – 300% faster that other tools.
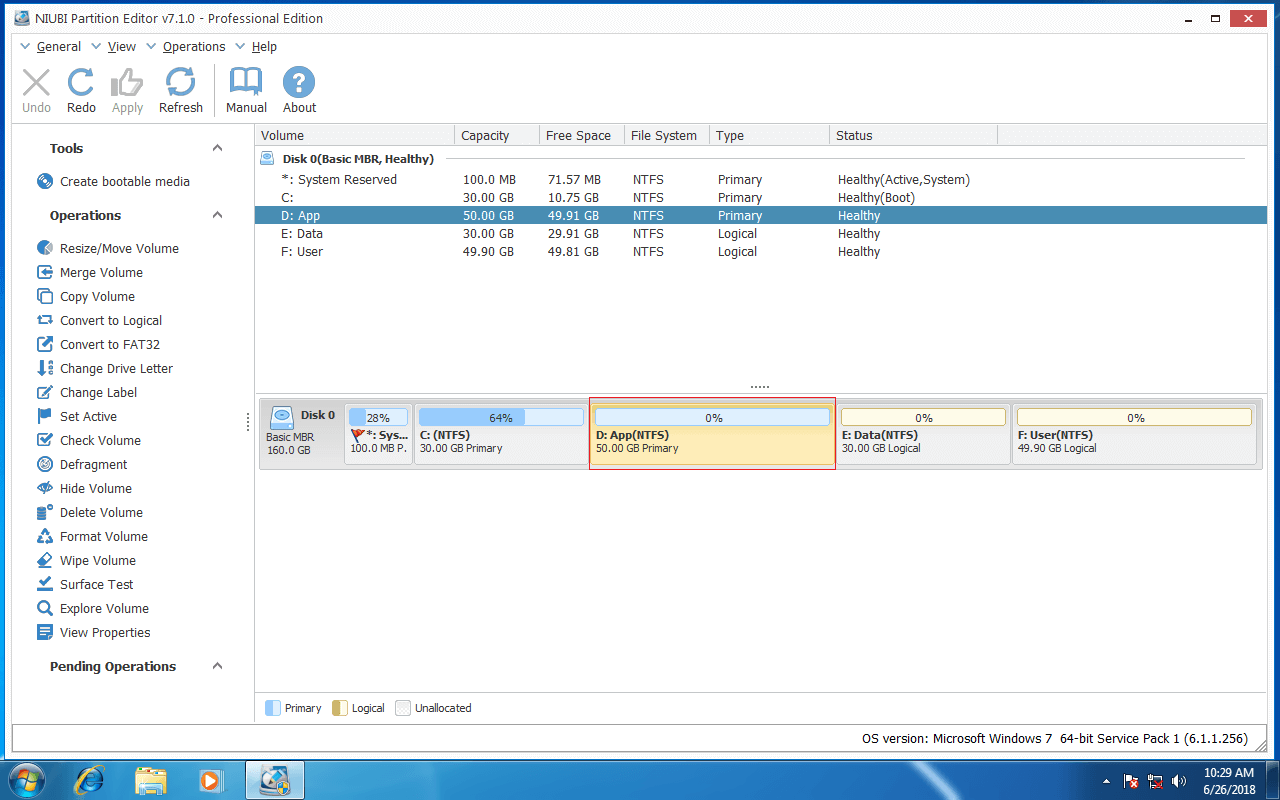
Download NIUBI Partition Editor, you’ll see all disks with partition layout on the right side, which is similar with Windows Disk Management
Steps to extend partition on Windows 7 with NIUBI:
Step 1: Right click D and select Resize/Move Volume, drag left border rightwards to shrink D in the pop-up window.
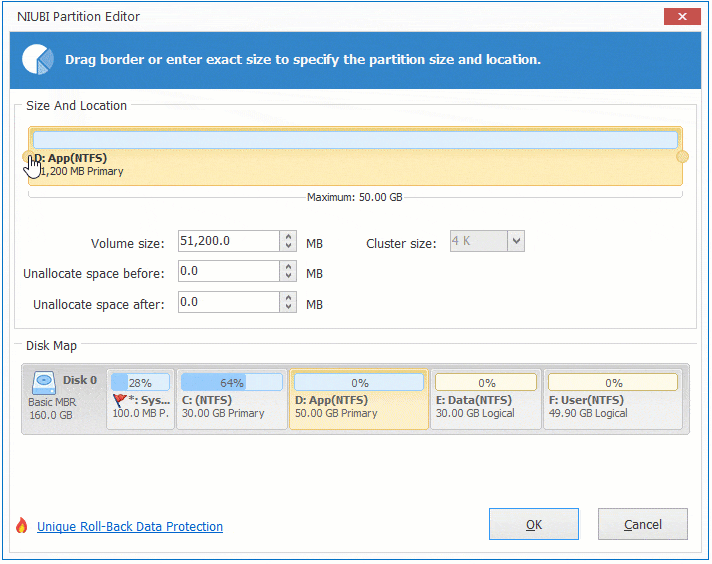
20GB Unallocated space is produced on the left side of drive D.
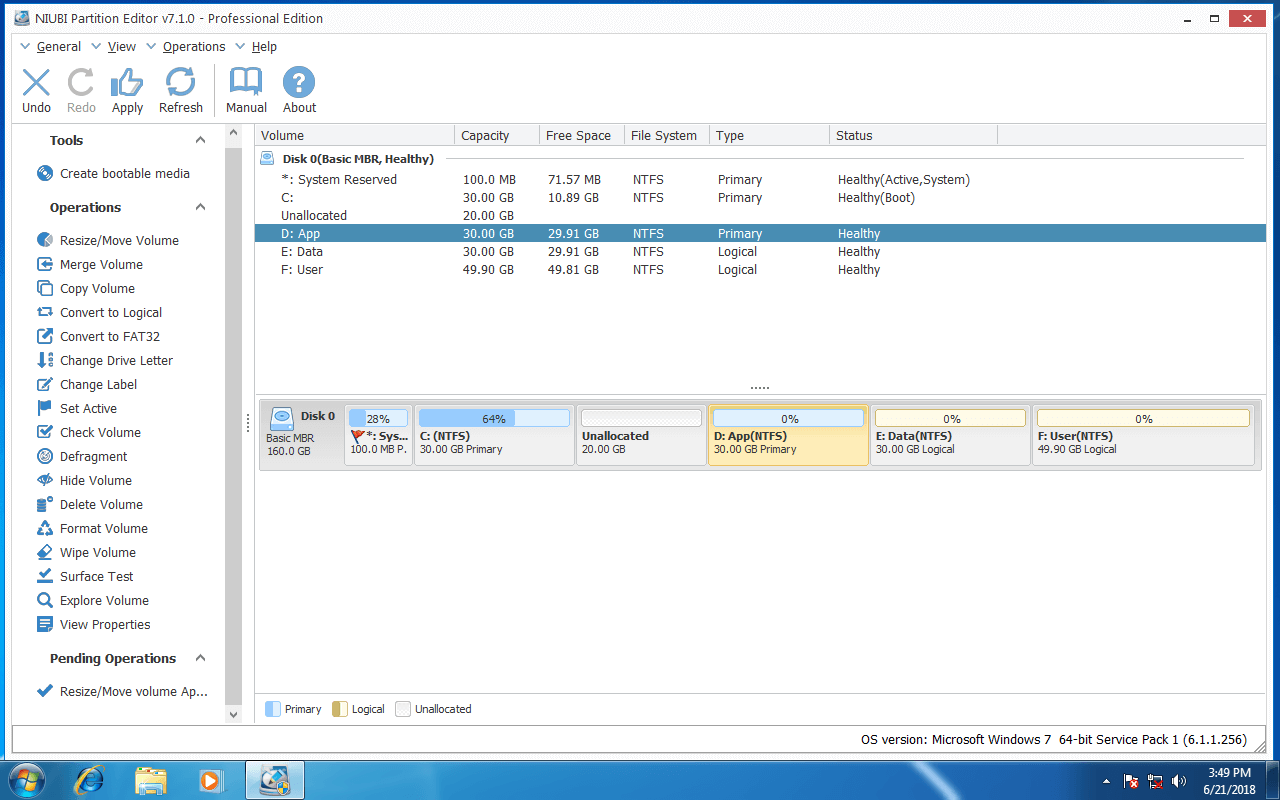
Step 2: Right click drive C and select Resize/Move Volume again, drag right border rightwards to occupy the Unallocated space.
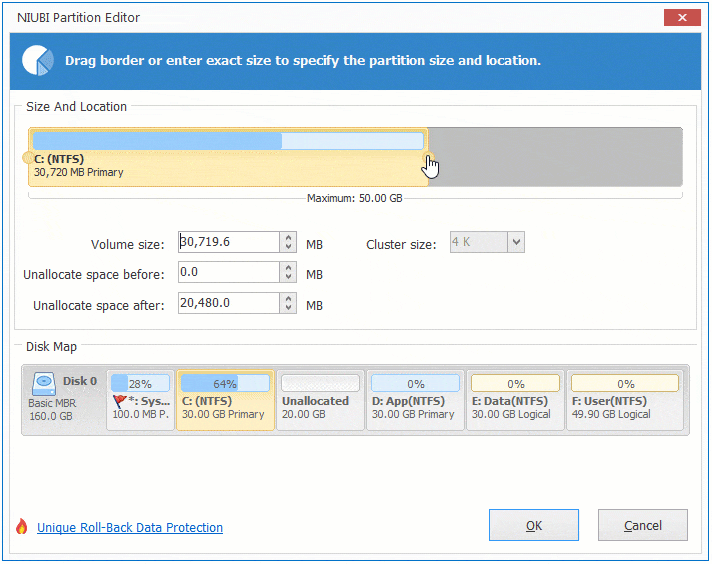
Partition C is extended to 50GB.
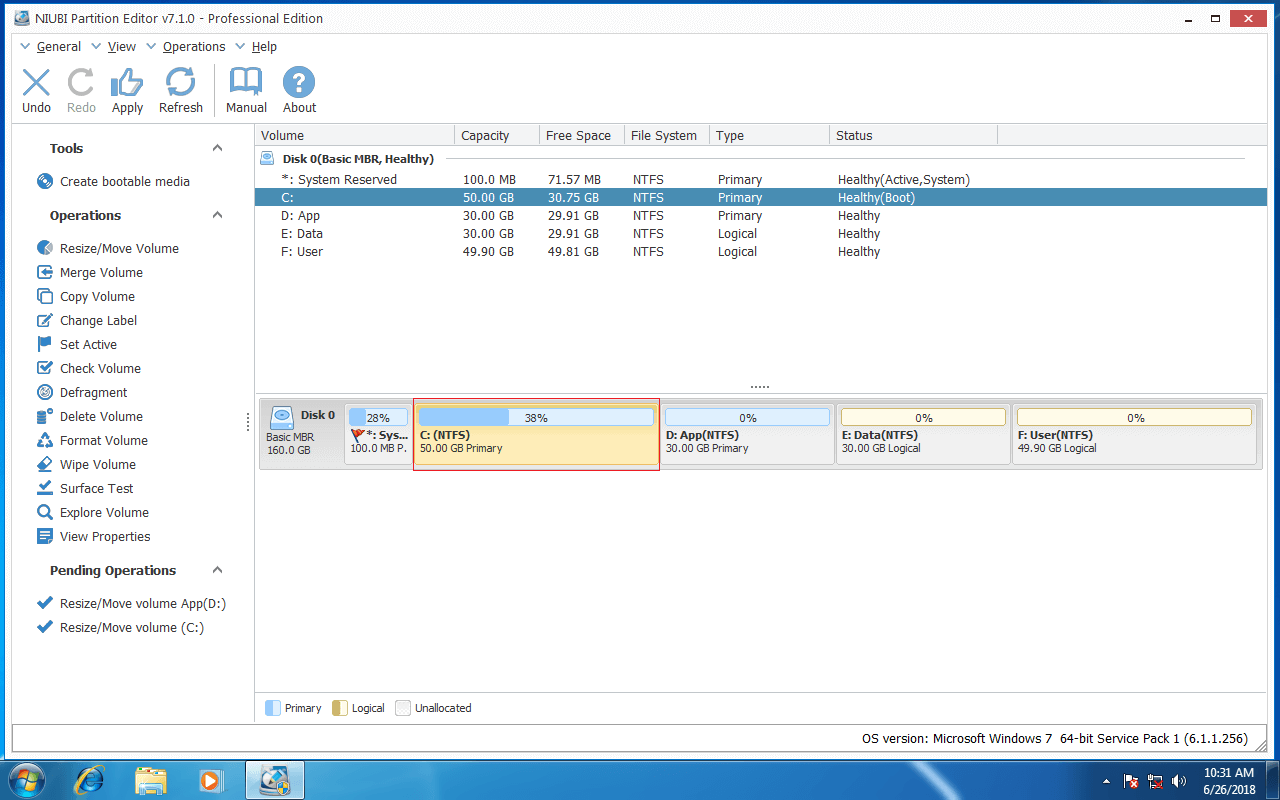
Tips: To avoid mistake, NIUBI Partition Editor works in virtual mode. The operations you do won’t take effect instantly, instead, they’ll be listed as pending on bottom left. You can click Undo on top left to cancel the unwanted operations, or click Apply to confirm.
Video guide to extend hard drive partition
What to do if there is not plenty of free space in the adjacent drive D? It doesn’t matter, free space inside of any other drives can be transferred and added to C drive. Note: existing Unallocated space or any other drive with free space should be in the same hard disk. No partitioning software can add space to C drive from another disk.
Watch the video how to extend partition in Windows 7 (32 & 64 bit):
In Summary
Windows built-in Disk Management has limited ability to shrink and extend partition, the better choice is running professional partition manager software. Because of its data protecting ability and other advantages, NIUBI Partition Editor can help you shrink and extend disk partition on Windows 7, 8, 10 safely and easily.