This article introduces how to change partition size in Windows 7 32/64 bit, 3 ways to change size of partition volume without losing data.
After running your Windows 7 laptop or desktop for a period of time, you need to change the size of partition volume. For example, the system C drive is getting full so you need to expand it and increase free space. To do that, you can decrease a large drive to get Unallocated space and then add into C drive.
To change partition size in Windows 7, there are two kind of tools: Windows native Disk Management and third party partition software. Disk Management is safe in most cases, but it has many restrictions. 3rd-party partition software is much more powerful, but you'd better run the reliable and safe one, otherwise, there is potential data loss risk.
How to change partition size with Disk Management
Windows 7 Disk Management has the built-in Shrink Volume function to decrease partition size and Extend Volume to increase partition size. However, only NTFS partitions are supported.
How to decrease partition size:
- Press Windows and R together on the keyboard, type diskmgmt.msc and press Enter to open Disk Management.
- Right click the NTFS partition that you want to decrease and select Shrink Volume.
- Enter an amount of space and click Shrink to execute.
How to increase partition size:
Note: the partition that you want to increase must be formatted as NTFS, and there must be adjacent Unallocated space on its right.
- Right click the NTFS partition and select Extend Volume.
- Simply click Next till Finish in the pop-up Extend Volume Wizard windows.
If you want to extend a partition by shrinking other one, it is impossible with Disk Management.
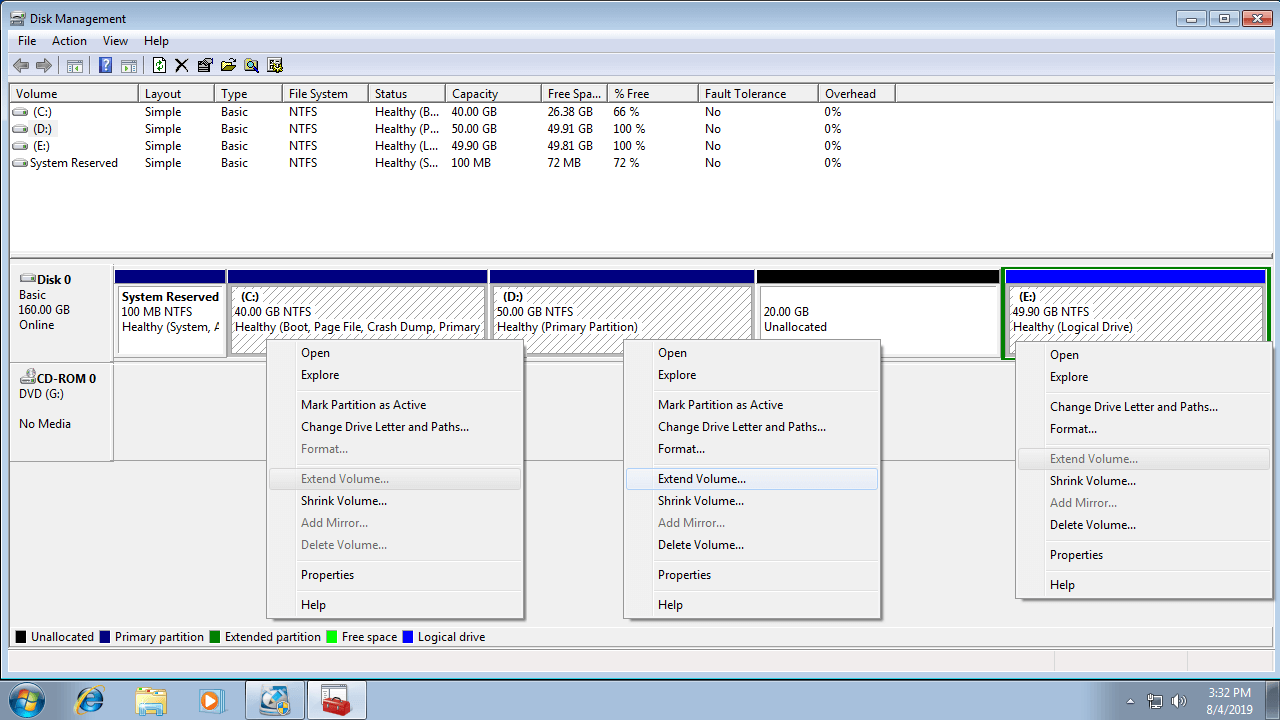
As the screen shot shows, Disk Management can't extend volume C: or E: after shrinking D.
This is because:
- Shrink Volume function can only make Unallocated space on the right side of a partition while shrinking.
- Extend Volume function can only combine Unallocated space to the contiguous partition on its left.
Unallocated space shrunk from D is non-adjacent to drive C and is on the left side of E, therefore, Extend Volume is disabled.
If D is Logical partition, you still cannot extend C drive even by deleting it.
How to change volume size with NIUBI Partition Editor
Comparing with Disk Management, NIUBI Partition Editor supports both NTFS and FAT32 partitions, it can generate Unallocated space on either side while shrinking partition. Unallocated space can be moved and combined to any volume on the same disk. To change partition size with NIUBI, you just need to drag and drop on the disk map.
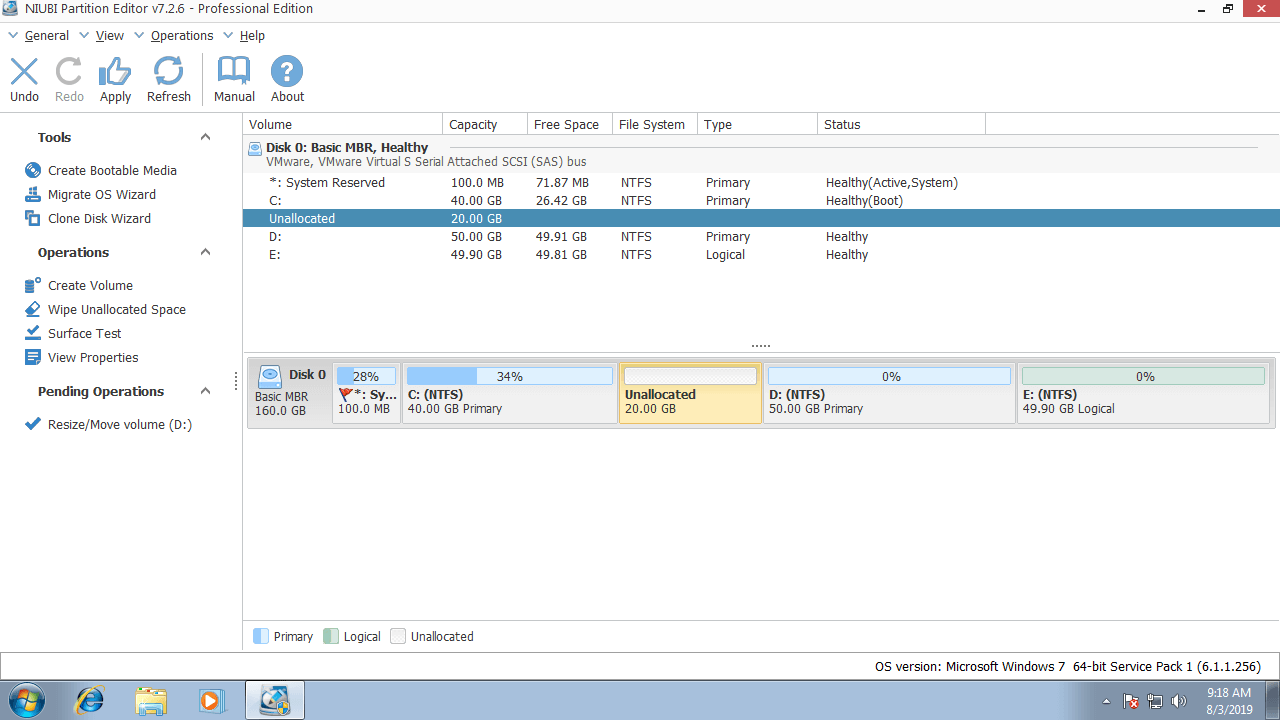
Download it and you'll see the main window with disk partition structure and other information. In my Windows 7 computer, there are drive C, D, E and a system reserved partition in Disk 0.
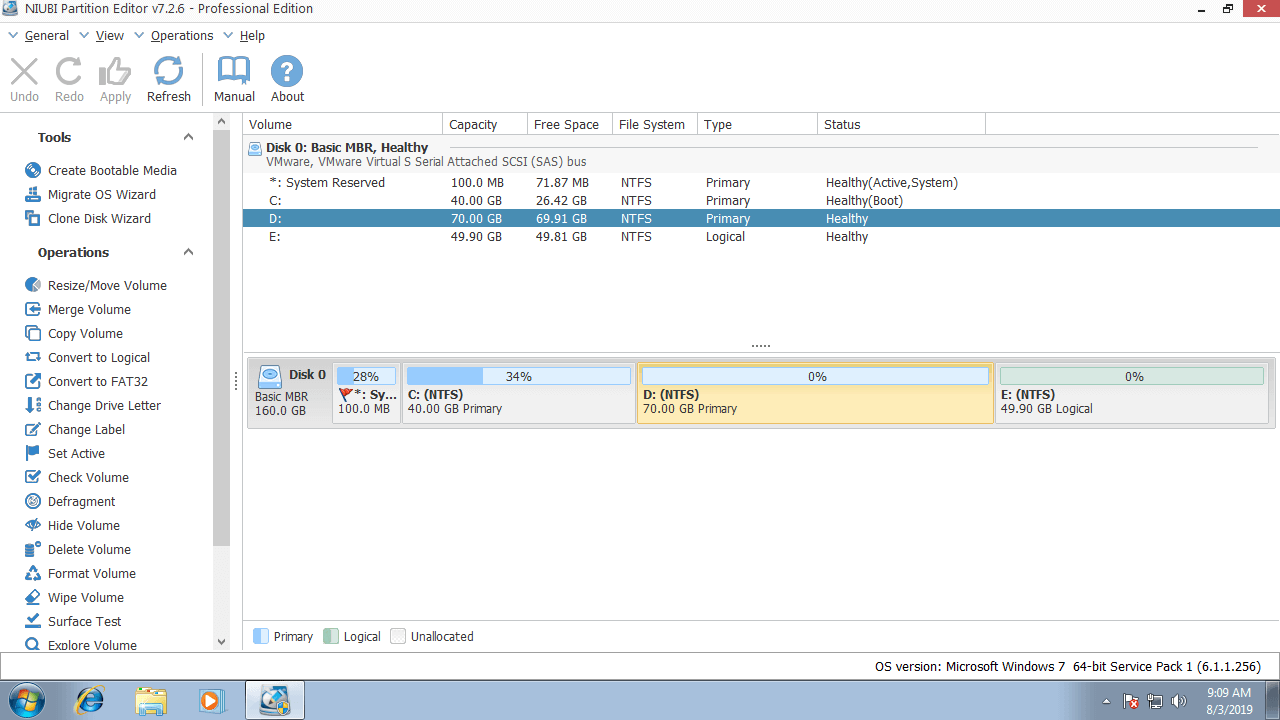
For example how to change size of partition C and D in Windows 7 32/64 bit:
Step 1: Right click the right contiguous partition D (or E: in some computers) and select "Resize/Move Volume", in the pop-up window, drag left border towards right or enter an amount in Unallocated space before.
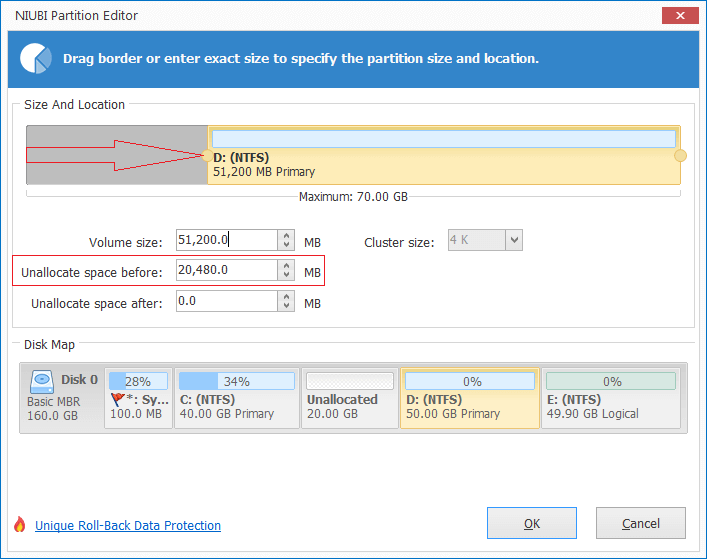
Then drive D is decreased and some Unallocated space is made on the left.
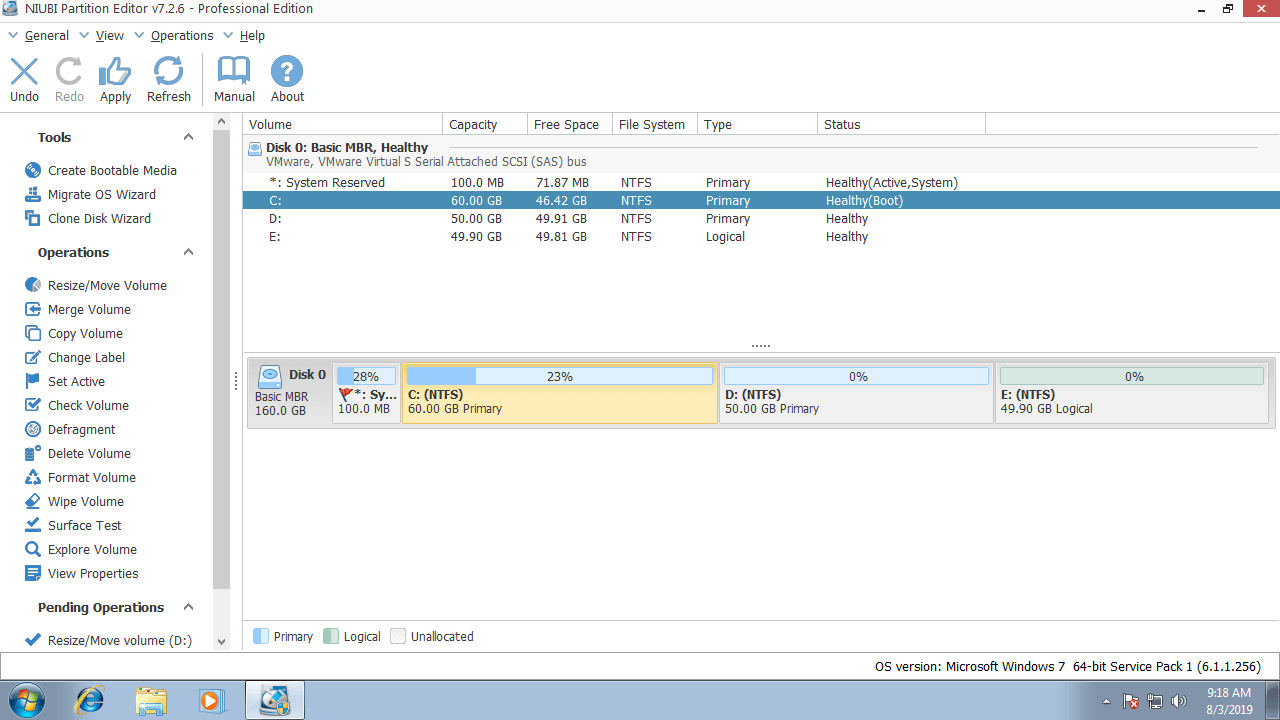
Step 2: Right click drive C and select "Resize/Move Volume" again, drag right border towards right to combine this Unallocated space.
Then C drive is changed from 40GB to 60GB.
Step 3: click Apply on top left to execute. (Any operations before this step only work in virtual mode, add real partitions won't be changed.)
If you want to shrink a partition to expand any non-adjacent volume, such as drive E and C in my computer, there is an additional step to move partition before adding Unallocated space to C drive.
Watch the video how to change partition size in Windows 7 with NIUBI:
Note: the partitions that you want to shrink and extend must be on the same disk, if there is no available free space in a disk, you can clone to a larger one with NIUBI, and then extend partition with additional disk space.
How to change size of virtual disk partition
If there is available free space in a disk, there is no difference to change size of virtual partition, no matter you use any types of hardware RAID array or use VMware/Hyper-V virtual machine.
If you use Windows 7 as guest Operating System in virtual machine and there is no available free space in a disk, you can expand this virtual disk without copying.
After expanding disk, additional space is shown as Unallocated on the end of original disk, then follow the step in the video to combine the Unallocated space to other partition(s).
In Summary
To change partition size in Windows 7, the built-in Disk Management is not the best tool because of many limitations. In most cases, you still need third party software. Better than other tools, NIUBI Partition Editor has powerful 1 Second Rollback, Cancel-at-will and Virtual Mode technologies to protect system and data. It also helps you do many other operations such as merge, defrag, wipe, hide, format, create, scan partition, etc.