This article introduces how to extend volume in Windows 7 32/64 bit without losing data, extend Windows 7 partition with Disk Management and free partition editor.
Windows 7 is much better than previous Windows Vista and XP, but the same with the old versions, low disk space issue still exists in Windows 7. Most of the Windows 7 users feedback that C drive is running out of space. The smaller C drive and longer computer running time, the higher probability. In this situation, you can extend Windows 7 volume without reinstalling operating system and programs.
To do this, Windows native Disk Management can help you under specific condition. Because of many limitations, you'll encounter trouble while extending Windows 7 partition with this tool. Professional disk partition software is better choice.
How to extend partition in Windows 7 using Disk Management
Windows 7 Disk Management inherited Extend Volume functionality from previous Windows Vista, which can be used to extend system partition and data volumes without losing data on the fly. However, before extend a partition (such as C:), you must delete the contiguous partition (such as D: or E:). I'll explain the reason in next section.
Steps to extend volume C in Windows 7 using Disk Management:
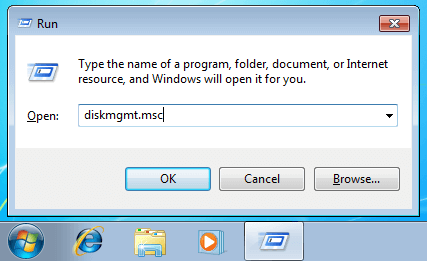
① Press Windows and R together on the keyboard, press diskmgmt.msc and press Enter to open Disk Management.
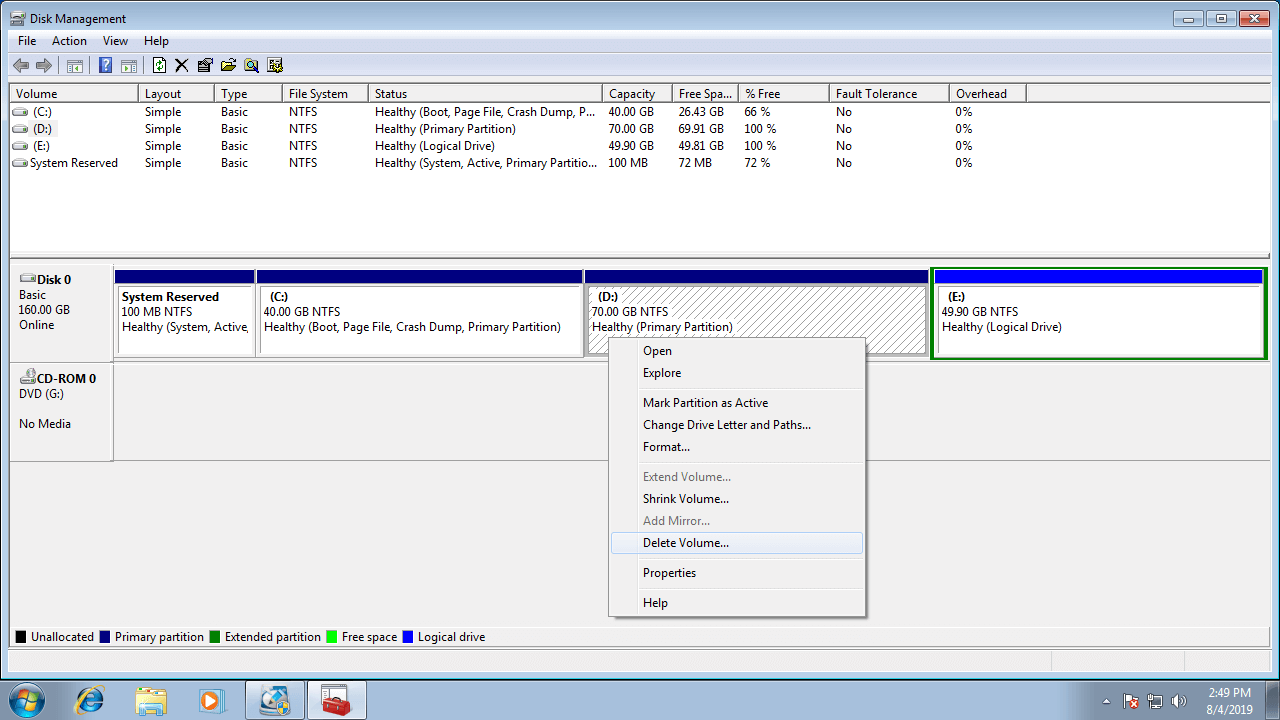
② Right click D (the partition contiguous and on the right) and select Delete Volume.
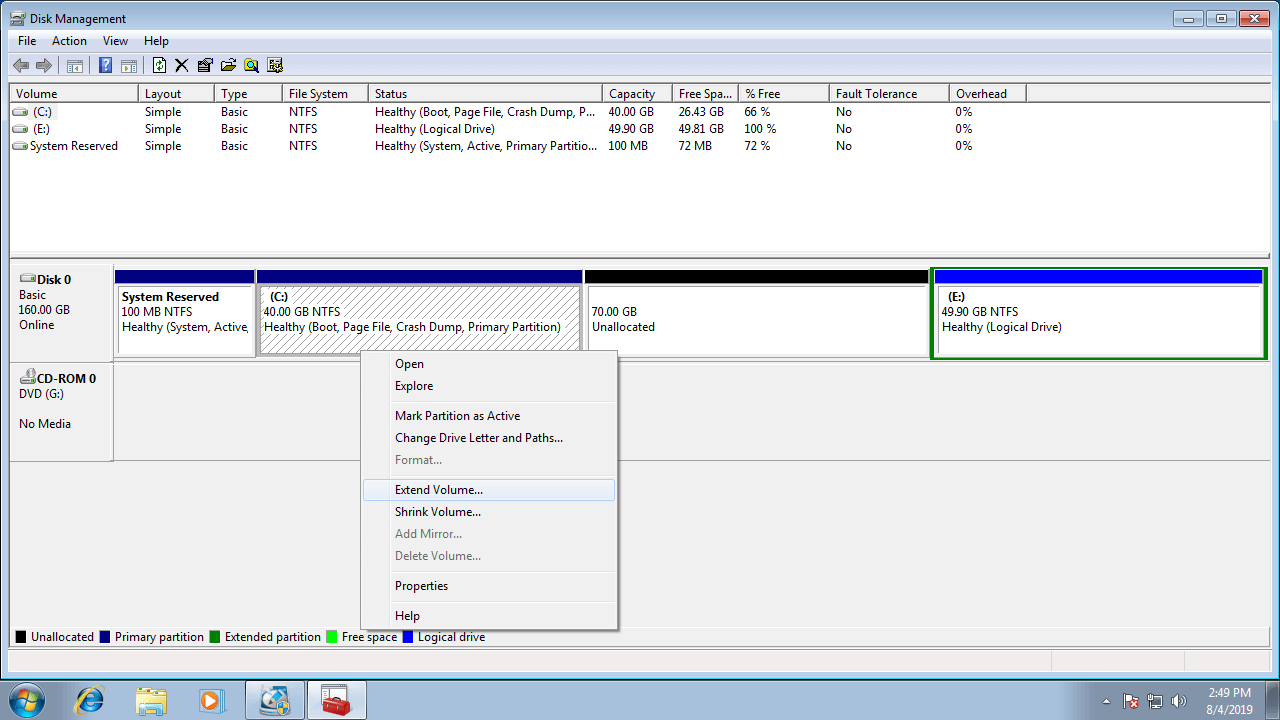
③ Right click system C drive and select Extend Volume.
④ Simply click Next in the pop-up Extend Volume Wizard window.
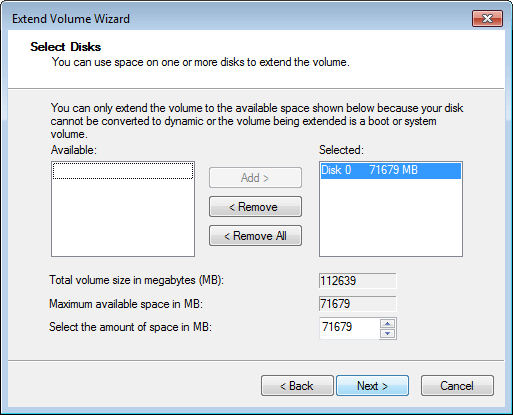
⑤ Available disk space is selected by default, click Next to continue.
⑥ Click Finish to confirm and begin extending.
In a short while, system partition C is extended.
Do not delete D drive if you installed programs into it, otherwise, they'll be invalid even if you transfer all files to other partition.
Windows 7 Extend Volume greyed out/disabled
There is another Shrink Volume function in Disk Management, why deleting drive D to expand C? This is because that Extend Volume will be grayed out after you shrinking any other partitions. This is the common issue encountered by Windows computer users.
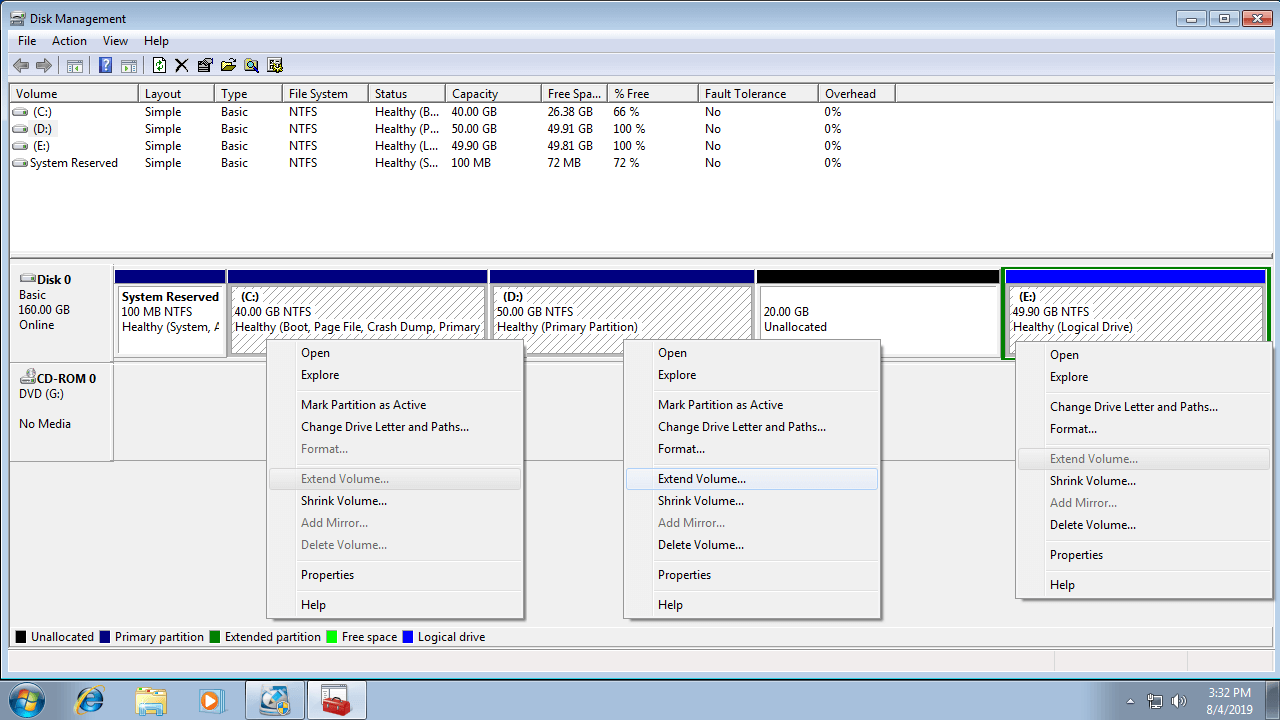
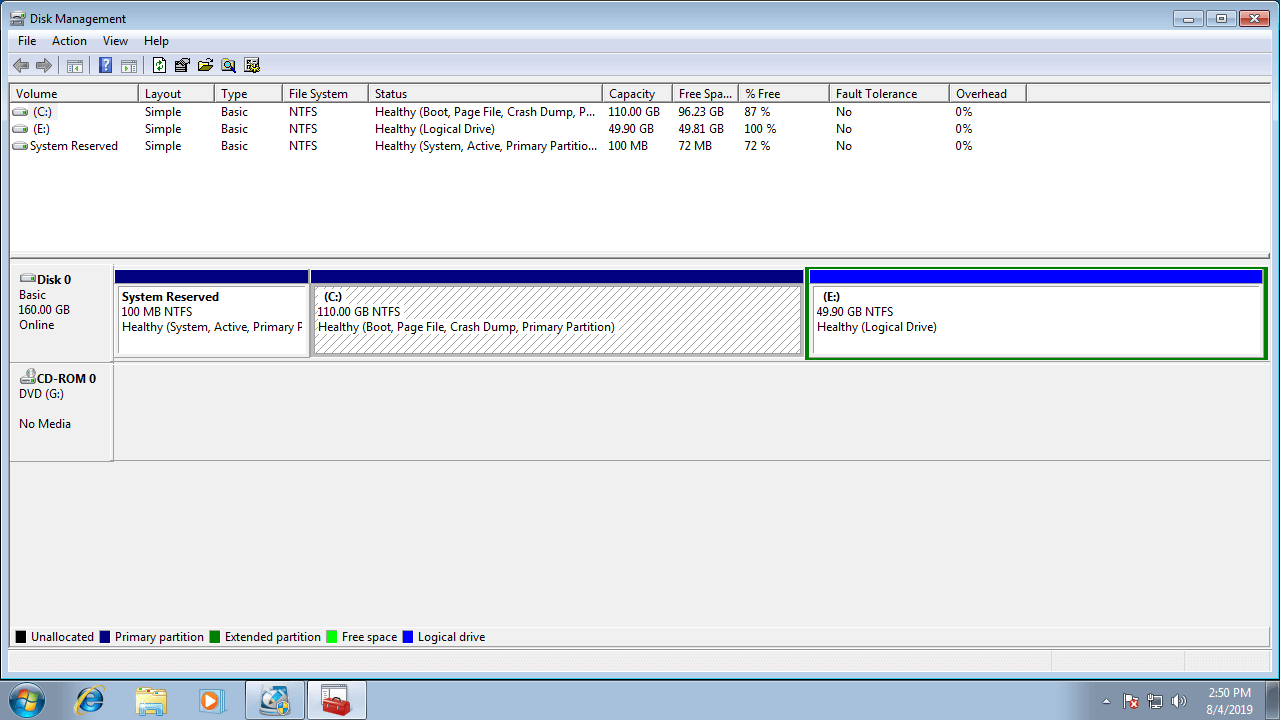
As you see in the screen shot, Extend Volume is disabled for both drive C: and E: after shrinking D.
When you shrinking the adjacent drive D with built-in Shrink Volume feature, Unallocated space can only be made on the right. But to expand C drive with Extend Volume, Unallocated space must be on the left side of D drive.
In a word, Extend Volume cannot extend Unallocated space to the right contiguous or any non-adjacent partition.
When extending Windows 7 partition with Disk Management, you may encounter following additional issue:
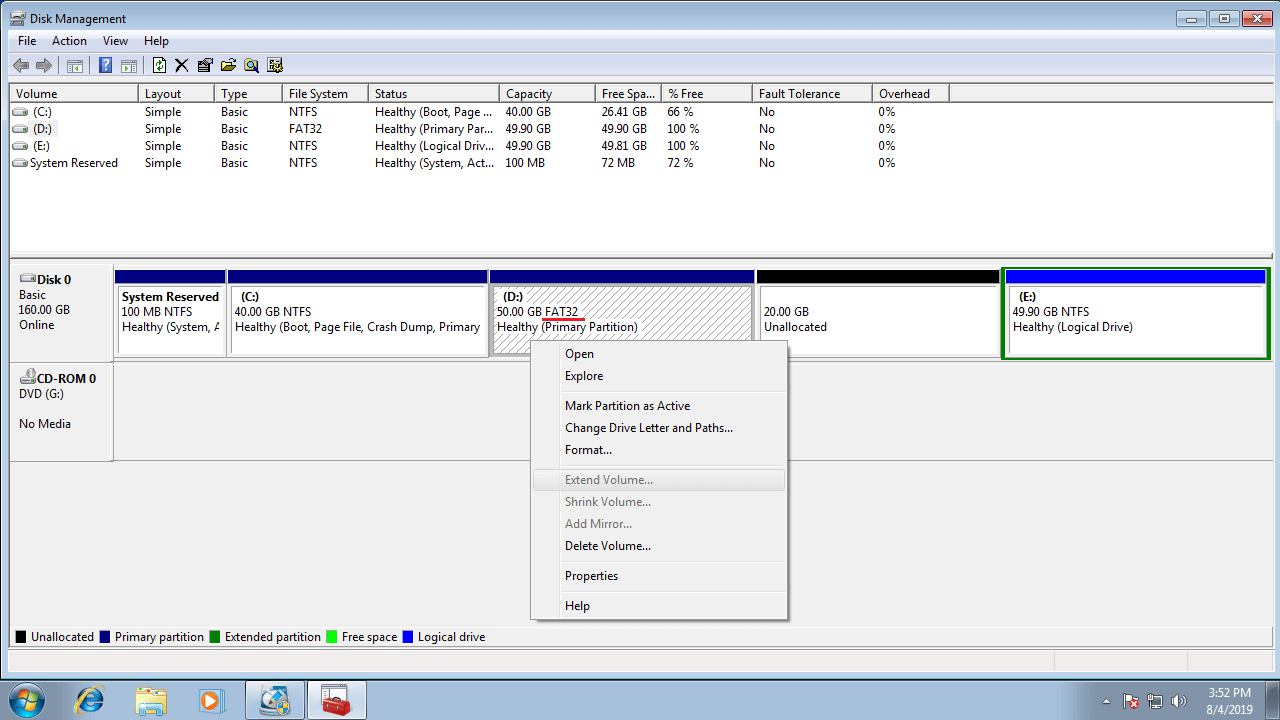
Only NTFS partitions are supported, FAT32 and any other types of partitions can't be extended via Disk Management even if there is right contiguous Unallocated space.
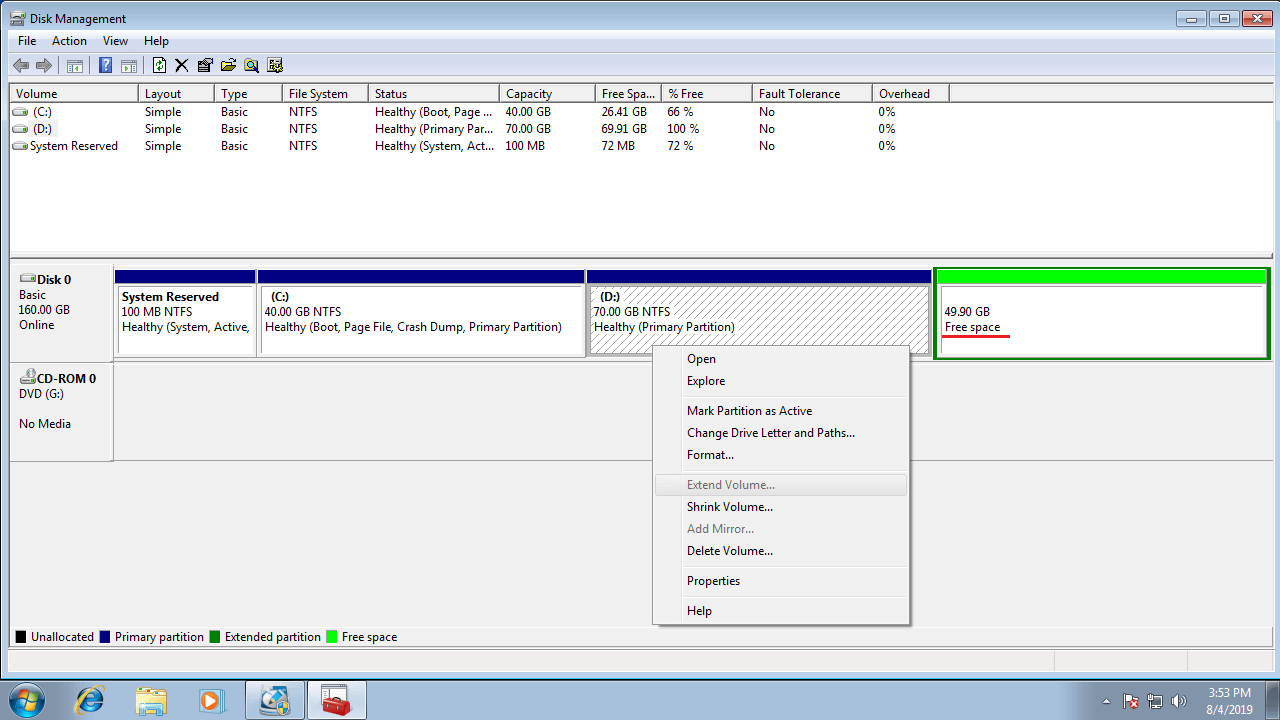
Free space deleted from a Logical drive can't be extended to any Primary partition. Unallocated space deleted from Primary partition can't be extended to any Logical partition.
Extend Windows 7 volume with free partition editor
With professional disk partition software, you can extend volume in Windows 7 by shrinking other drives without deleting. Comparing with Disk Management, NIUBI Partition Editor has more advantages while resizing partition such as:
- Both NTFS and FAT32 partitions can be shrunk and extended.
- Unallocated space can be made on either left or right when shrinking a partition.
- Unallocated space can be extended to either contiguous partition by 1 step.
- Unallocated space can be moved and combined to any non-adjacent partitions on the same disk.
- You just need to click, drag and drop on the disk map to shrink and extend partition.
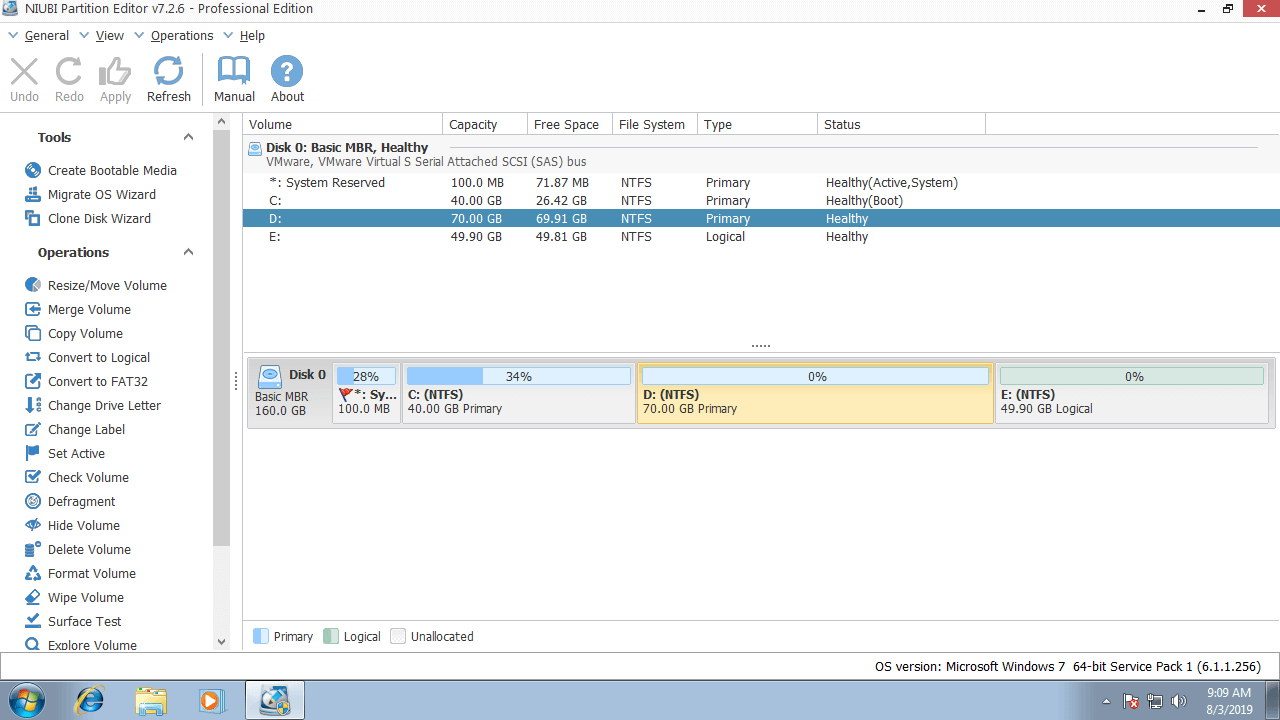
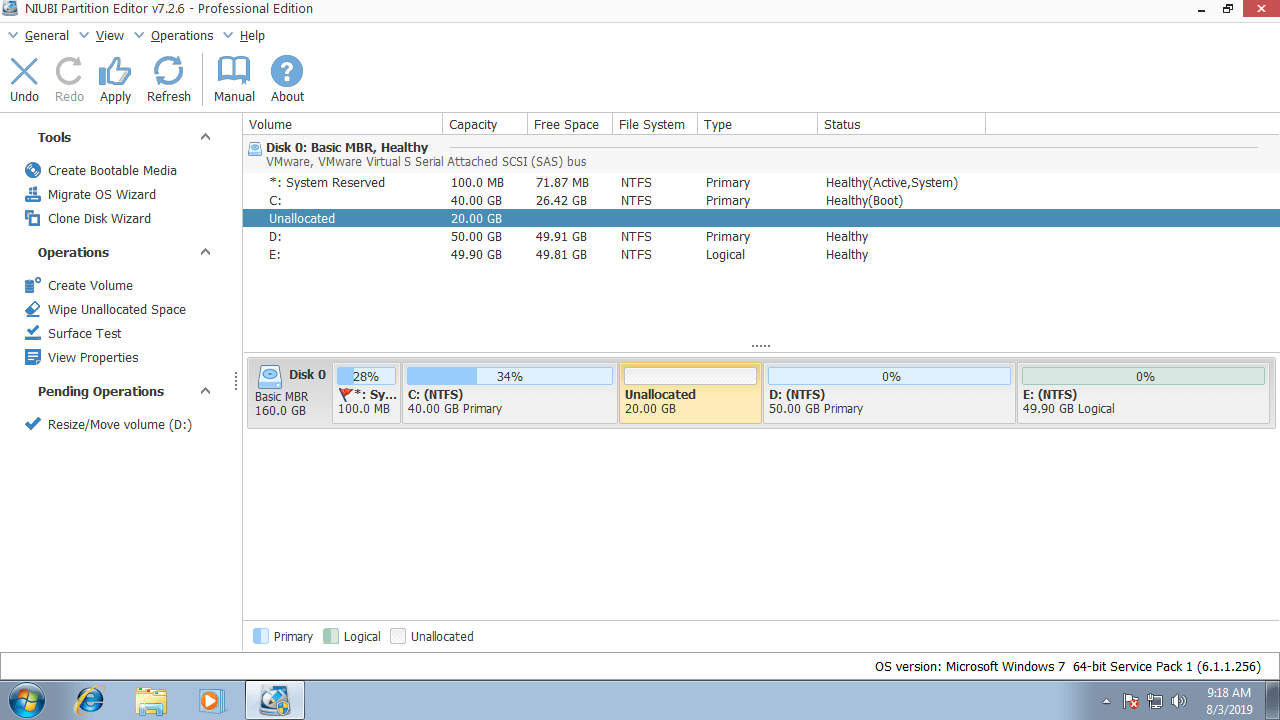
Download NIUBI Partition Editor, you'll see the main window with disk partition structure and other information. In my test computer, there are drive C, D, E and a system reserved partition in Disk 0.
Steps to extend partition C in Windows 7 (32/64 bit) with NIUBI:
Step 1: right click D: drive and select "Resize/Move Volume", in the pop-up window, drag left border towards right or enter an amount in Unallocated space before.
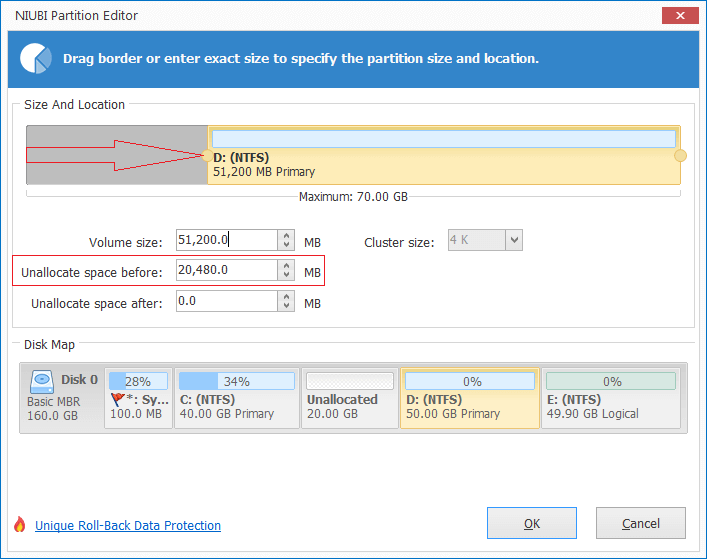
Then D: drive is shrunk and Unallocated space is made on its left.
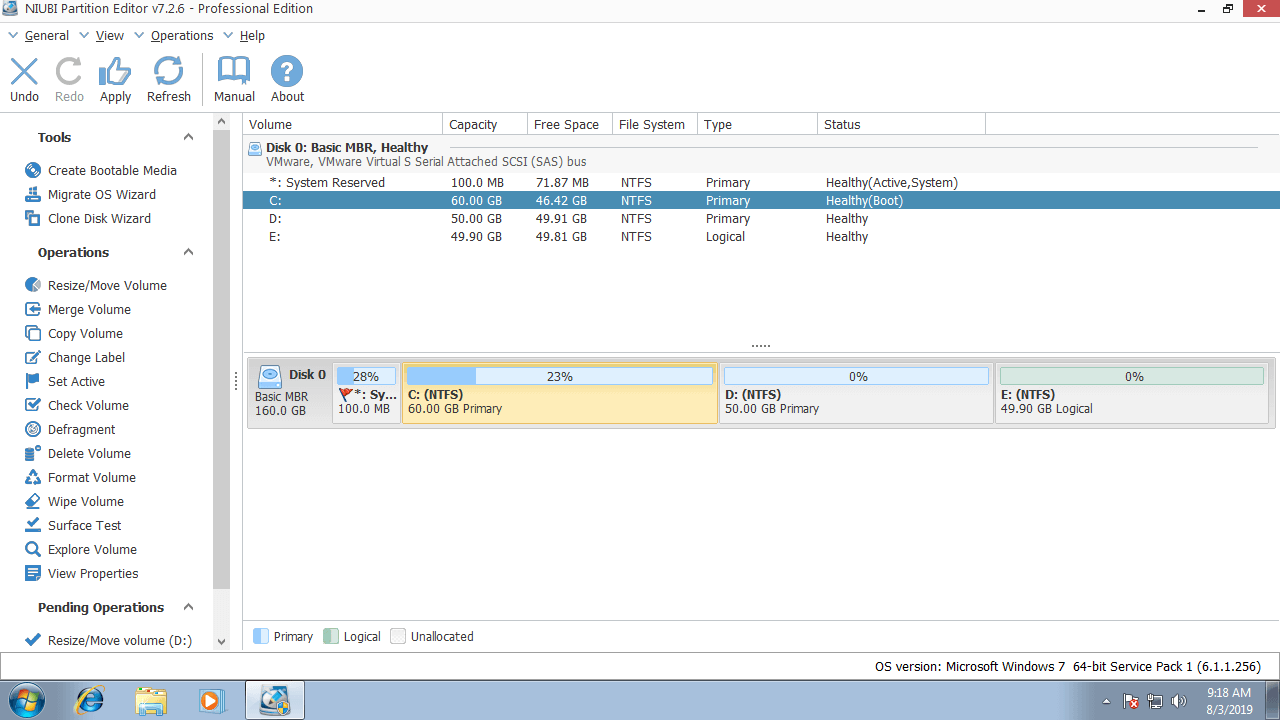
Step 2: right click C: drive and select "Resize/Move Volume", drag right border towards right in the pop-up window to combine this Unallocated space.
Then the system partition C is extended from 40GB to 60GB.
Step 3: click Apply on top left to execute. (The operations you do will be listed as pending on bottom left, real disk partitions won't be changed until you click Apply to confirm. If you did something wrong, simply click Undo to cancel.)
If there is not plenty of free unused space in the contiguous drive D, you can extend system partition C with the non-adjacent drive E. In that case, there's an additional step to move Unallocated space.
Watch the video how to extend Windows 7 partition by shrinking other volume:
In Summary
Windows 7 native Disk Management utility provides Extend Volume to increase partition size, but it is useless if there is no contiguous partition on the right or you cannot it. To extend volume in Windows 7 (32/64 bit), partitioning software is much more powerful. Better than other tools, NIUBI Partition Editor provides unique 1 Second Rollback, Virtual Mode, Cancel-at-will technology to ensure system and data intact. Furthermore, because of its special file-moving algorithm, it is 30% to 300% faster. It has free edition for Windows 10/8/7/Vista/XP home users. Except 1 Second Rollback technology and bootable media builder, it is the same with commercial edition.