Extend hard drive on Windows Server 2016
Many server administrators encountered the problem that hard disk drive is running out of space, especially to system C: drive and the drives for backup, database, exchange, etc. If entire hard disk becomes full, you have to replace with larger one, but if one of the drive partitions is getting full, you can extend it with free space inside of another one.
This page shows how to extend hard drive on Windows Server 2016 without reinstalling OS or losing any data.

Extend hard drive by deleting
To extend a hard drive partition, there must be Unallocated space. As the name, this space is blank (though files can be recovered) and does not belong to any partitions. To get Unallocated space, you may either delete or shrink a drive. After deleting a drive, all disk space of it will be converted to Unallocated, by shrinking a drive, part of the unused space will be converted to Unallocated. By merging Unallocated to a drive, it will be converted to part of unused space.
Windows Server 2016 native Disk Management has the ability to shrink, delete and extend hard drive. When a drive partition is getting full, you can delete the adjacent partition to get Unallocated space, and then combine with Extend Volume functionality. It is NOT the best way but an available option.
Steps to extend hard drive in Server 2016 Disk Management:
![]() Transfer files in the adjacent partition (here is E:). Press
Transfer files in the adjacent partition (here is E:). Press ![]() and
and ![]() on keyboard and then select Disk Management.
on keyboard and then select Disk Management.
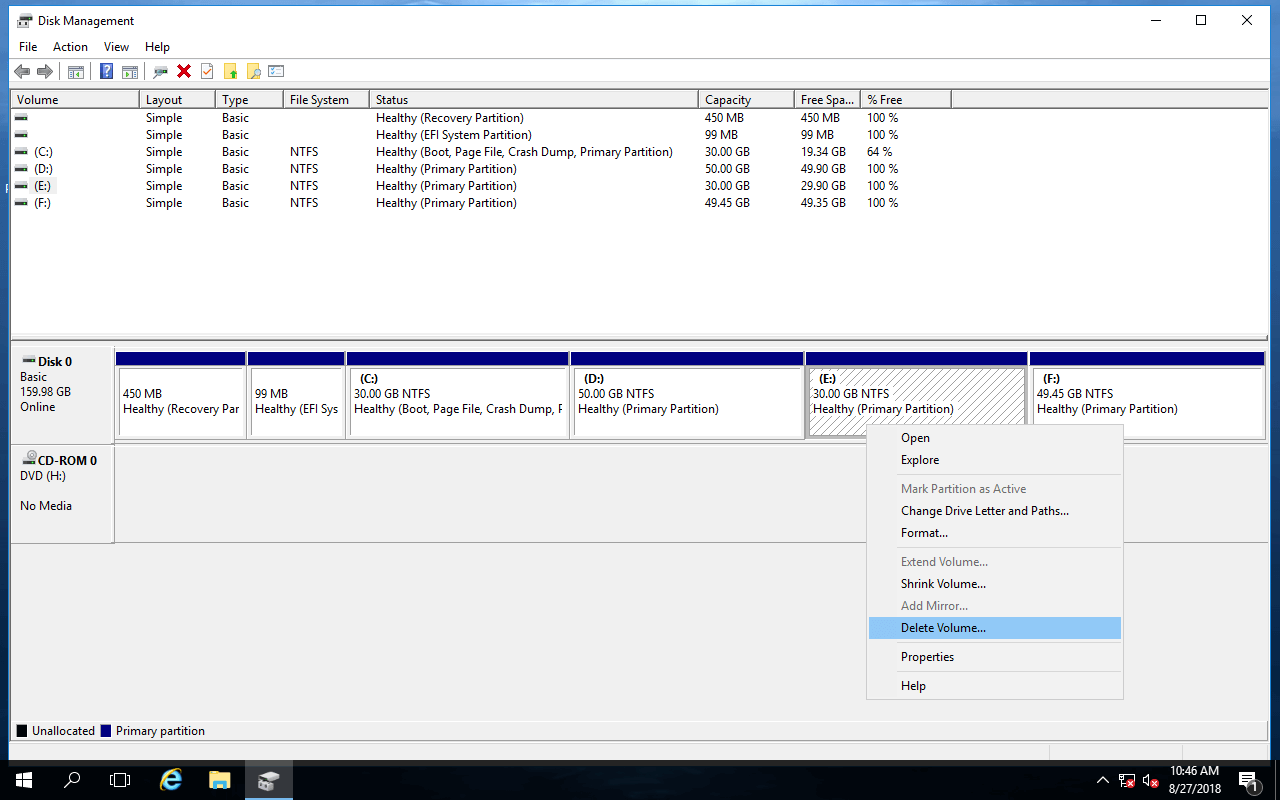
![]() Right click drive E and select Delete Volume.
Right click drive E and select Delete Volume.
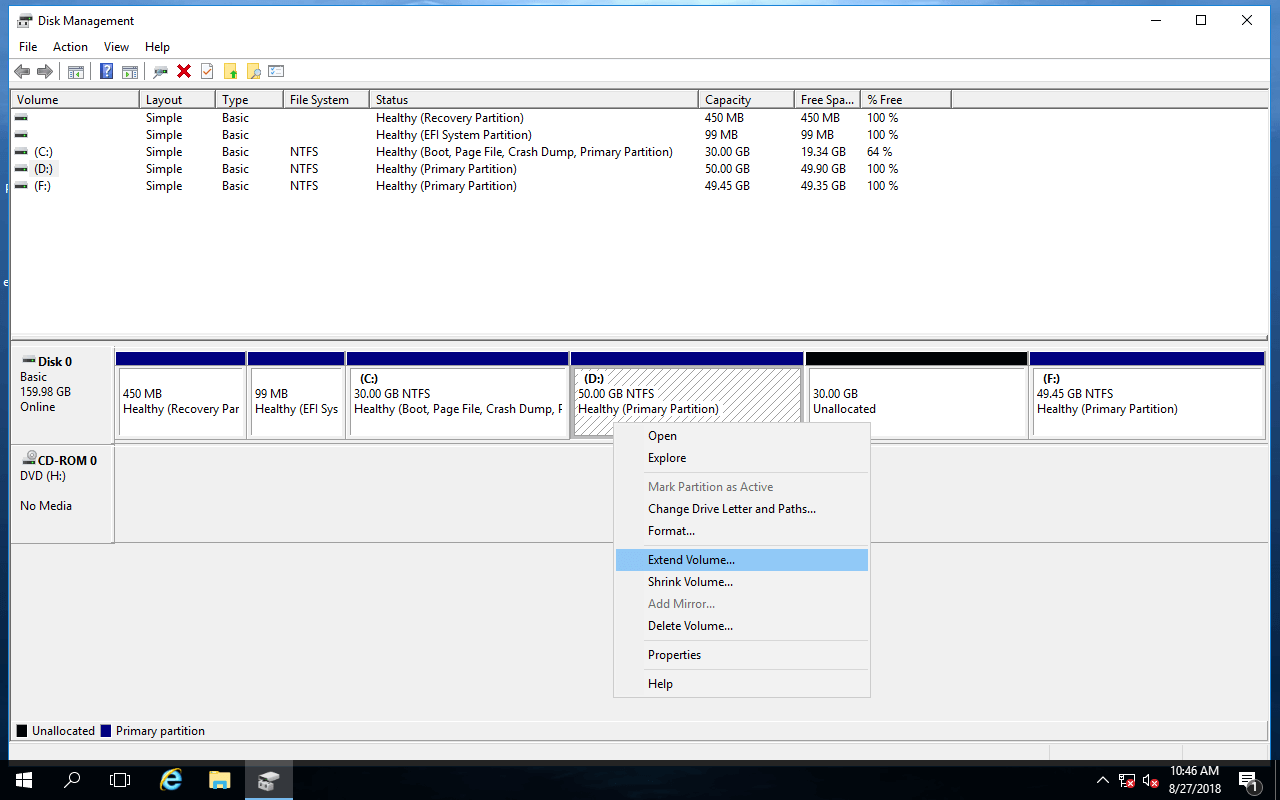
![]() Right click drive D and select Extend Volume.
Right click drive D and select Extend Volume.
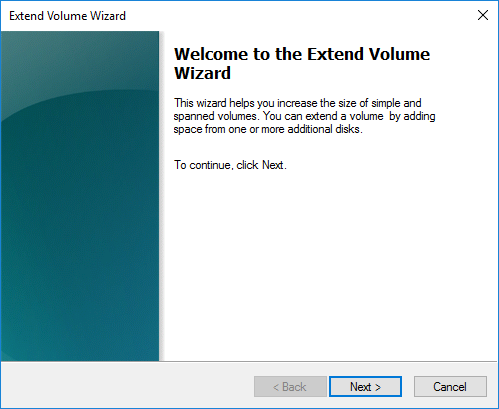
![]() Extend Volume Wizard will be launched, simply click Next till Finish.
Extend Volume Wizard will be launched, simply click Next till Finish.
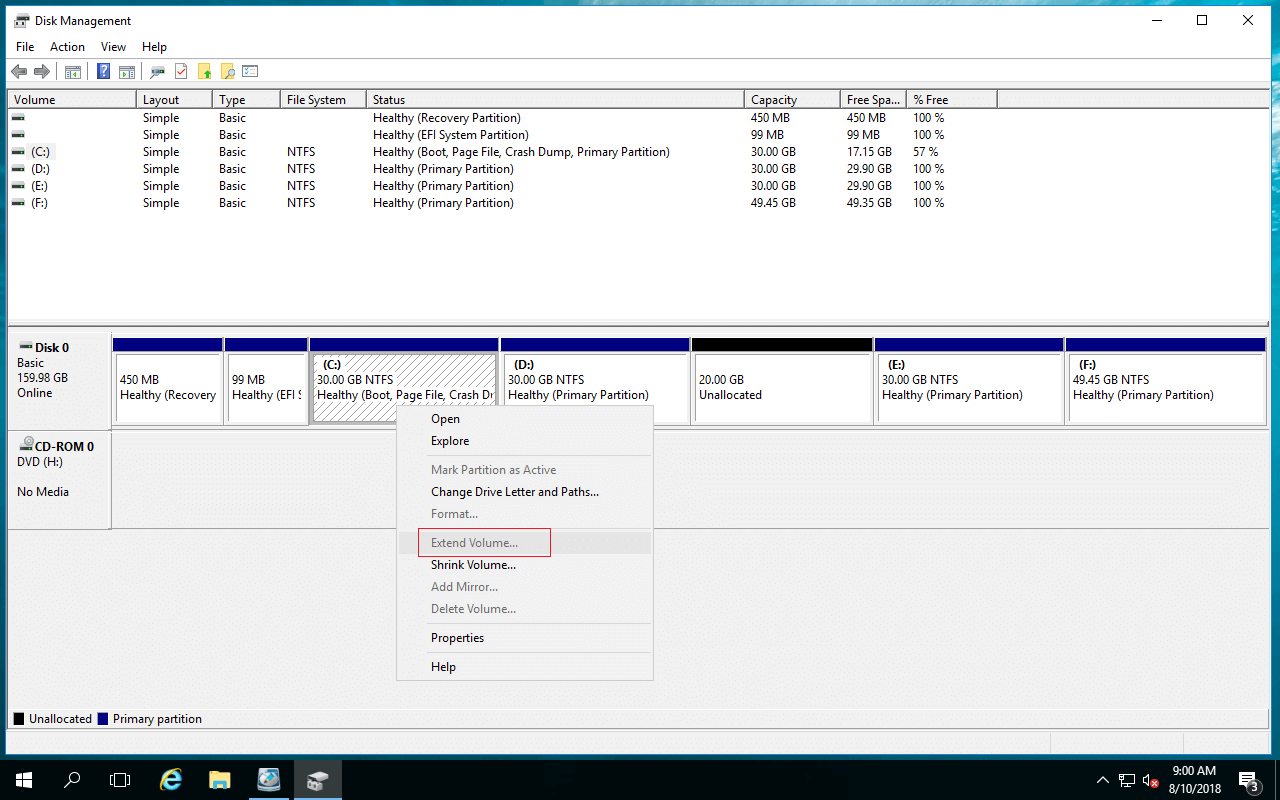
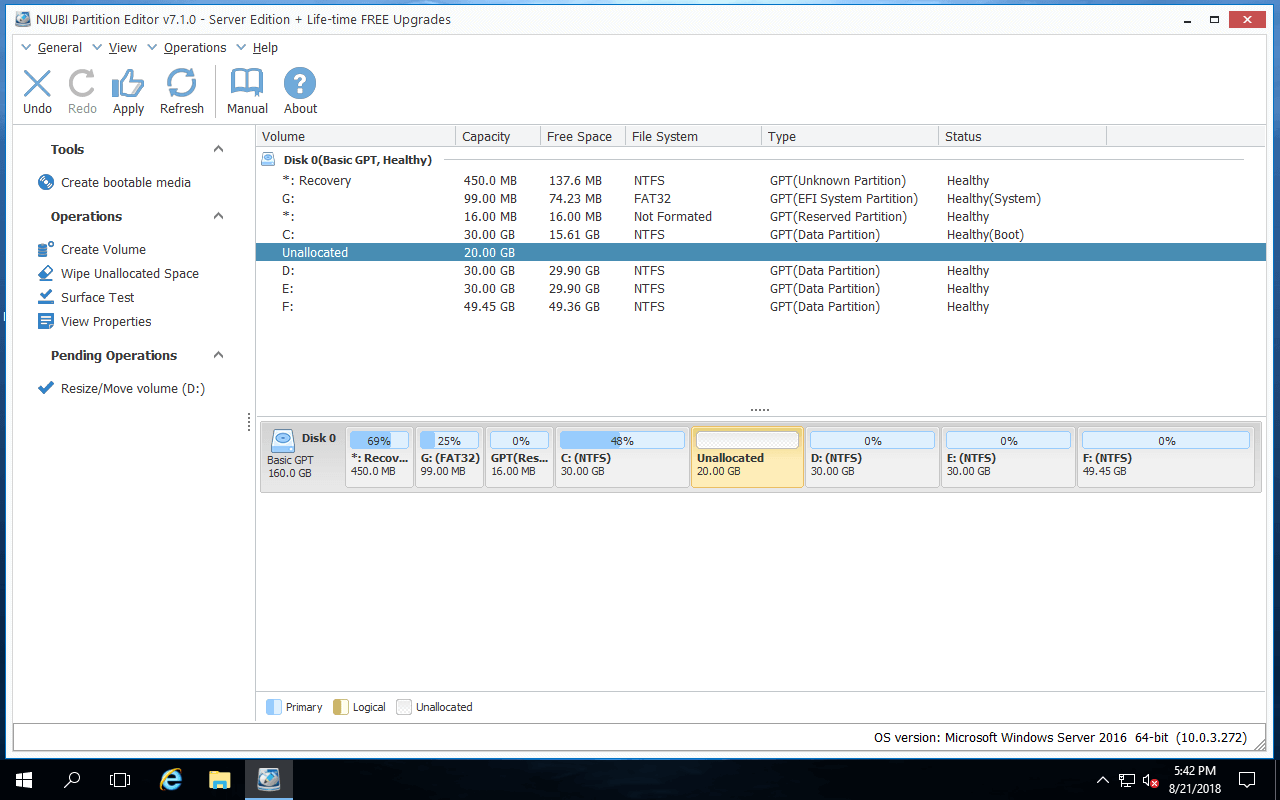
Hard drive D is extended in a short time.

As I said above, all disk space will be converted to Unallocated after deleting a drive, you’ll lose files if you forget to back up or transfer to other place. Furthermore, if you want to extend C drive, you cannot delete the adjacent drive D, because programs and part of Windows services running from it.
By shrinking a drive, only part of unused space will be converted to Unallocated and all files keep intact. Thus, many people want to extend hard drive in Server 2016 by shrinking another one.
Extend disk drive by shrinking
To extend hard disk drive by shrinking, Server 2016 Disk Management cannot help you, though there are built-in Shrink Volume and Extend Volume functionalities.
For example, Unallocated space is produced on the right side after shrinking drive D, but to extend system partition C, this Unallocated space must be on the left side of D. When you right click C drive, Extend Volume is grayed out. From Microsoft explanation, Extend Volume can only extend NTFS partition with adjacent Unallocated space on the right side.
To extend hard drive in Server 2016 by shrinking another one, you need server partition software such as NIUBI Partition Editor. You can extend a drive by shrinking any other one in the same disk, no matter it is adjacent or not. To achieve, you just need to drag and drop on the disk map.
Extend hard disk drive by drag and drop
Comparing with data drives, system C drive is more likely running out of space, and there is another adjacent drive (D) in the same disk. Here I’ll show you how to extend hard drive C by shrinking D, it is similar if you want to extend other drives.
Steps to extend hard drive C in Server 2016 with NPE:
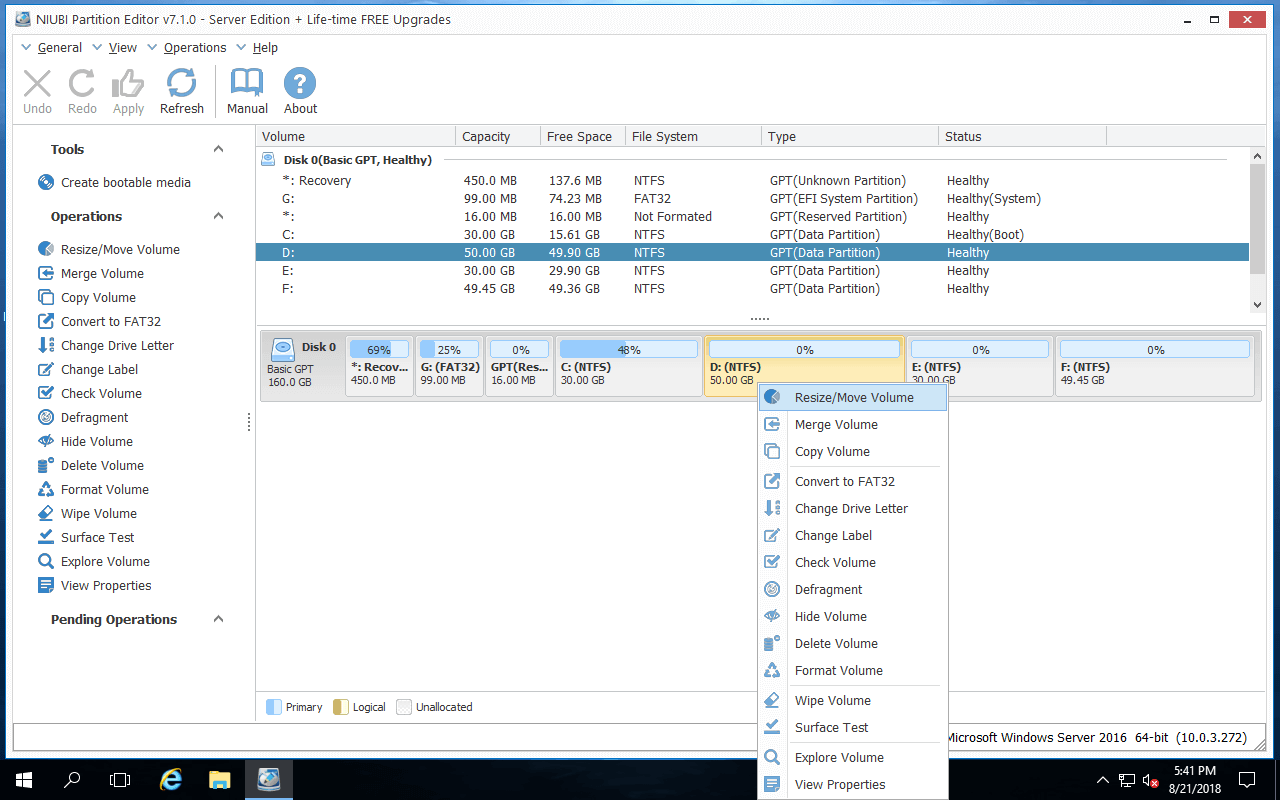
![]() Download NIUBI Partition Editor, right click drive D and select “Resize/Move Volume”.
Download NIUBI Partition Editor, right click drive D and select “Resize/Move Volume”.
Drag the left border rightwards in the pop-up window to shrink it.
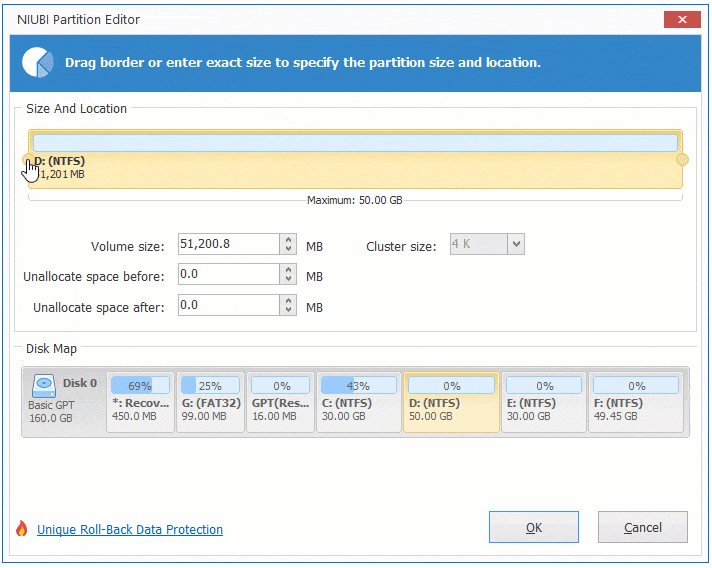
20GB unused space is converted to Unallocated on the left side.
![]() Right click drive C and select “Resize/Move Volume” again. Drag the right border rightwards to merge the Unallocated space.
Right click drive C and select “Resize/Move Volume” again. Drag the right border rightwards to merge the Unallocated space.
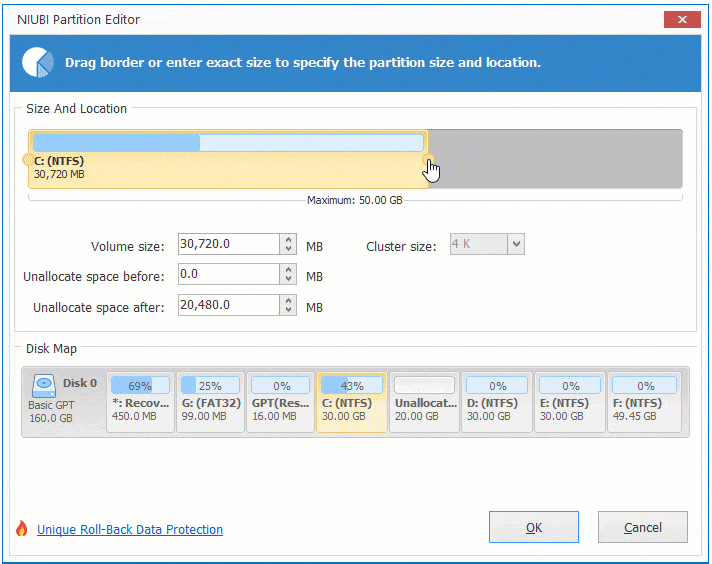
Click OK, C drive is extended to 50GB.
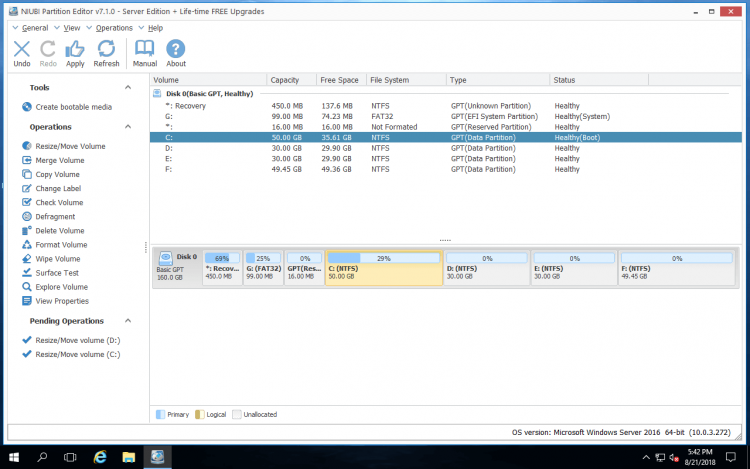
![]() Click Apply on top left to execute, done.
Click Apply on top left to execute, done.
![]() NIUBI Partition Editor is working in virtual mode to avoid mistake and the operations you do will be listed as pending on bottom left. You can click Undo to cancel the wrong or unwanted operations, real disk partition won’t be modified until you click Apply to confirm.
NIUBI Partition Editor is working in virtual mode to avoid mistake and the operations you do will be listed as pending on bottom left. You can click Undo to cancel the wrong or unwanted operations, real disk partition won’t be modified until you click Apply to confirm.
The pending operations marked as ![]() can be done in desktop on the fly. If the operation to shrink D is marked as
can be done in desktop on the fly. If the operation to shrink D is marked as ![]() , it meas that rebooting is required. In this situation, you may close NIUBI, then close the running applications and opening files/folders in drive D, and then restart NIUBI to repeat.
, it meas that rebooting is required. In this situation, you may close NIUBI, then close the running applications and opening files/folders in drive D, and then restart NIUBI to repeat.
If you still do not understand how it works or there is not plenty of free space in drive D, watch the video how to extend hard drive on Windows Server 2016.
In Summary
To extend hard disk drive on Windows Server 2016, you may either use native Disk Management or disk partition software. Disk Management can only extend NTFS partition with adjacent Unallocated space on the right side. To other situations, you need to run partition software.
NIUBI Partition Editor is integrated unique 1 Second Rollback, Cancel-at-will, Hot-Resize, Virtual mode technologies and faster file-moving algorithm to help you extend hard drive on Windows Server 2016 easily and safely.