
The C drive is allocated while installing the Operating System or by the computer manufacturer. Sometimes you need to resize the C drive if it is too large or small. For example, the C drive is very large in some computers, so users need to decrease it to create more partitions. In some computers, the C drive is getting full, so users want to increase the C drive space without losing programs. Unlike data partitions, the C drive is where the Operating System is located, so you had better pay more attention. This article introduces how to resize the C drive in Windows 10/11 without losing data.

Resize the C Drive in Windows 10/11 Without Software
Similar to previous Windows 7/8 versions, Windows 10/11 has a native Disk Management utility to help change partition size without losing data. The built-in "Shrink Volume" function can decrease partition size to create unallocated space. "Extend Volume" can increase partition size when there is adjacent unallocated space on the right. However, if you want to extend a partition by shrinking another one, Disk Management cannot help you.
1. How to Resize the C Drive to a Smaller Size
It is easy to resize the C drive with the Disk Management tool, but you may encounter issues:
- If there are unmovable files located in the C drive, you can only shrink a little space.
- In some cases, you cannot shrink the C drive even if there is plenty of free space.
- Unallocated space can only be created on the right after shrinking; it cannot be merged into another volume with Disk Management.
Steps to resize the C drive in Windows 10/11 via Disk Management:
- Press the Windows + X keys together and click Disk Management in the list.
- Right-click the C drive and select Shrink Volume.
- Click Shrink to use the default maximum space, or enter an amount in MB (1024MB=1GB) by yourself.
In most computers, the C drive is formatted with NTFS. If your C drive is FAT32, "Shrink Volume" will be grayed out.
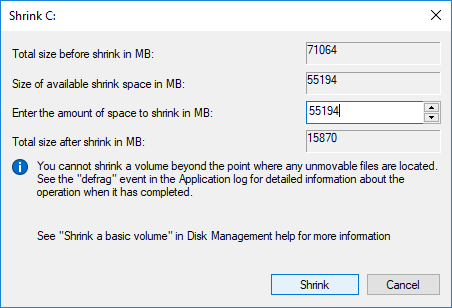
2. How to Resize the C Volume to a Larger Size
With Disk Management, you can only enlarge the C drive by deleting D (the contiguous partition on the right side). Why not shrink D to expand the C drive? Because the "Extend Volume" function only works when there is contiguous unallocated space on the right. The unallocated space shrunk from D (or any other partition) is non-adjacent to the C drive, so "Extend Volume" is grayed out for the C drive.
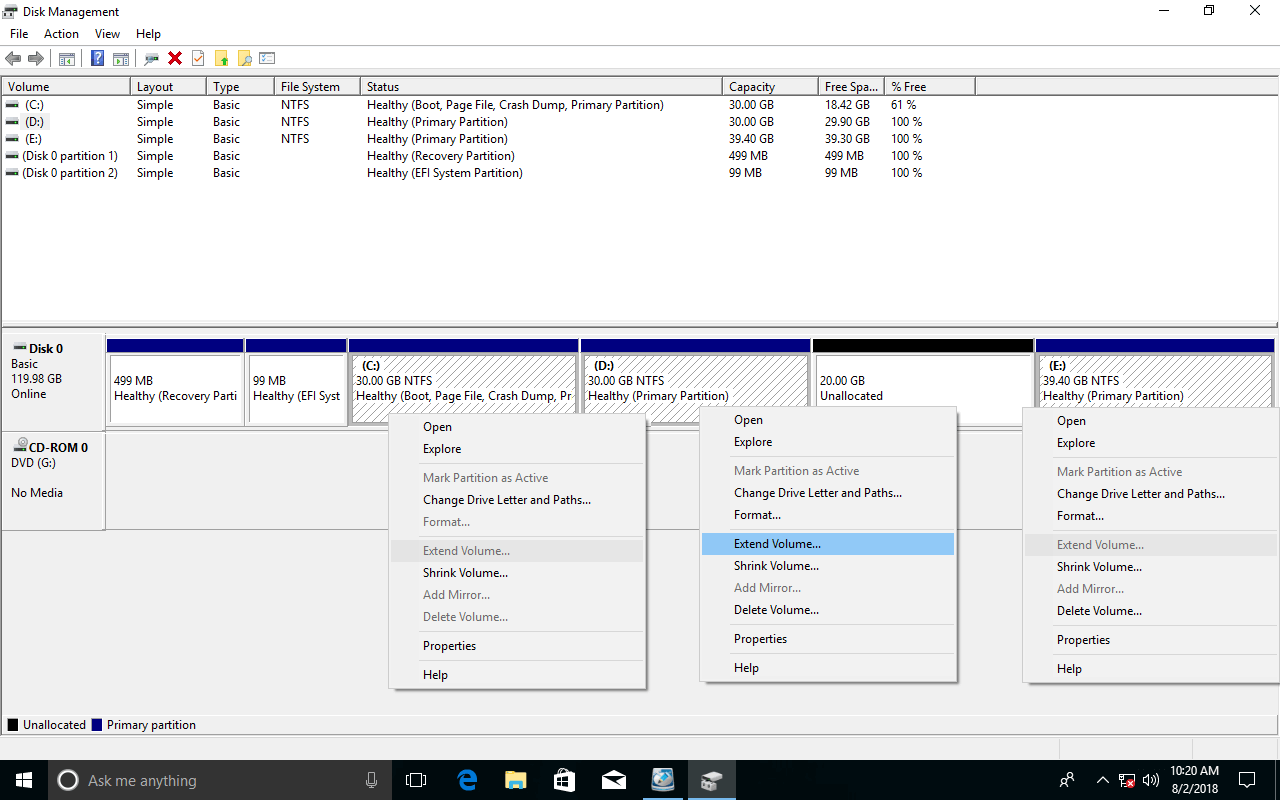
Do not delete D if you installed programs in it; otherwise, you have to reinstall all programs.
Steps to resize the C drive larger in Windows 10/11 without software:
- Migrate all files in the D: drive to another location.
- Right-click D: in Disk Management and select Delete Volume.
- Right-click the C drive and select Extend Volume.
- Simply click Next in the next dialog boxes.
- Click Finish to confirm and execute.
If D is a Logical drive, you still cannot extend the C drive in Disk Management after deleting D.
Best Way to Resize Partition C in Windows 10/11
With third-party software, you can extend the C drive without deleting any partitions; the Operating System, programs, and everything else will remain exactly the same as before. However, you had better make a backup in advance and run safe partitioning software, because there is a potential data loss and system damage risk. As the safest tool, NIUBI Partition Editor is recommended by many editors, because it has many advantages:
Compared with Windows Disk Management:
- Both NTFS and FAT16/32 partitions are supported.
- Creates unallocated space on either side when shrinking a drive.
- Extends a partition with adjacent unallocated space on either side.
- Moves and merges unallocated space into a non-adjacent partition.
- Much easier; you just need to drag and drop on the disk map.
Compared with other partitioning software:
- 1-Second Rollback technology to ensure the system and data remain intact.
- Virtual mode technology to avoid incorrect operations.
- Cancel-at-will - cancel ongoing operations without data loss.
- Hot-Resize technology to help extend the C drive on the fly.
- Resizes partitions much faster because of a unique file-moving algorithm.
To change the C drive size on a Windows 11/10/8/7/Vista/XP home computer, NIUBI offers a free edition to help you.
Download this tool and you will see all storage devices with their partition layout in the main window.
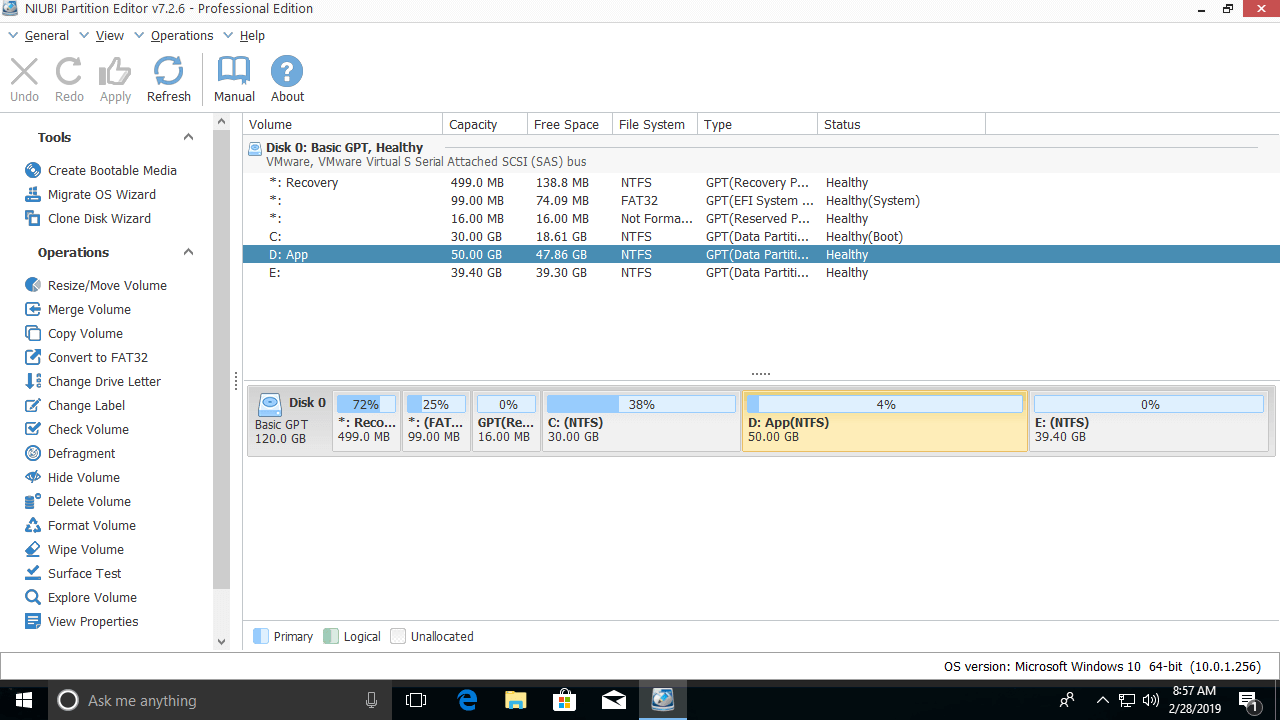
How to resize the C drive in Windows 10/11 with a free partition editor:
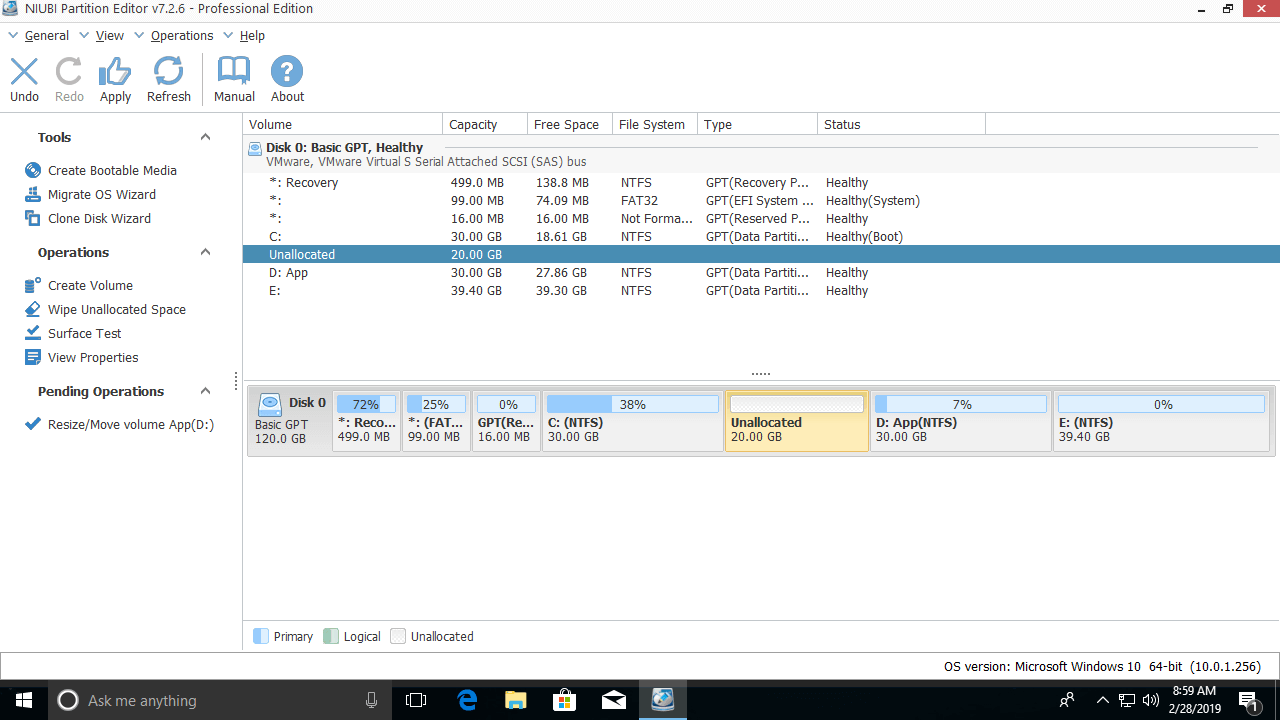
Step 1: Right-click drive D and select "Resize/Move Volume"; drag the left border to the right in the pop-up window.
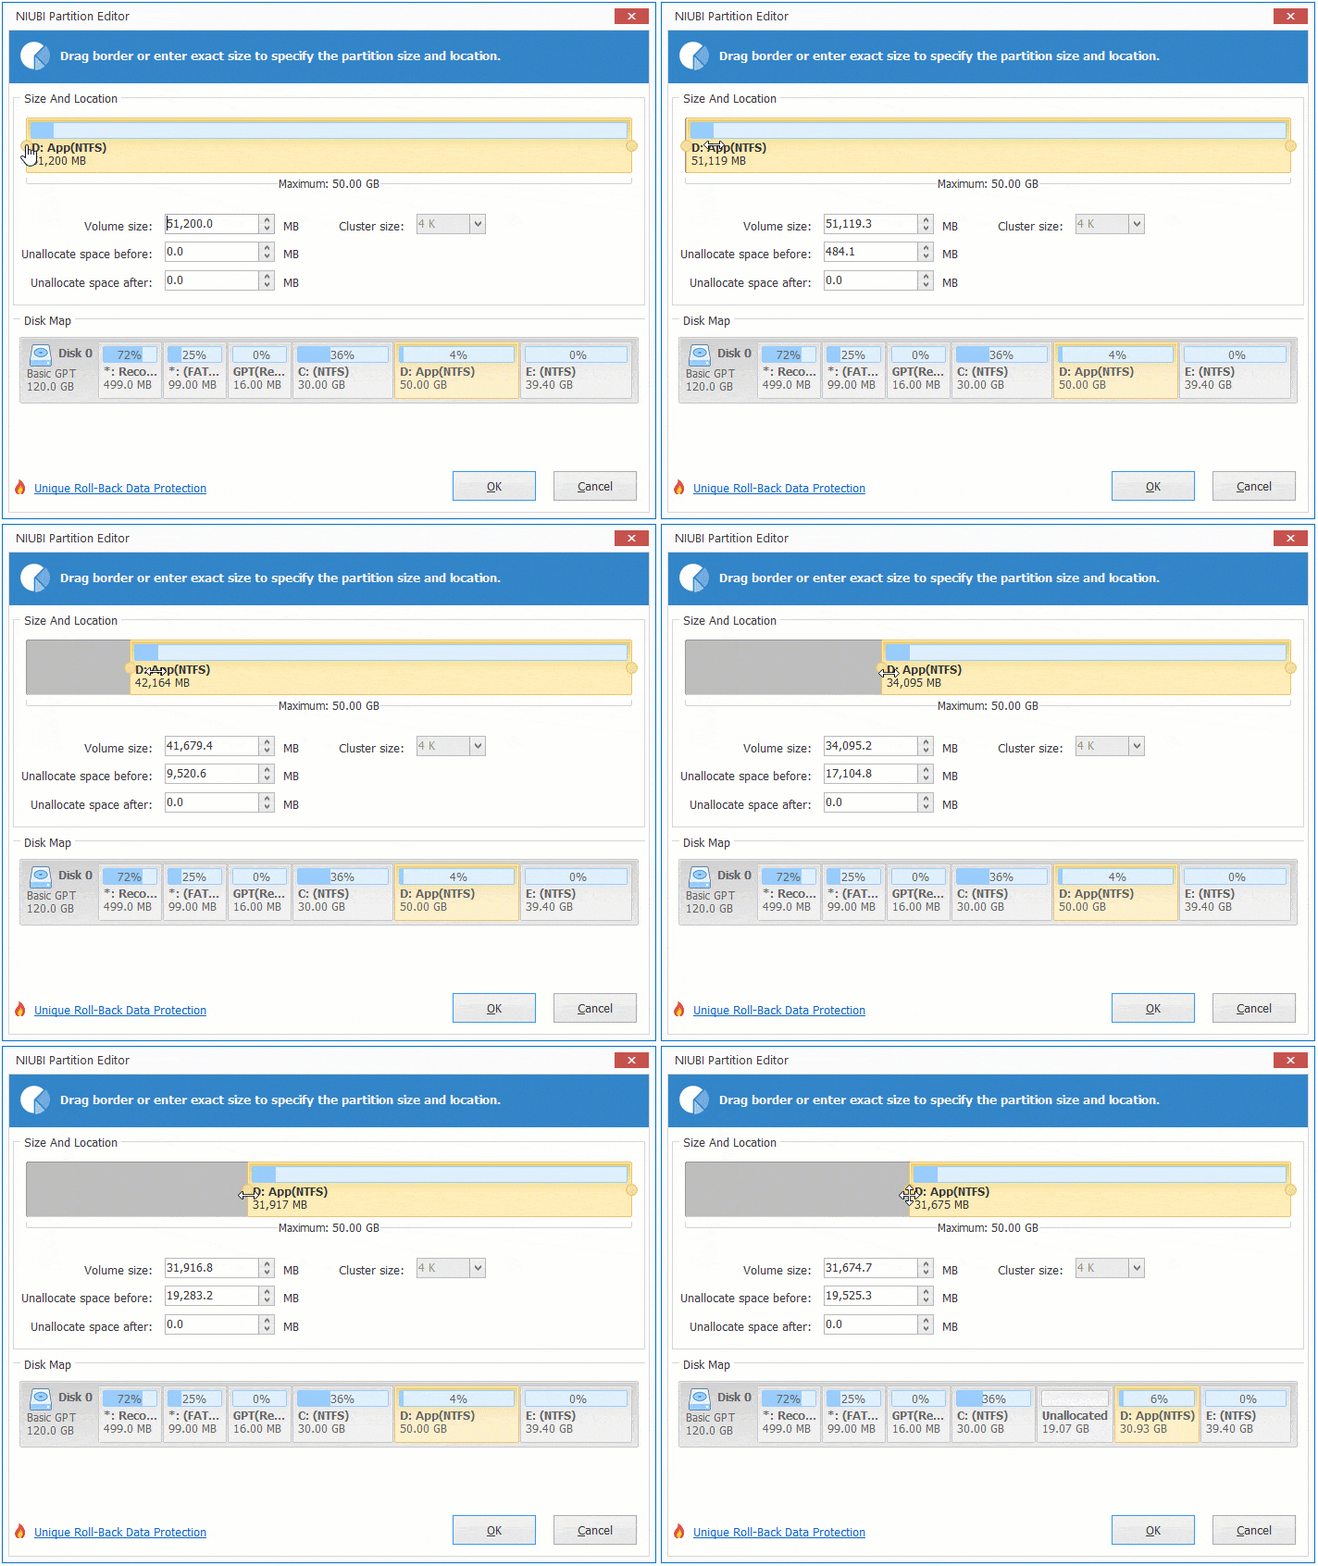
Drive D is shrunk, and unallocated space is created on its left side.
Step 2: Right-click drive C and select "Resize/Move Volume" again; drag the right border to the right to merge the unallocated space.
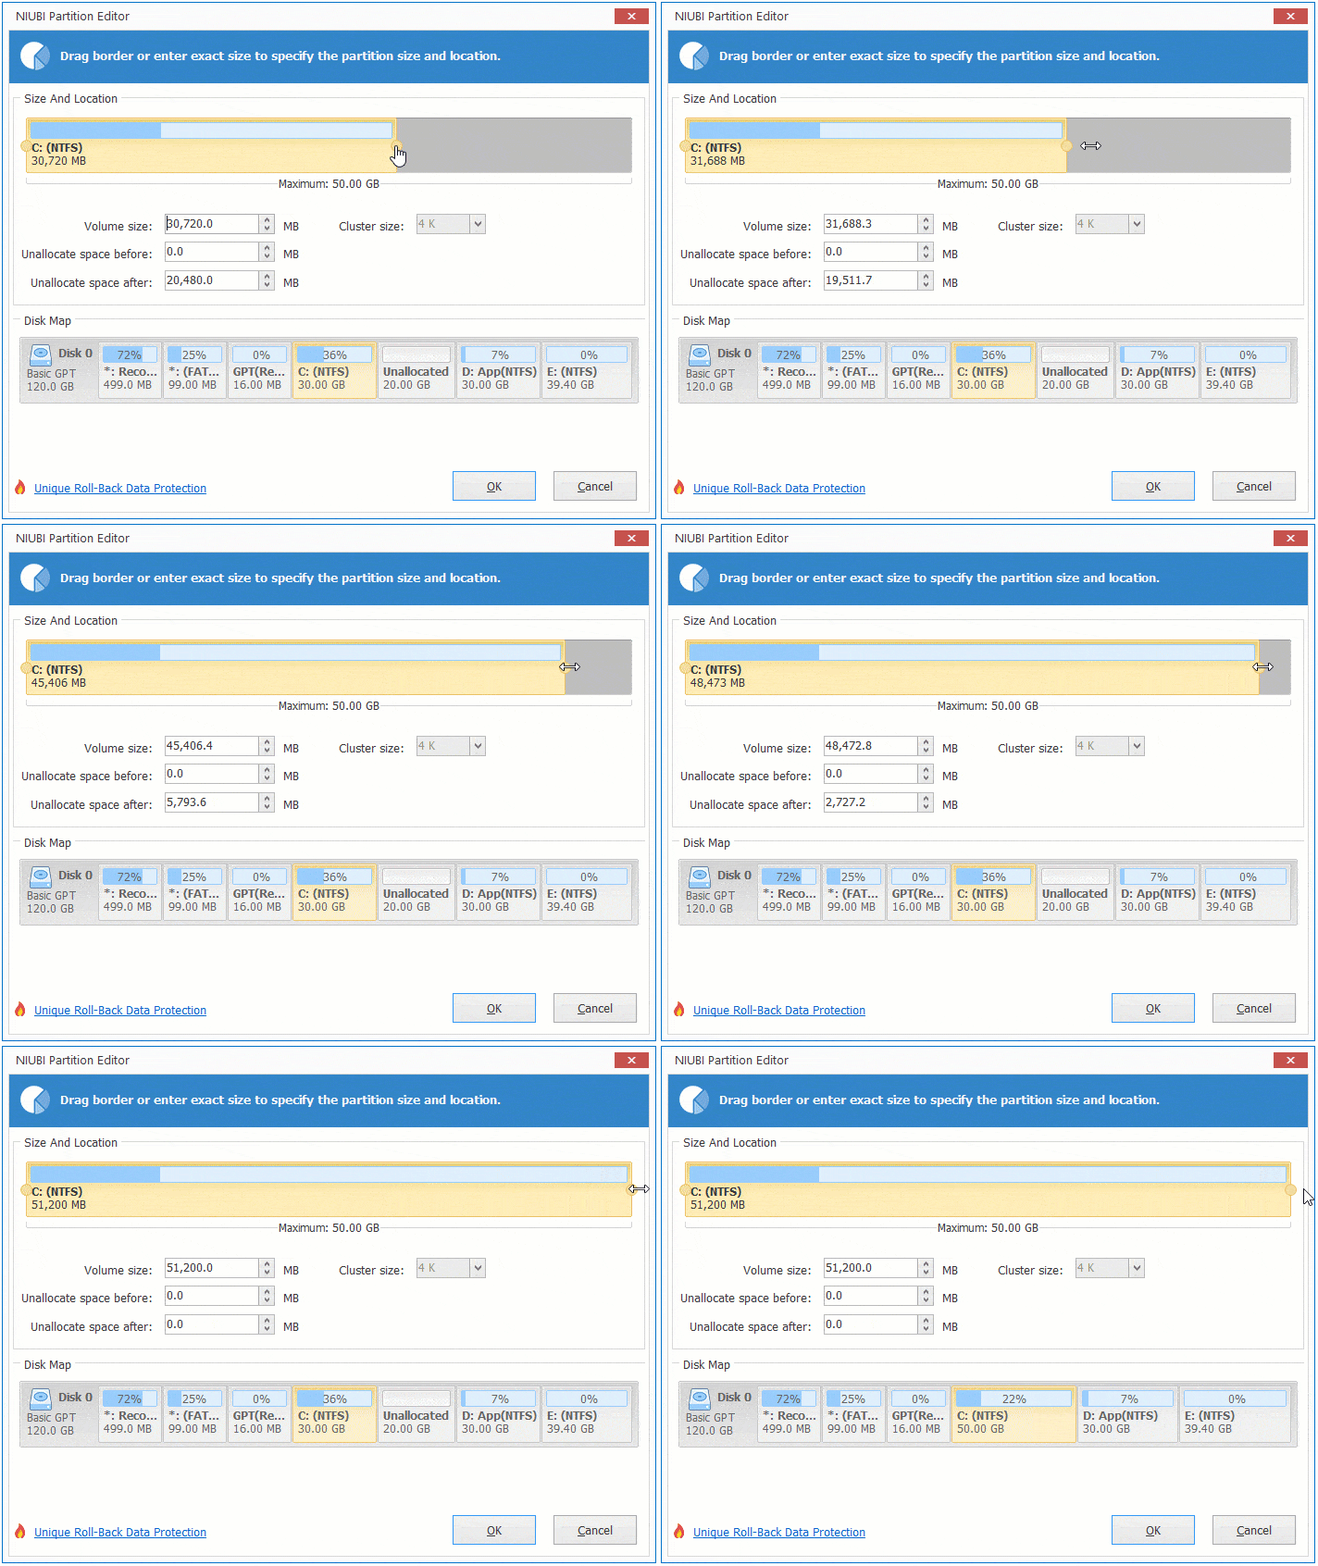
As you see, the C drive is resized from 30GB to 50GB.
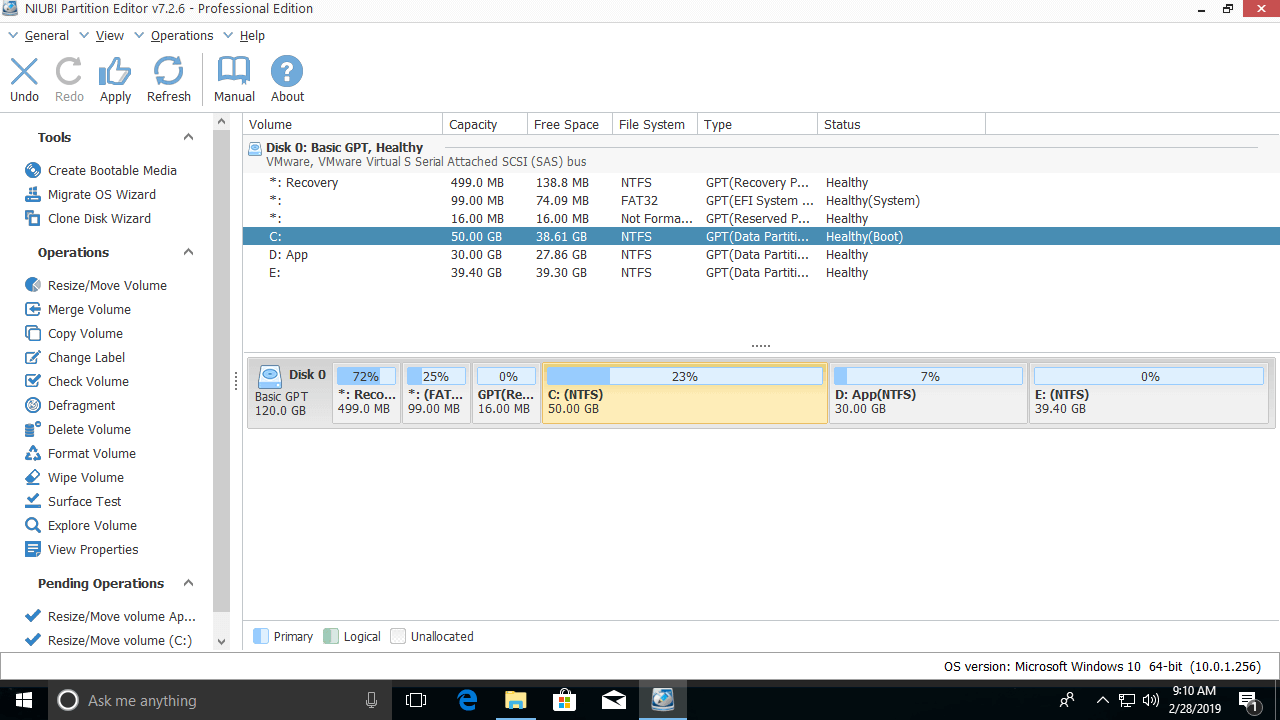
Remember to click Apply on the top left to execute; otherwise, real disk partitions will not be modified.
Follow the steps if you want to shrink the C drive in Windows 10/11 to extend the system reserved partition or increase the D drive space.
Adjust the C Drive Partition Size with Another Disk
If there is not enough free space in the contiguous D drive, you can shrink a non-adjacent partition on the same disk; then you just need an additional step to move the unallocated space next to the C drive.
But if there is no other data volume on the same disk, no partitioning software can extend the C drive with free space from a different disk. In that case, you can clone this disk to a larger one and resize the partition with the extra disk space. If there is another partition on the same disk, you may consider moving the partition to another disk, then deleting this partition and adding its space to the C drive.
Besides shrinking and extending partitions in Windows 11/10/8/7/Vista/XP, NIUBI Partition Editor helps you perform many other operations such as merging, copying, moving, converting, defragging, wiping, hiding partitions, scanning for bad sectors, etc.
 © 2009 - NIUBI Technology All Rights Reserved. |